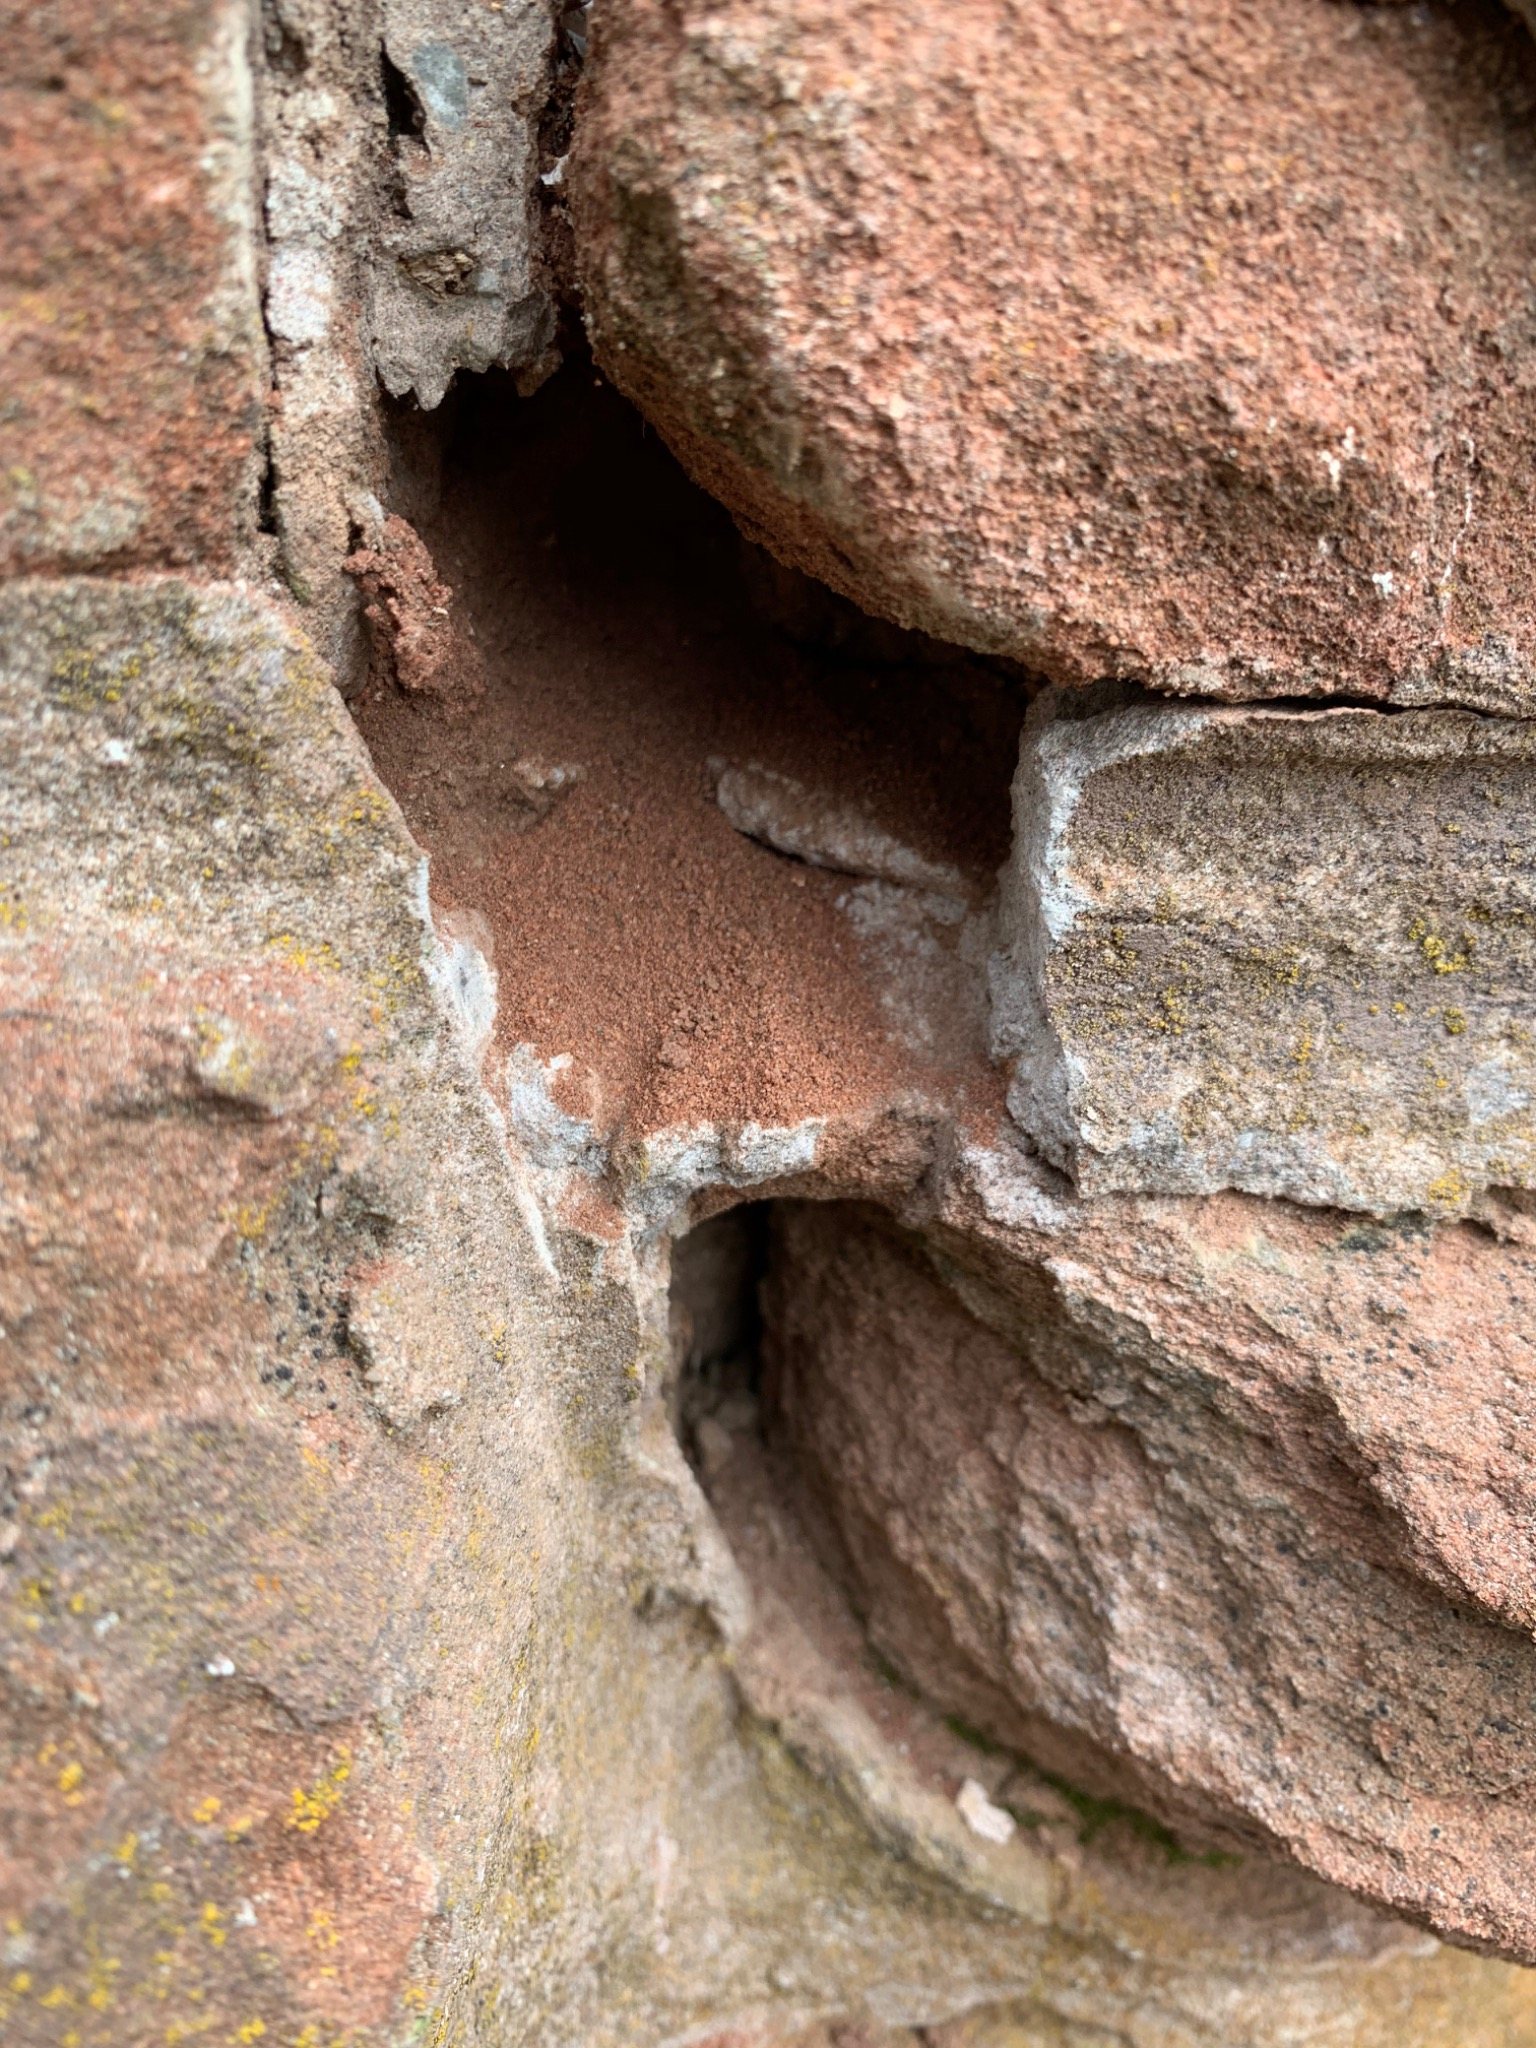
Eroded sandstone: deep localized weathering shows why aggressive removal methods could have caused additional loss at the stone edges.
Dalvay by the Sea presented several connected masonry problems: weathered soft sandstone, hard previous mortar, water being directed onto masonry, deteriorated stone sills and heavily used fireplaces that required functional repairs as well as cleaning.
The work was approached as a heritage masonry project rather than a collection of isolated patches. Mortar compatibility, colour matching, water management and preservation of serviceable original material all influenced the repair decisions.
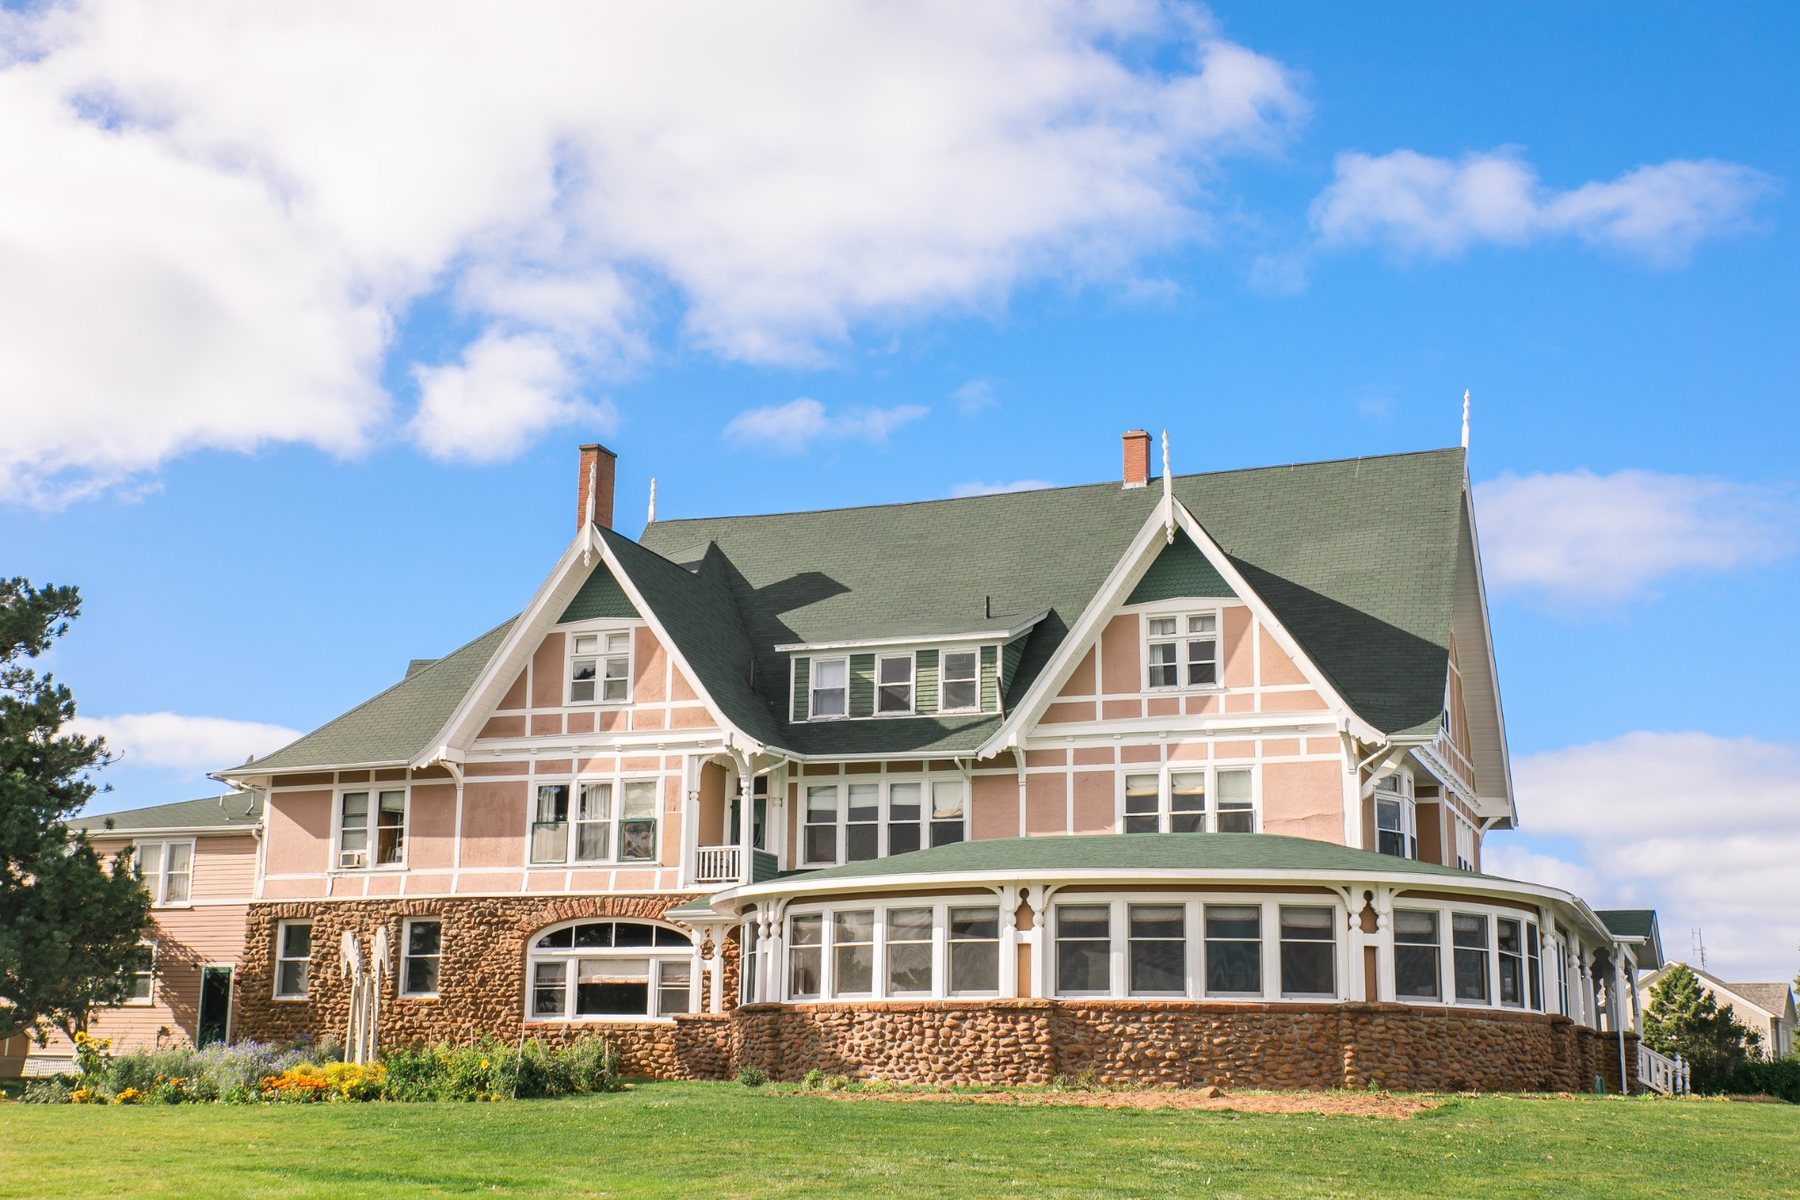
Dalvay by the Sea: the project involved exterior sandstone restoration, water-management corrections, stone sill work and repairs to the building's two main fireplaces.
Dalvay-by-the-Sea is designated a National Historic Site of Canada for its national architectural significance as a fine domestic example of the Queen Anne Revival style. Parks Canada highlights the building's steep roofs, dormers, gables, contrasting materials and extensive use of local Island materials, including sandstone.
The Government of Canada's Canadian Register of Historic Places also records the hotel as a Classified Federal Heritage Building. Its heritage character includes the asymmetrical Queen Anne Revival composition, cobblestone base, local sandstone, extensive craftsmanship and major interior features such as the large fireplace spaces.
That context mattered to the repair approach. DinoMac's work was not simply maintenance on an ordinary stone wall. It involved substantial intervention to heritage sandstone masonry that forms part of the building's recognized character, so material compatibility, visual matching, careful removal and preservation of serviceable original stone were central to the work.
Parks Canada: Dalvay-by-the-Sea National Historic Site →
Canadian Register: Dalvay-by-the-Sea Hotel →
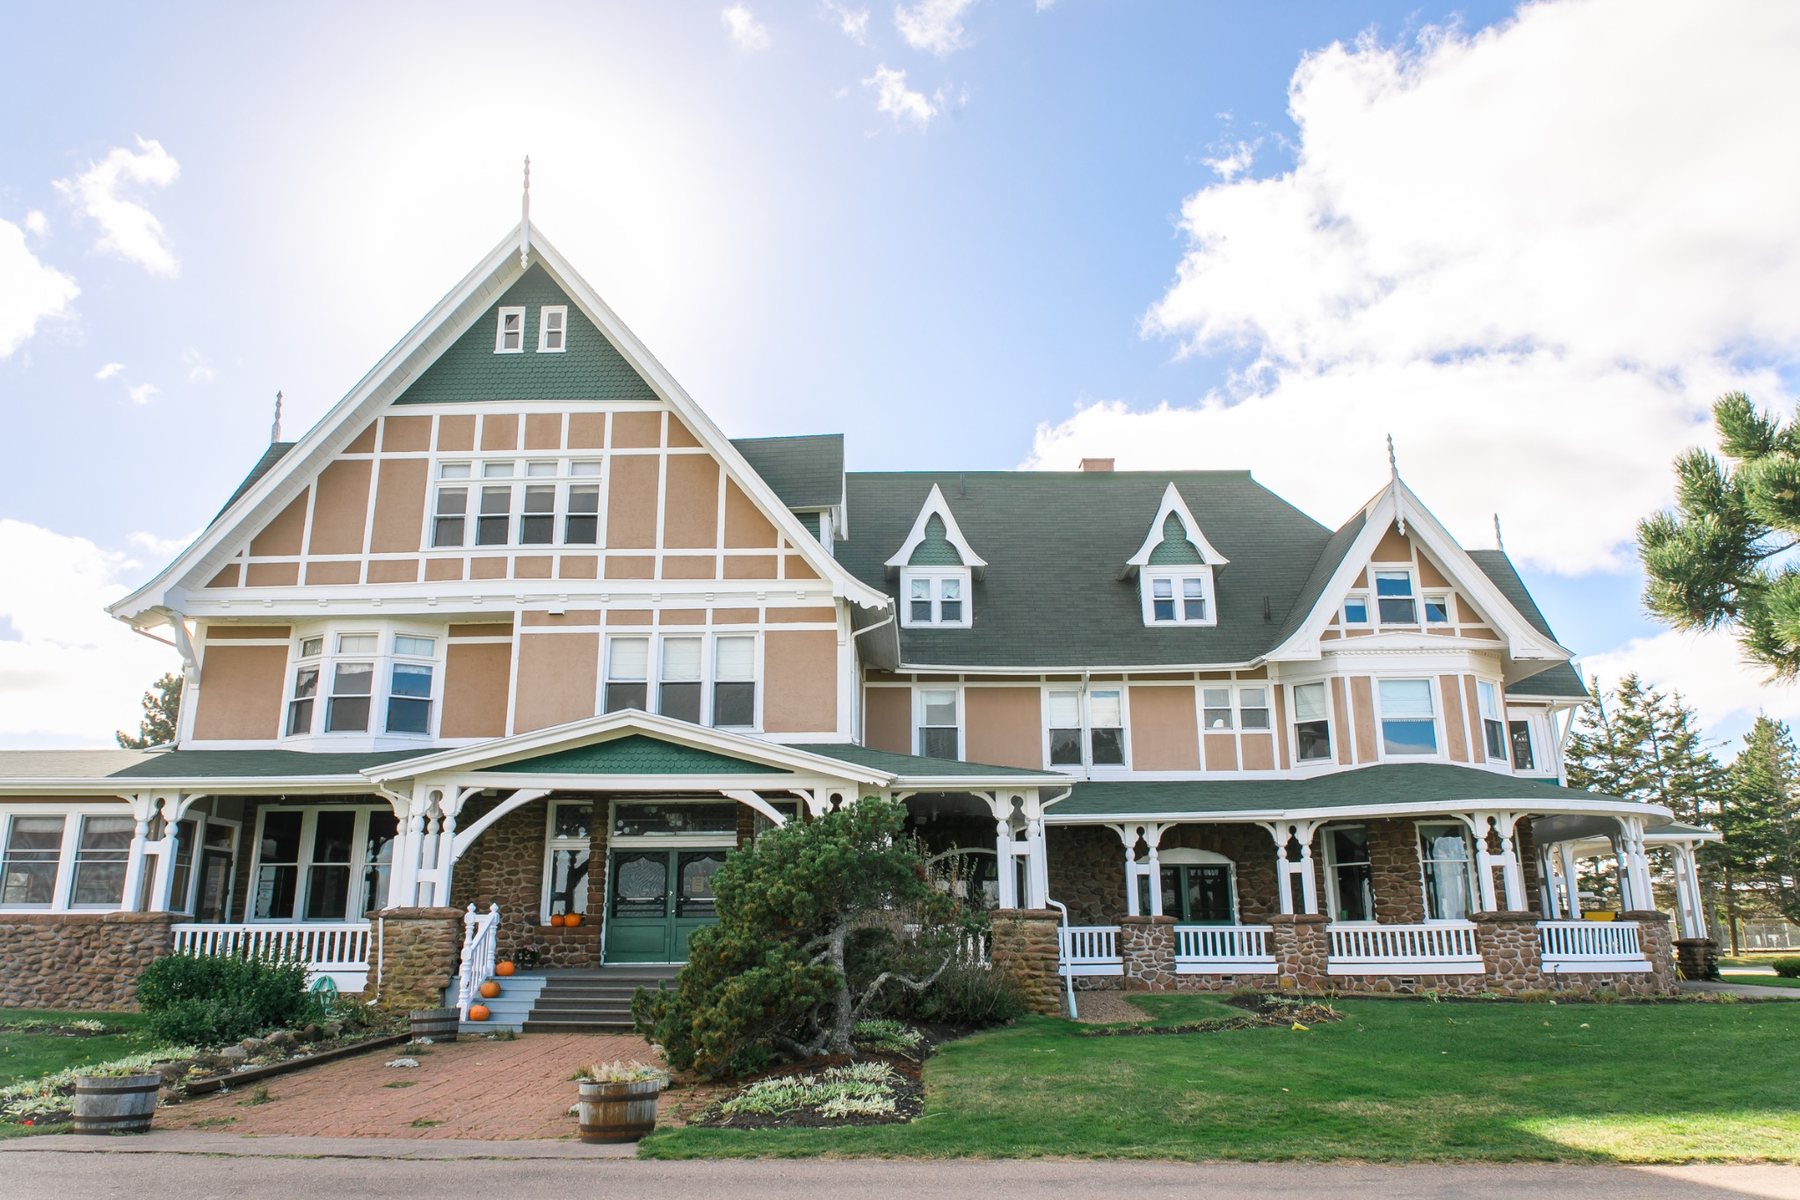
Recognized heritage fabric: the local sandstone and masonry base are part of the material character that makes Dalvay visually distinctive.
The sandstone at Dalvay had experienced substantial surface erosion. The property is in a location exposed to strong winds, and the combination of wind-driven weather and moisture had accelerated deterioration in some of the softer stone.
The condition was not uniform. Some stone remained serviceable while other areas had recessed faces, softened edges, open joints and deep localized loss. That variation is important on older masonry because the repair should respond to what is actually sound rather than treating every stone or joint as if it has failed to the same degree.
A key part of the work was separating deteriorated repair material from historic sandstone that could still remain in service.
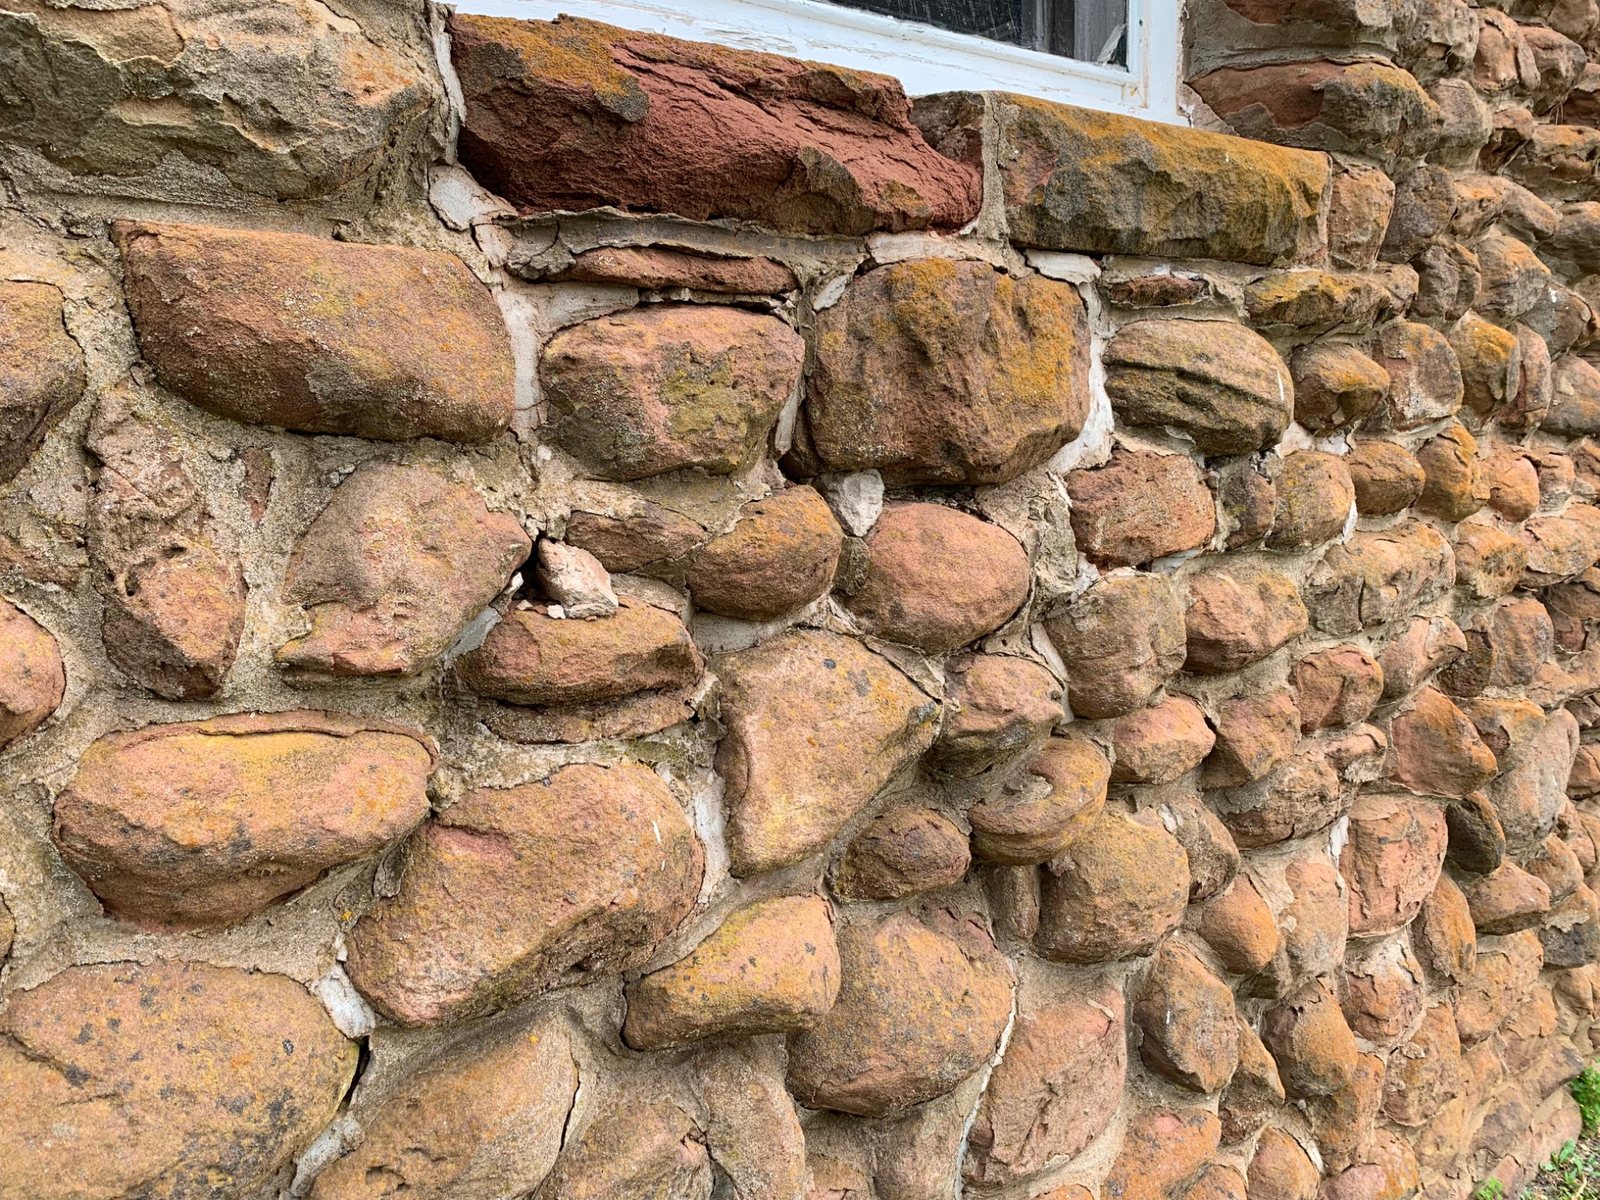
Existing wall condition: the sandstone shows the natural variation of the historic masonry along with localized erosion and previous repair material.
The repair mortar needed to be compatible physically and visually. Strength alone was not the goal.
Eroded sandstone: deep localized weathering shows why aggressive removal methods could have caused additional loss at the stone edges.
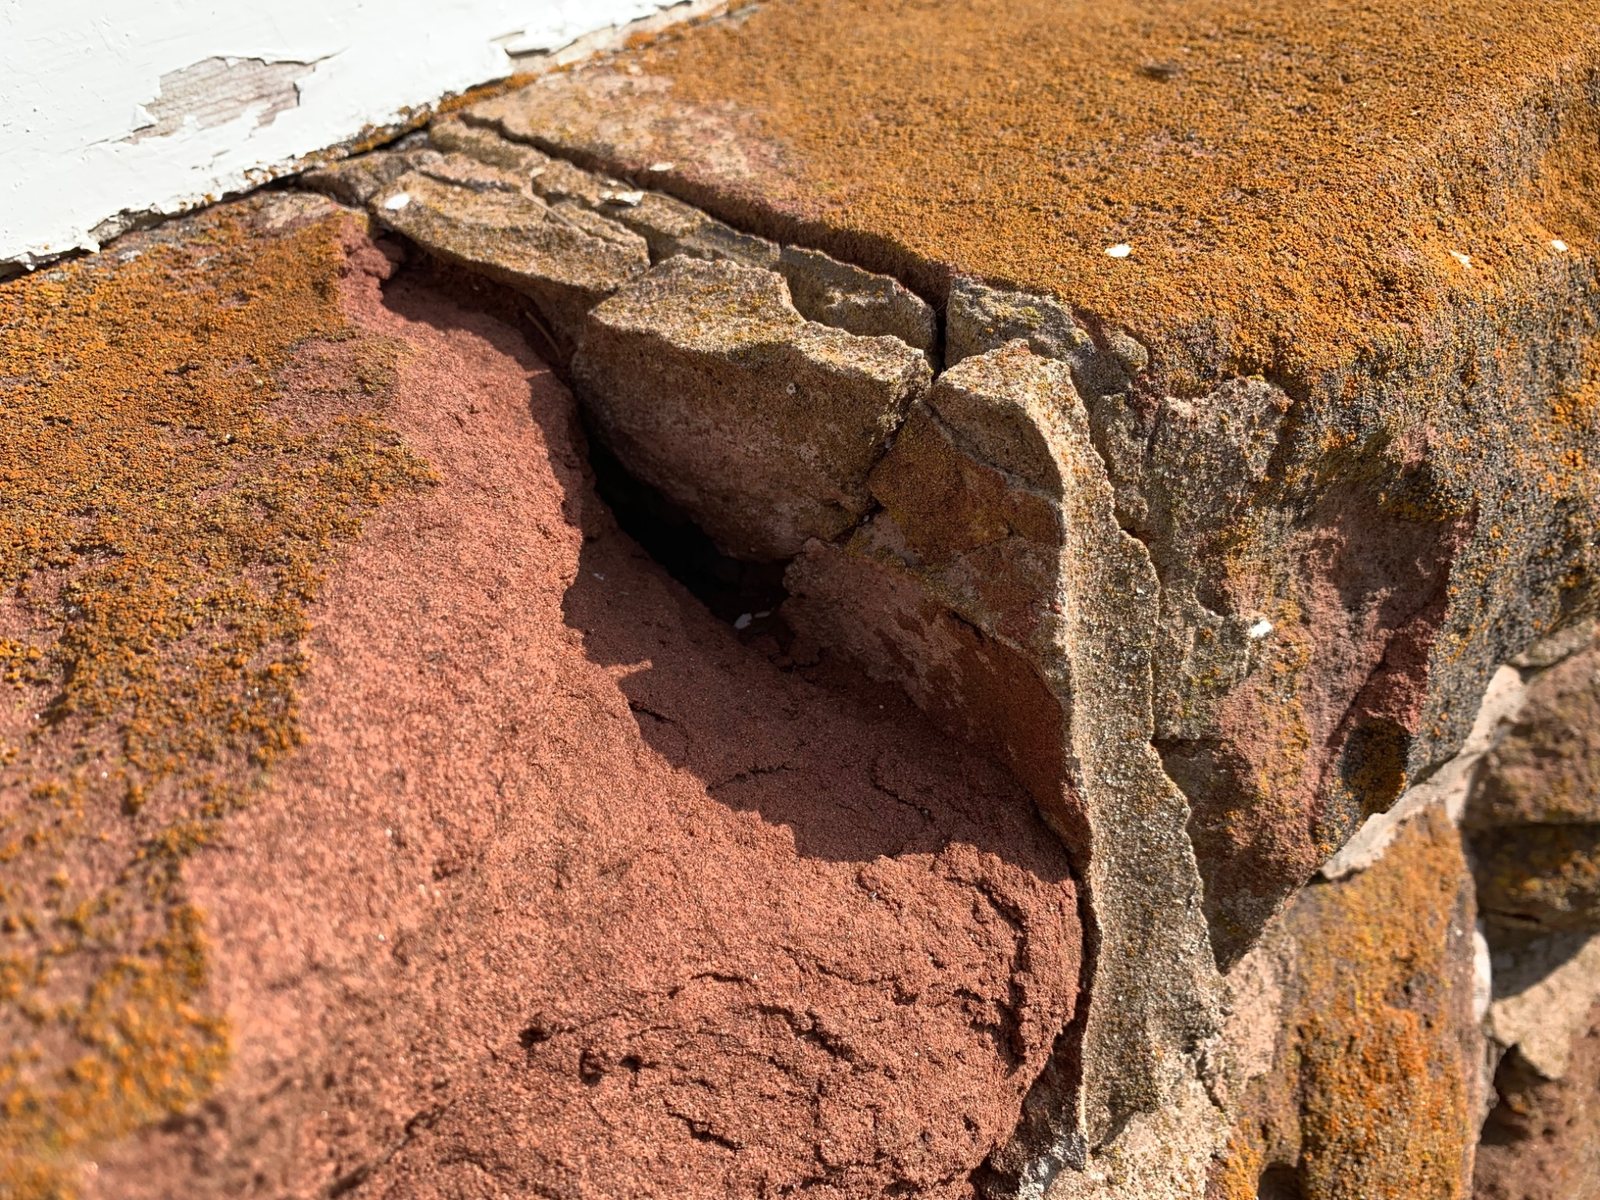
Soft material beside harder repairs: when the stone is the more vulnerable material, repair decisions have to protect it rather than simply produce the hardest possible joint.
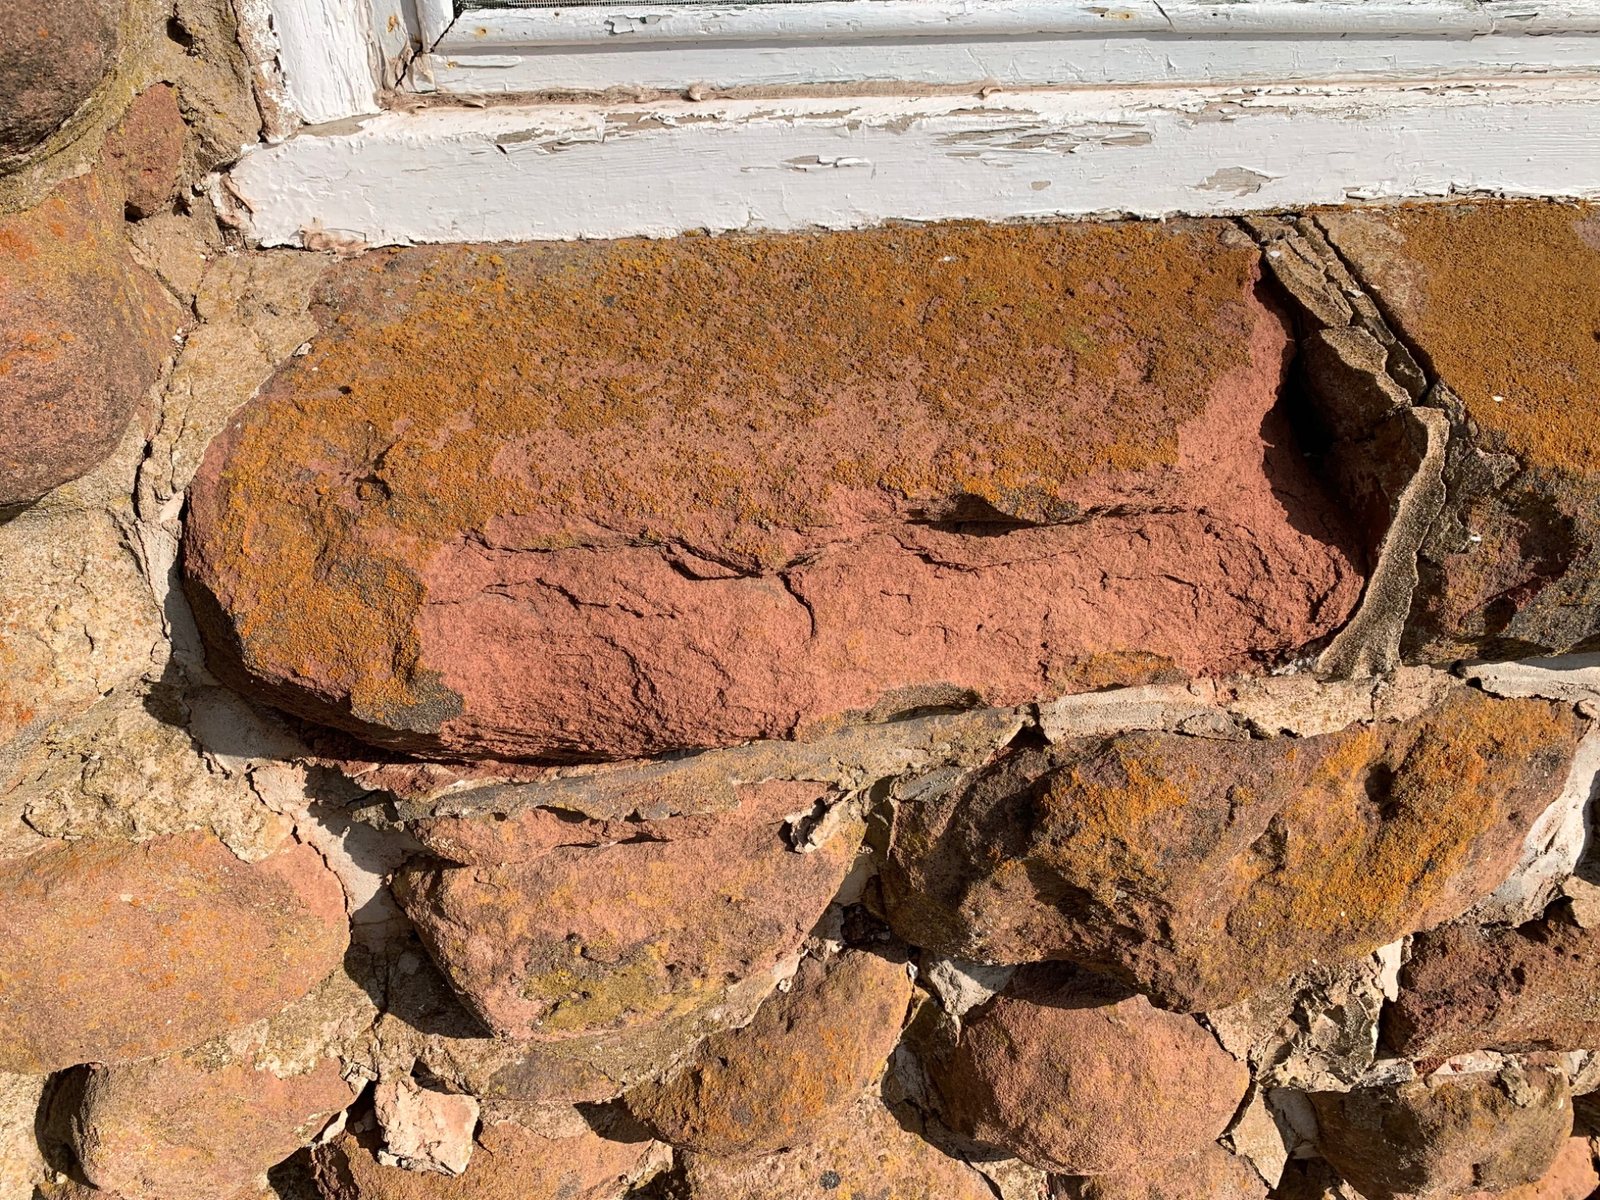
Localized loss: the amount of erosion varied across individual stones, making selective repair and careful preparation important.
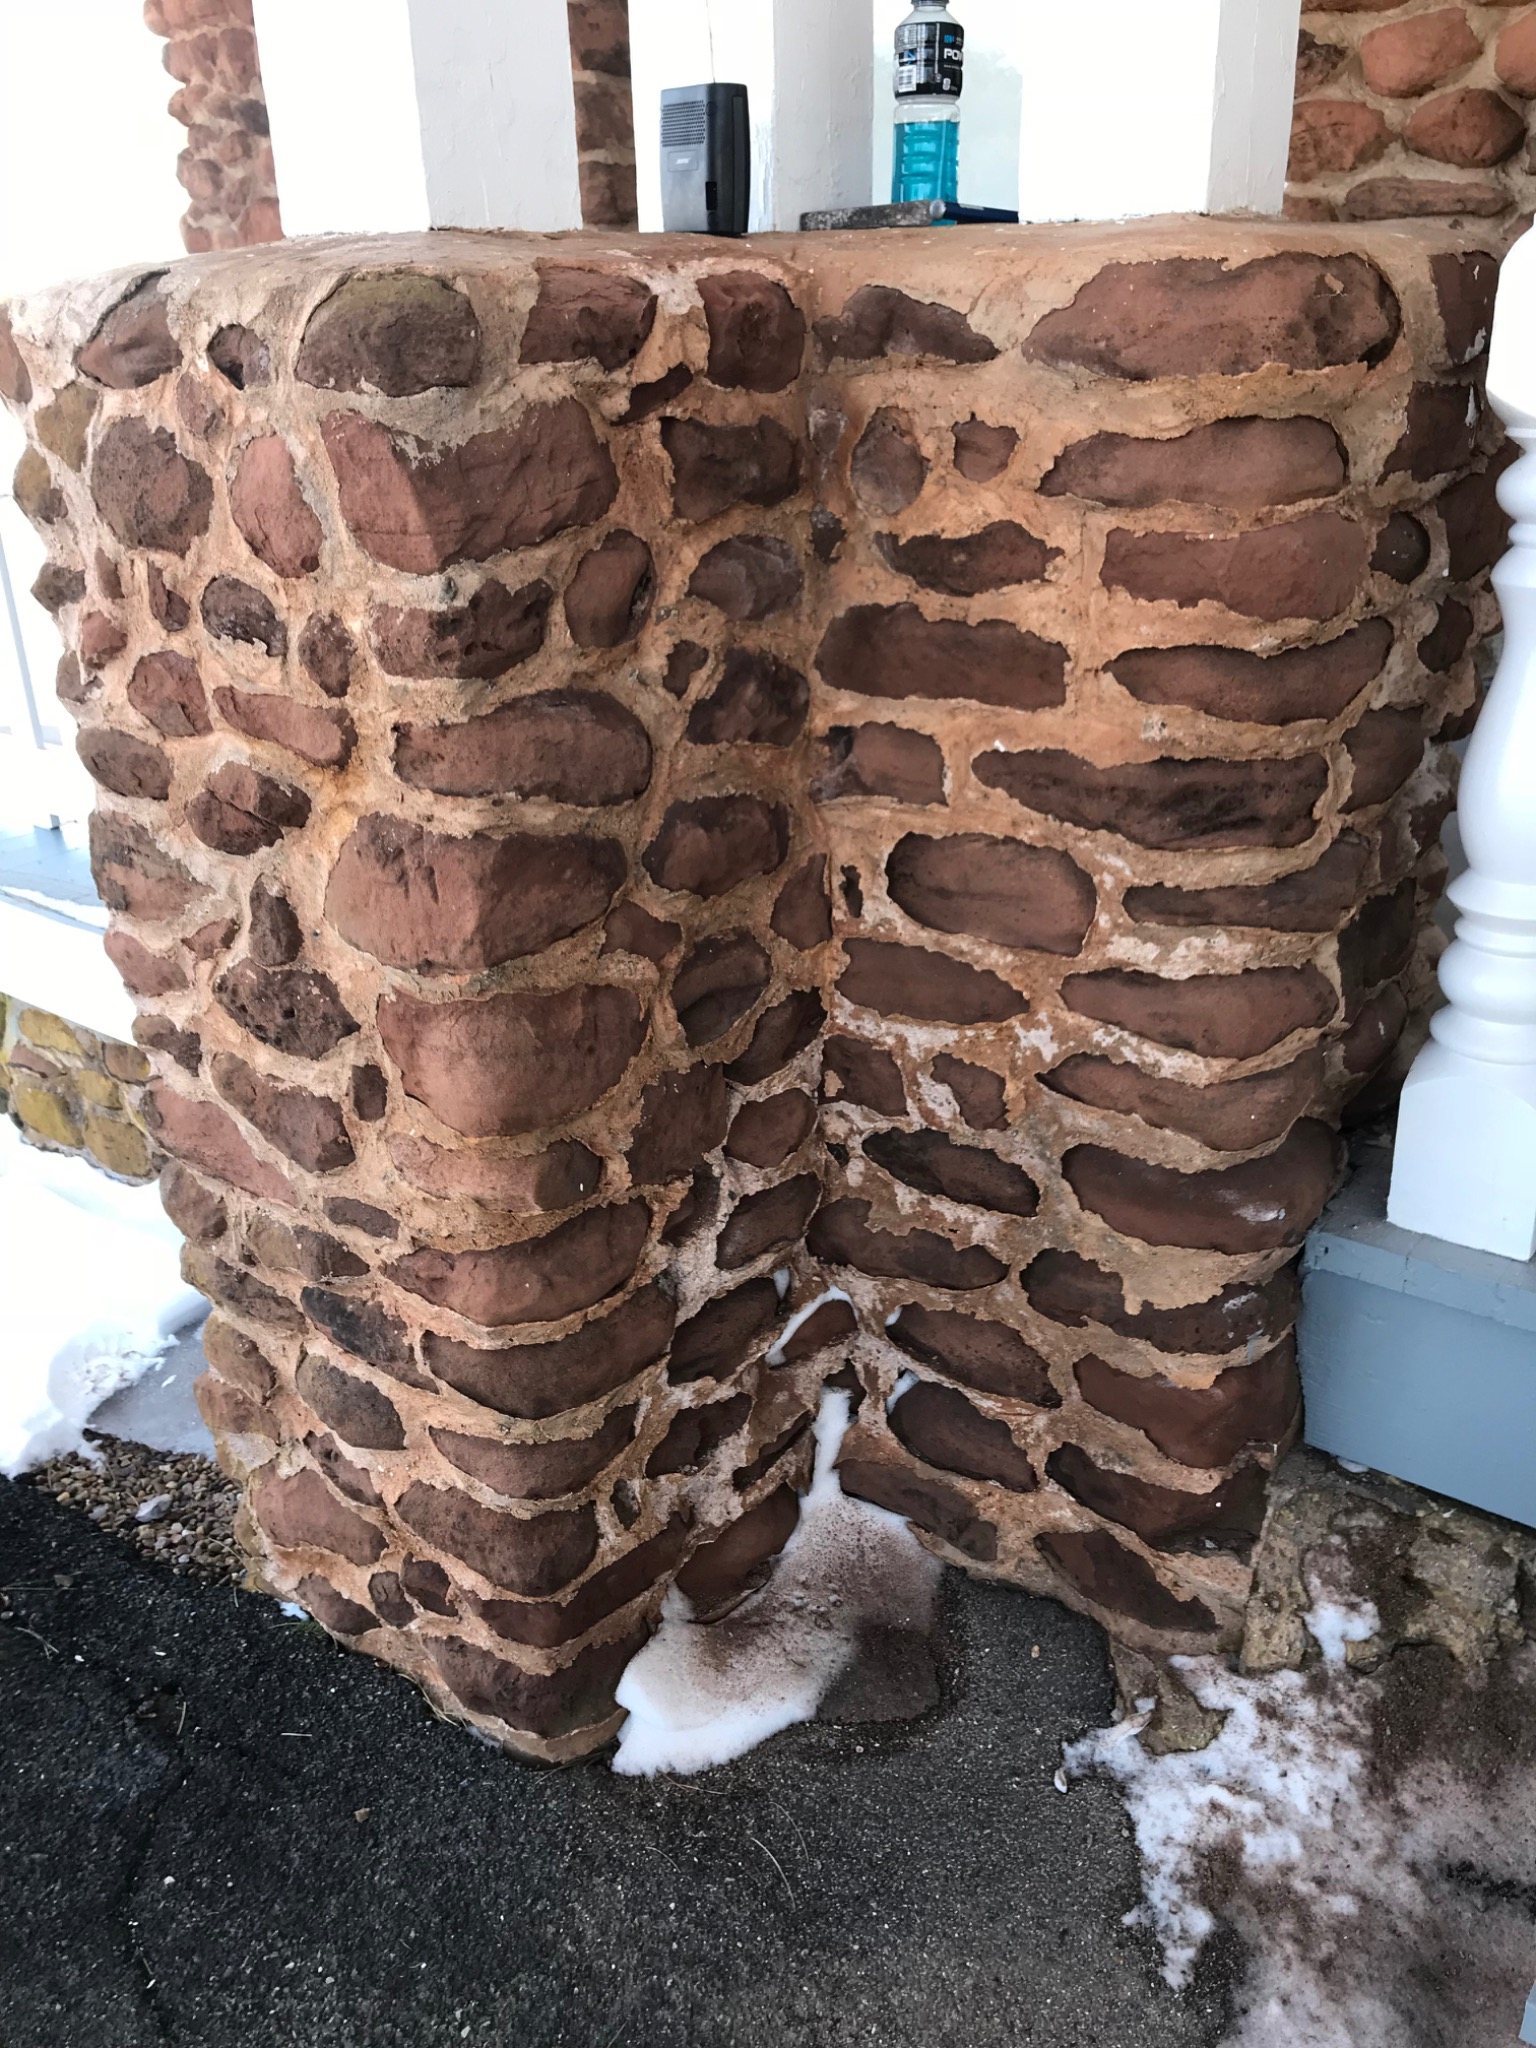
Hand-prepared repointing: existing hard mortar was carefully chiselled back so the new joint could be installed without unnecessarily cutting the softer sandstone.
Because of the softness and irregularity of the sandstone, the hard existing repair mortar was removed by hand chiselling rather than treating the wall as a modern brick elevation that could simply be ground out quickly.
The purpose was to create enough sound joint depth for the replacement mortar while reducing the risk of widening joints, cutting stone edges or removing material that did not need to come out.
Repointing then used a softer, more compatible mortar intended to work with the historic sandstone rather than becoming the hardest component in the wall.
Matching the appearance of the historic mortar required several sample mixes and mock-ups before the main work proceeded. Colour was a particularly important part of the approval process because the original lime mortar has a distinctive warm pink tone.
PEI sand was incorporated into the repair mix to help reproduce that characteristic colour and aggregate appearance. The final result therefore depended on the actual local aggregate, the mortar composition, the joint finish and how the mortar looked after curing.
This is one reason heritage mortar matching cannot be reduced to choosing a bagged mortar by type or picking a wet colour that looks close on the day it is installed.
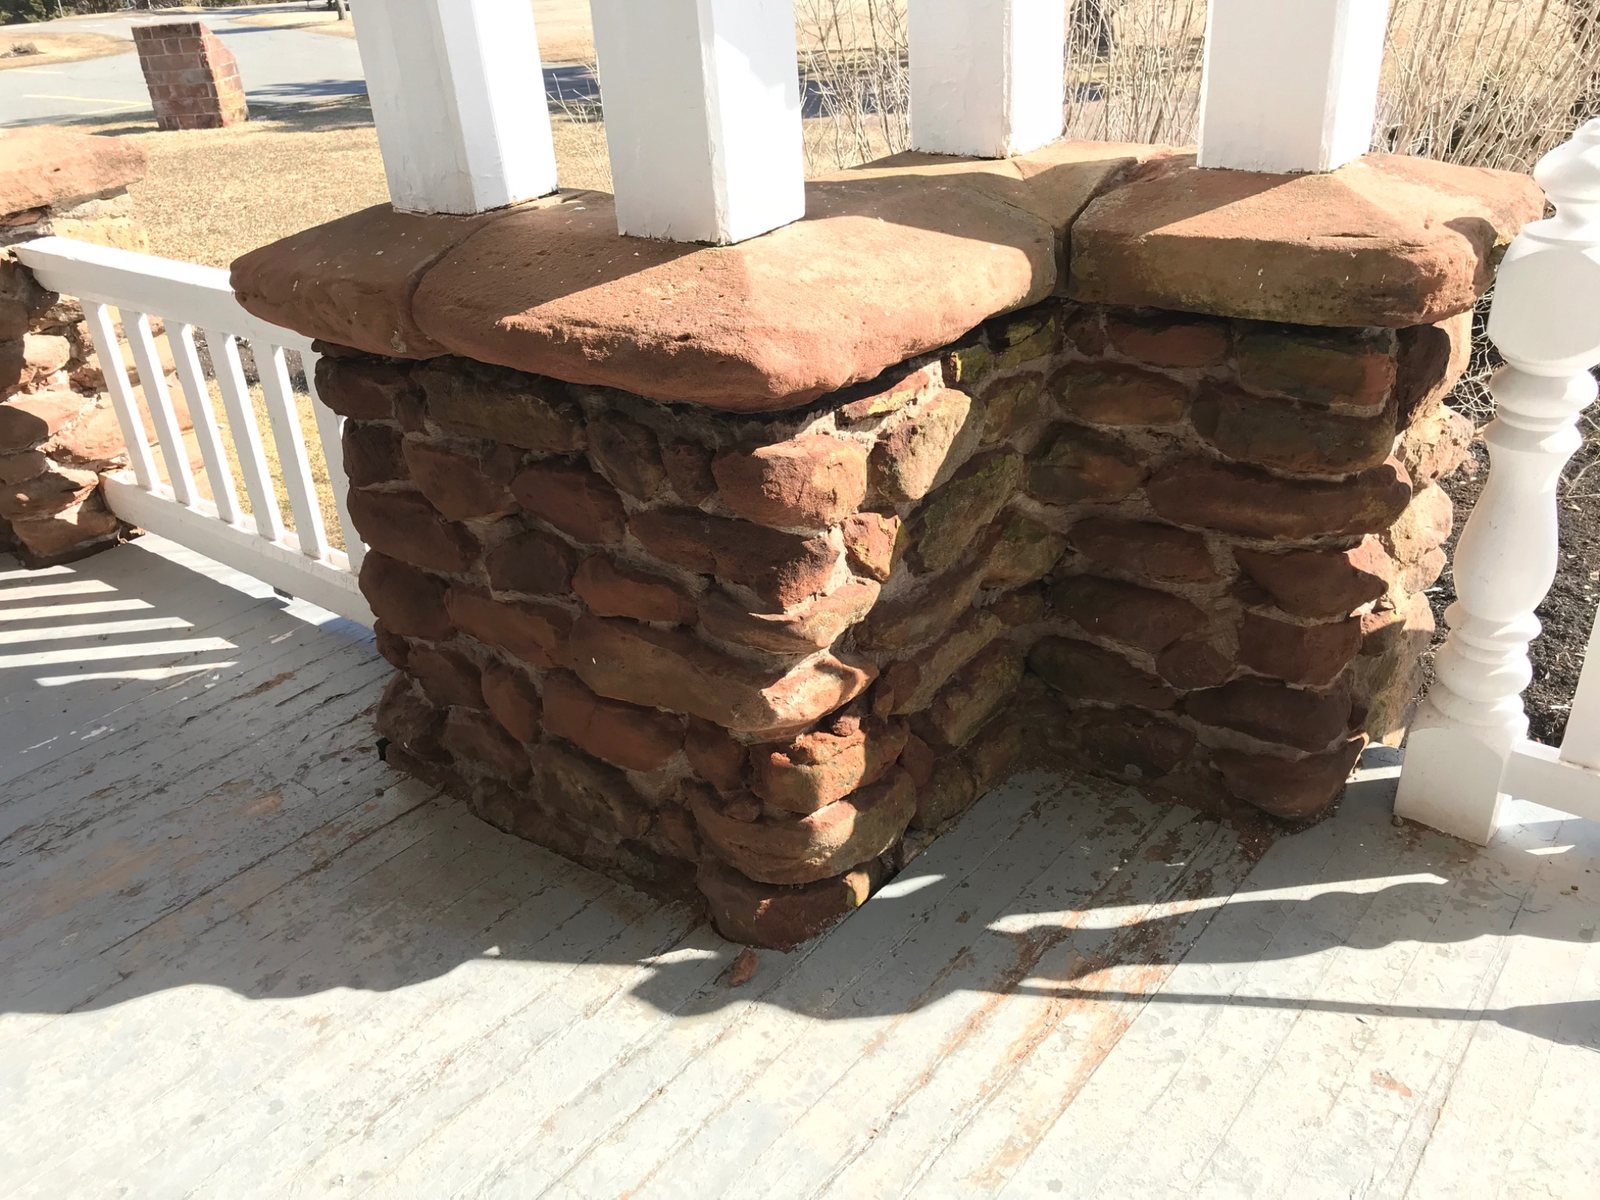
Finished mortar relationship: the goal was not to make every joint visually identical, but to produce a compatible repair that belonged with the existing sandstone and historic mortar palette.
Some downspouts were directing roof water onto sandstone pillars. Leaving that condition in place would have continued wetting the same masonry that had just been repaired.
Downspout locations were therefore changed so roof runoff was no longer concentrated on the stonework. This was a small part of the project visually, but an important part of protecting the repair.
The same principle applied at the windows. Some sill stones were directing water toward the building rather than away from it. Those stones were re-dressed where practical and replaced where necessary so the sill could shed water outward.
Read: How water damages masonry and why the source matters →
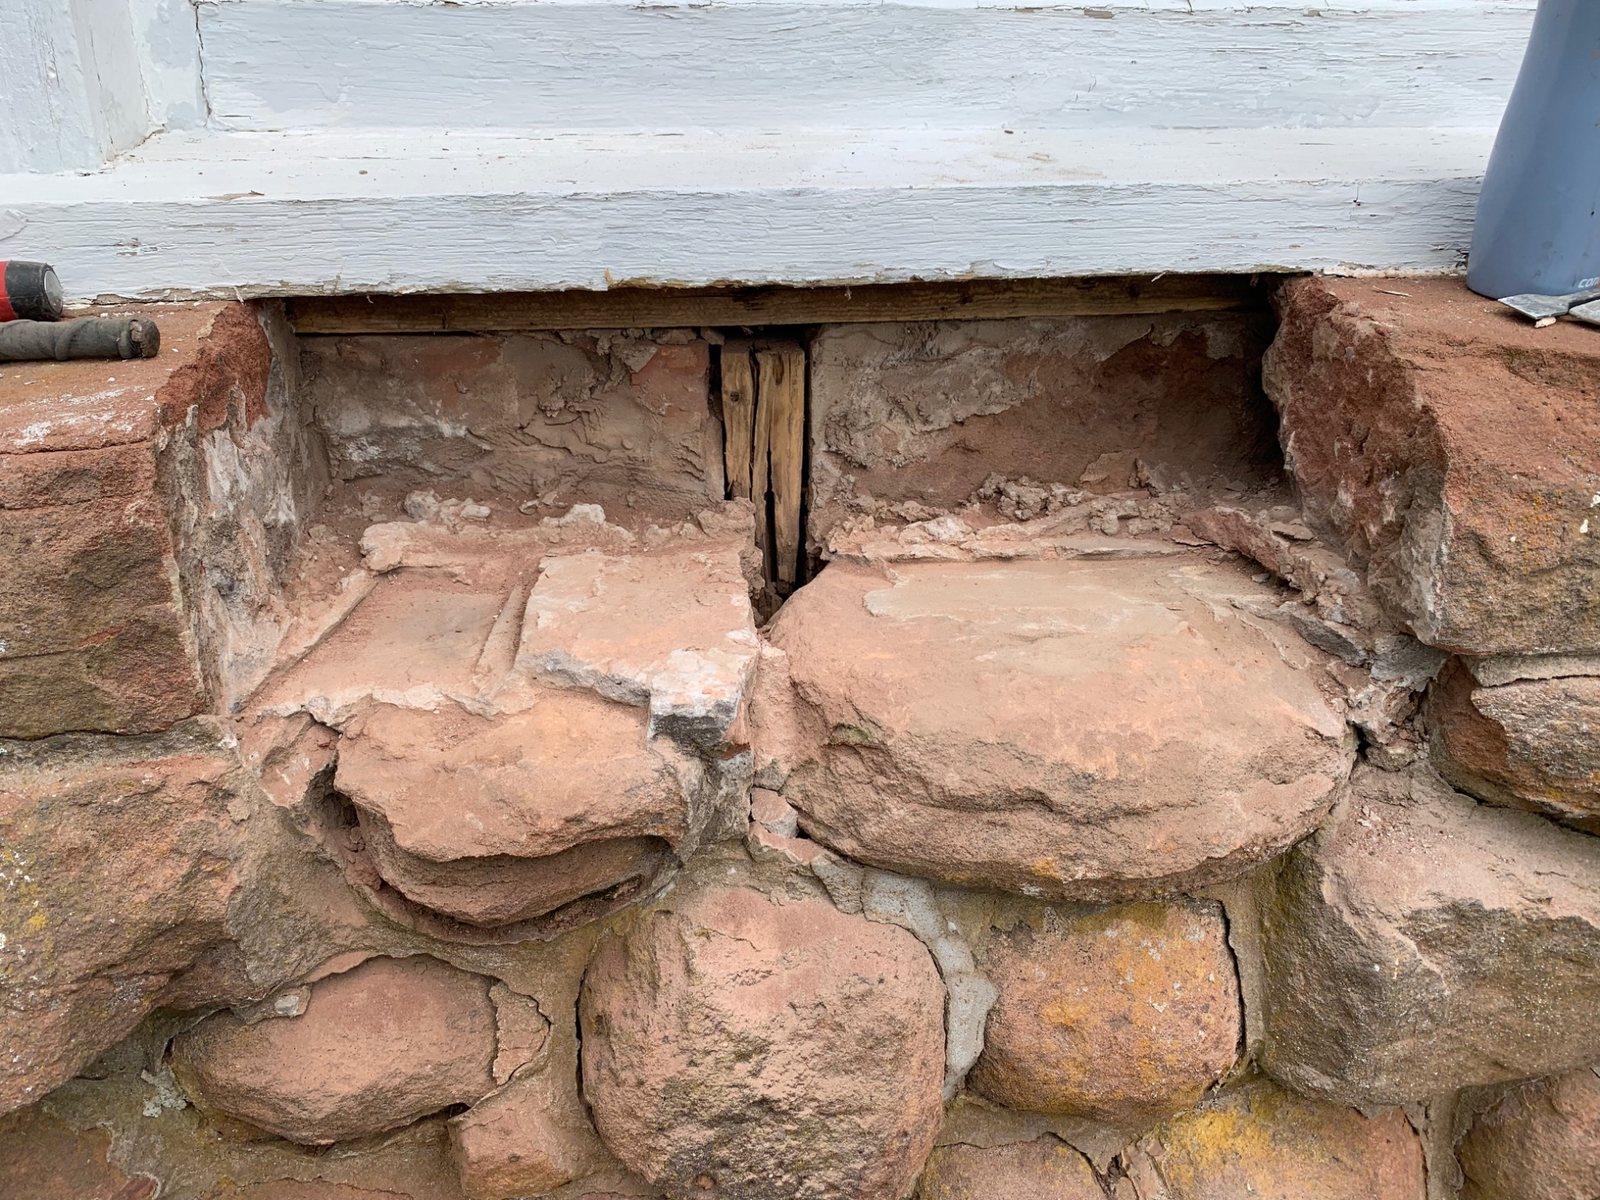
Water-shedding detail: opening the sill area showed why the repair had to address the stone shape and drainage path rather than sealing only the visible joint.
Repair included both re-dressing existing stone and replacing individual sill material where necessary.
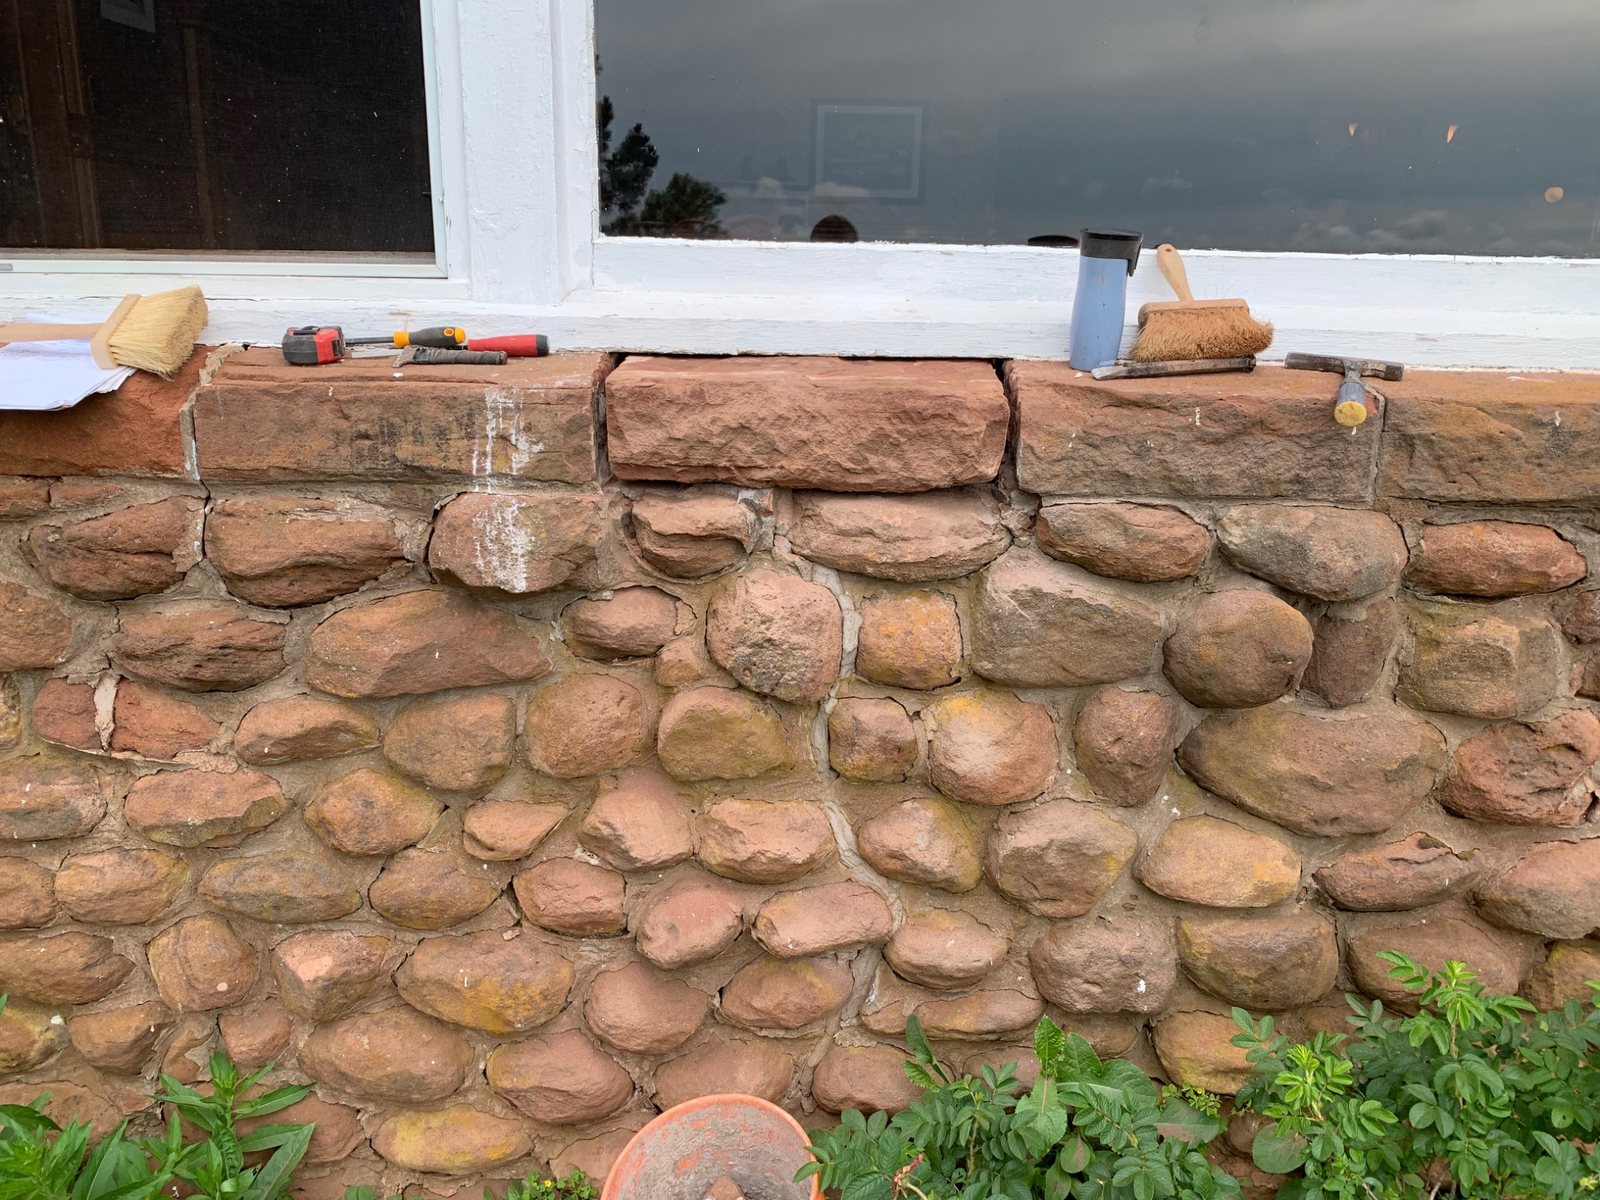
Repair in context: sill work was coordinated with the surrounding sandstone and mortar so the entire water path could be considered.
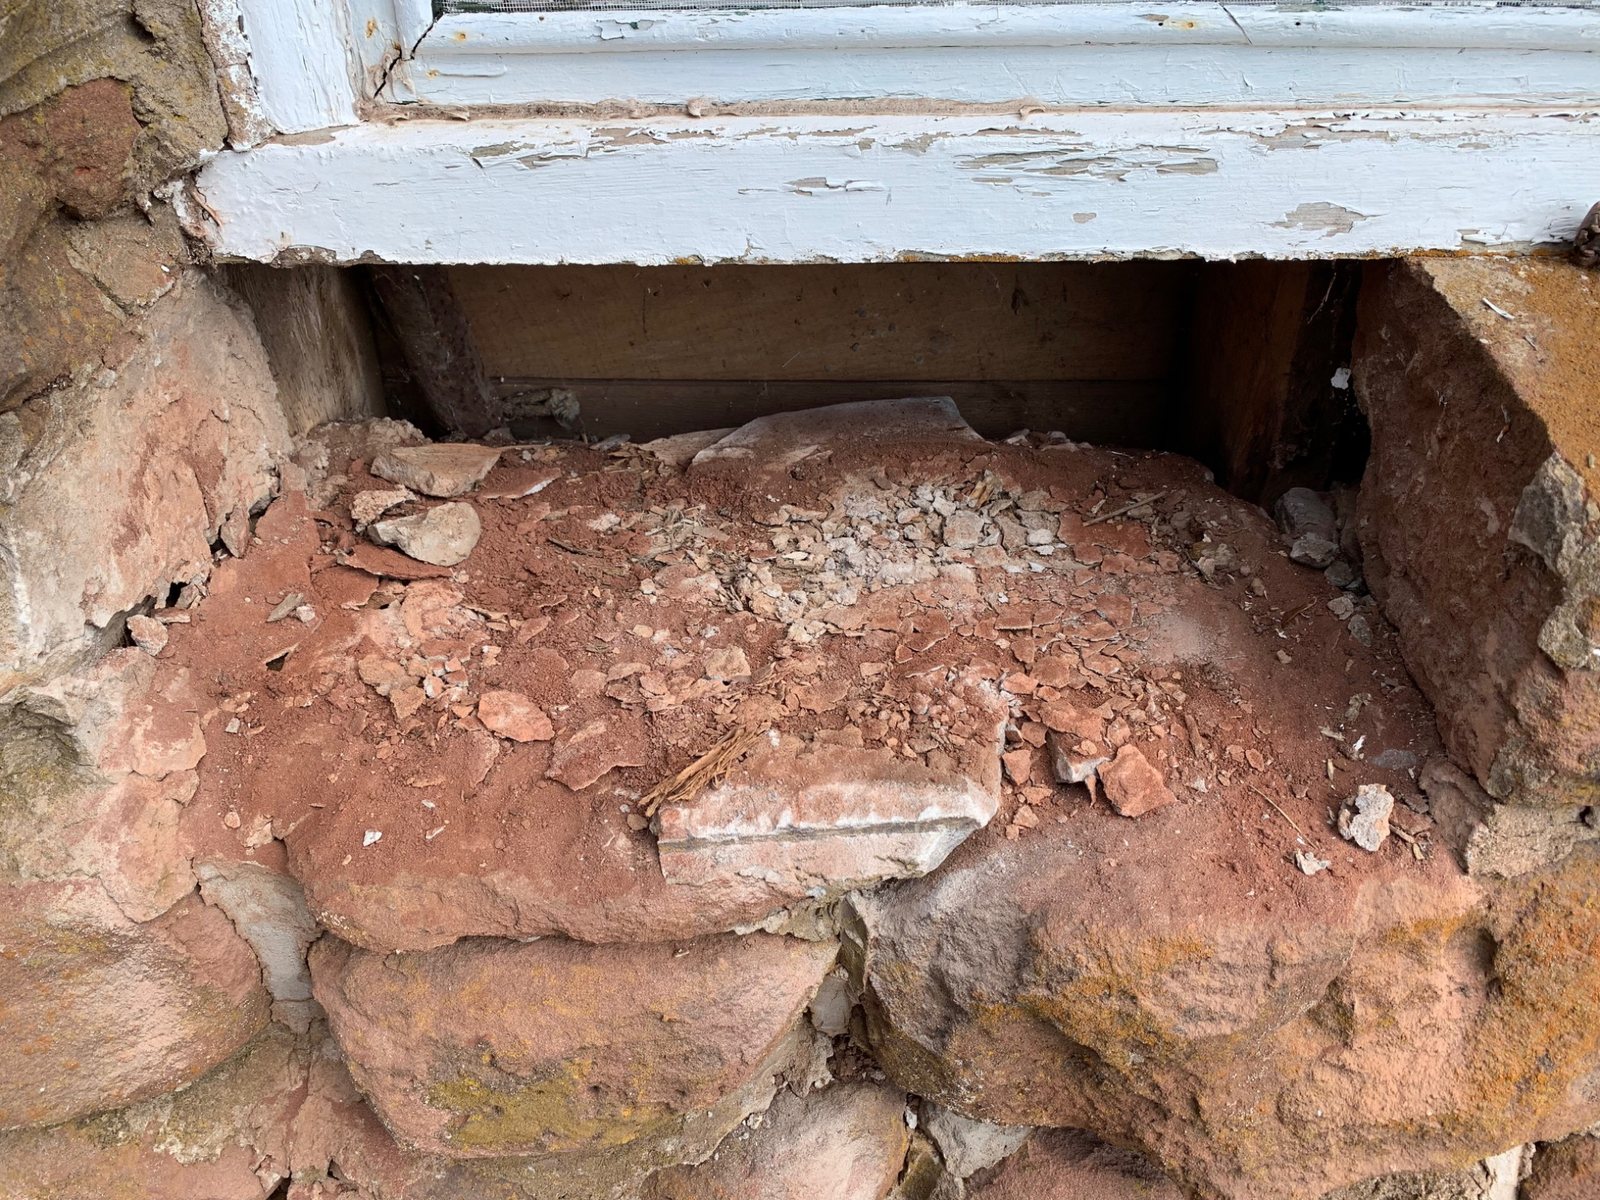
Deteriorated sill area: erosion and open material beneath the window can allow water to move into places that are not obvious from the interior finish.
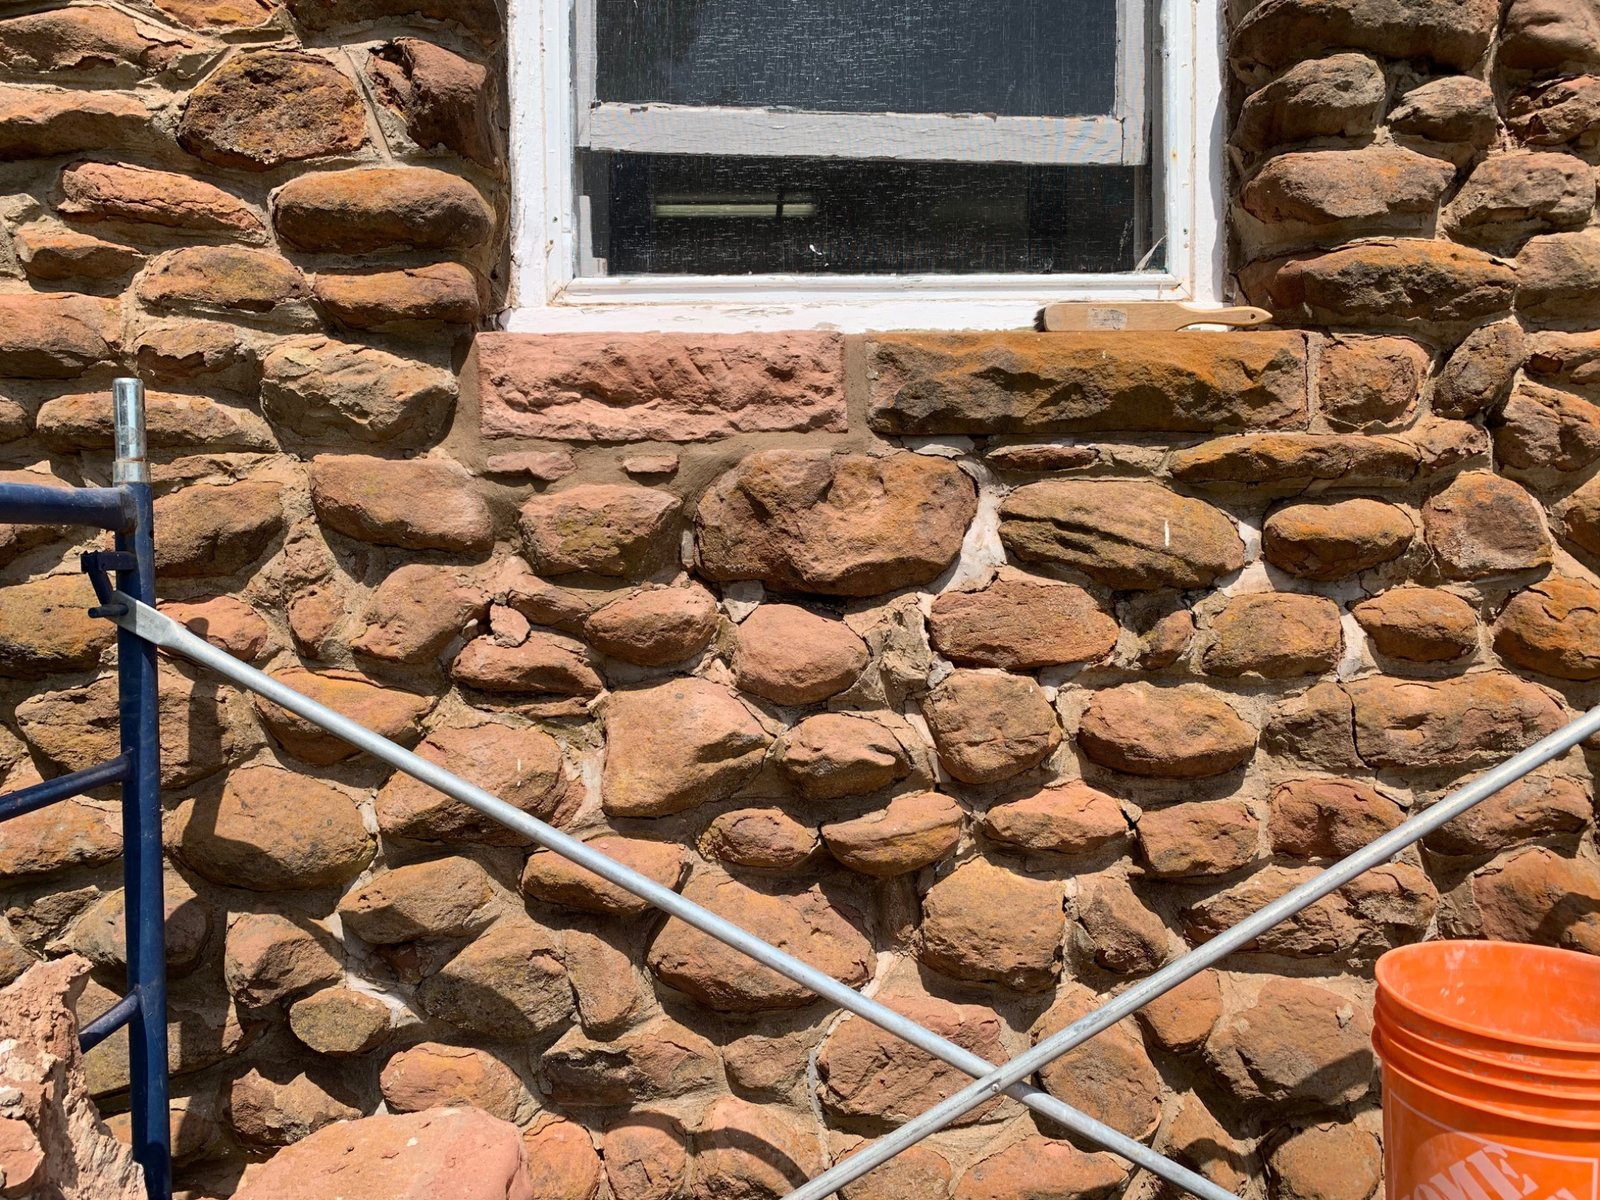
Selective intervention: the objective was to restore outward drainage while keeping usable historic masonry wherever practical.
These fireplaces operate continuously while the hotel is open from spring through fall, so the work had to address the firebox and smoke path rather than treating the masonry as a decorative surface only.
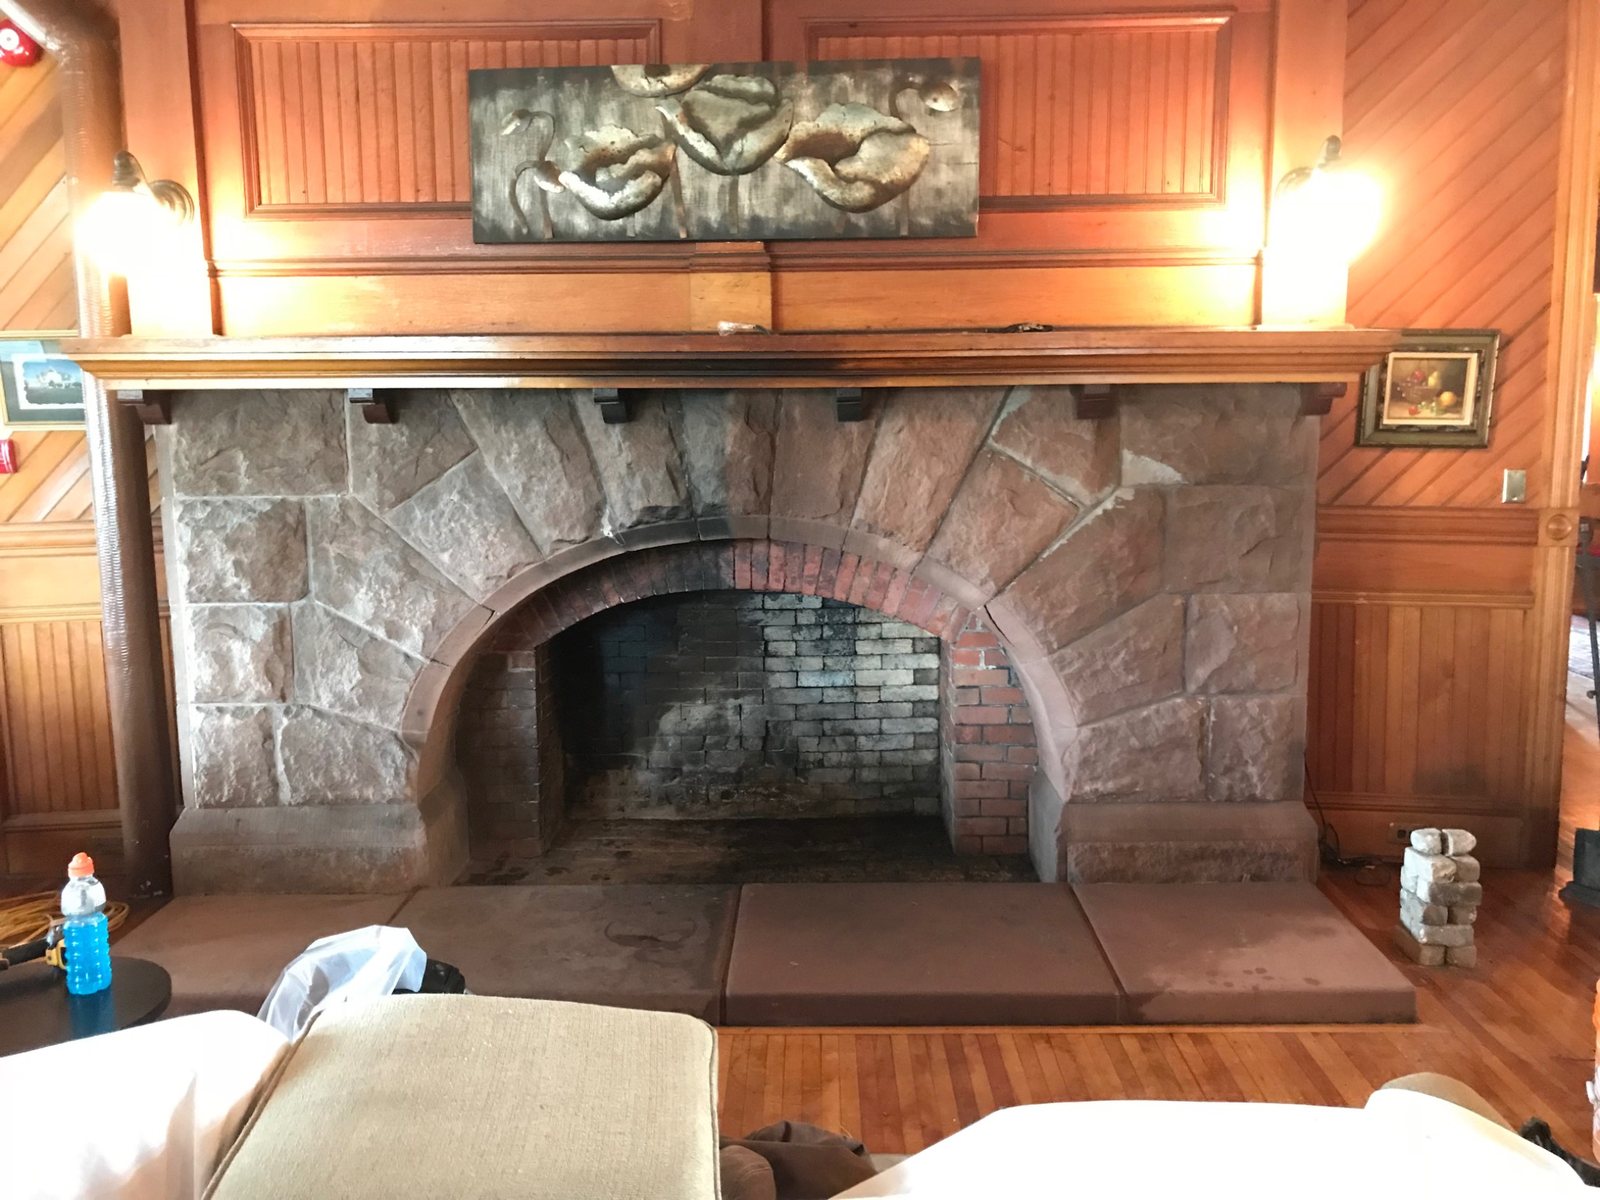
Cleaning contrast: one side of the masonry has been cleaned while the other remains soot-darkened, making the difference visible within the same fireplace.
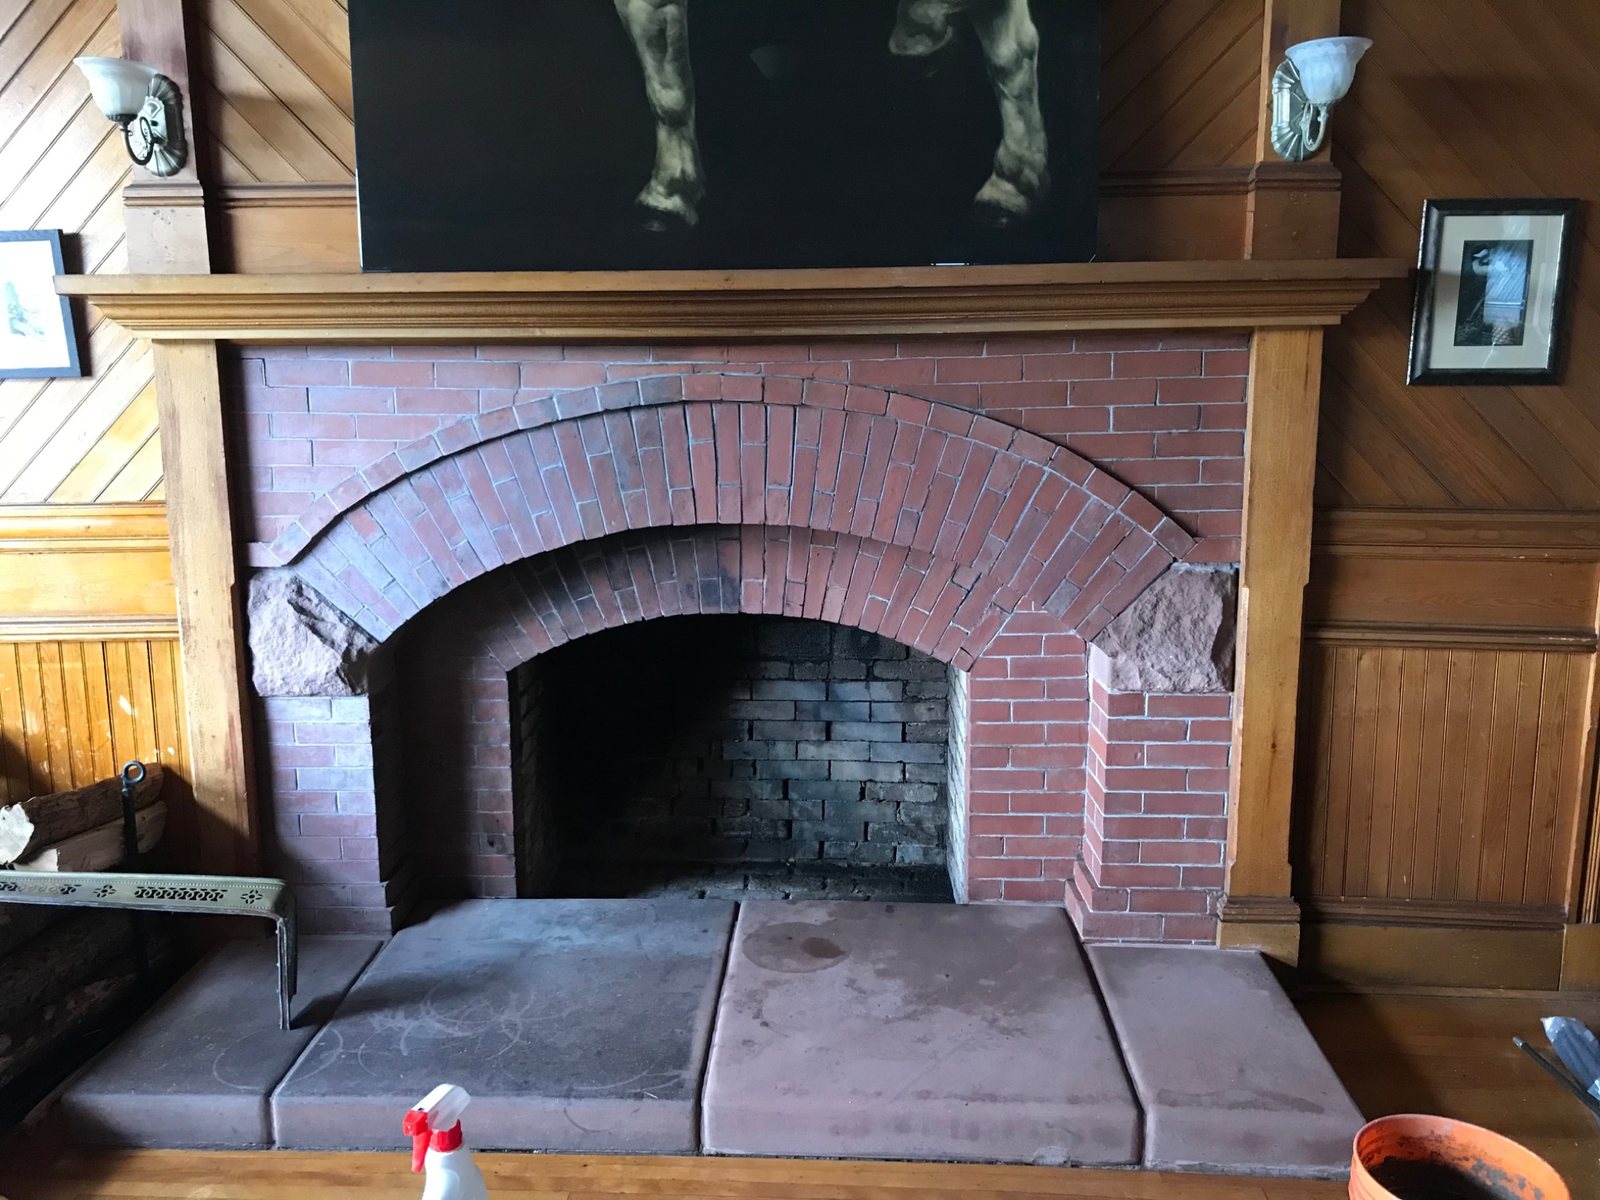
Second main fireplace: the same staged cleaning approach shows the accumulated soot deposits before the full masonry surface was completed.
Deteriorated mortar within the fireboxes was repaired so the masonry lining could continue functioning as intended under regular use.
The smoke chambers were also relined. Because these fireplaces see sustained seasonal use, the repair scope included the less-visible masonry above the firebox rather than stopping at the decorative face.
Read: When do firebox cracks and damaged firebrick need repair? →
The visible work at Dalvay included substantial sandstone repointing and repair, corrected sills, water-management changes and fireplace restoration. Because the sandstone masonry is part of a nationally recognized heritage property, the larger value of the project was in how those repairs were chosen and executed.
One building, several connected systems: stone, mortar, sills, drainage and fireplaces were treated as parts of the same historic property rather than unrelated repairs.
These guides explain the broader repair decisions illustrated by this project.
Why softer masonry often requires a more compatible repair mortar rather than simply the strongest available mix.
Read the guide →Joint preparation, adequate depth, placement, tooling and curing all matter to the finished repair.
Read the guide →Colour, aggregate, texture, tooling and weathered appearance all affect how a repair sits within an older wall.
Read the guide →Cleaning methods should remove unwanted deposits without trading appearance for material damage.
Read the guide →Repairing the wall is only part of the answer when drainage or runoff continues feeding moisture into it.
Read the guide →Understand the masonry side of firebox deterioration and when broader solid-fuel inspection may be appropriate.
Read the guide →Send wide photographs, close-ups of the deterioration and any information you have about previous repairs. Historic masonry usually benefits from understanding the existing material before selecting the replacement material.
Heritage-designation details on this case study are drawn from Parks Canada and the Government of Canada's Canadian Register of Historic Places. The repair descriptions and project photographs are based on DinoMac's field work at Dalvay by the Sea.
Prepared by Dean MacArthur, DinoMac Masonry Ltd., a third-generation mason with more than 20 years of hands-on masonry experience.
Reviewed August 26, 2026.
See additional real-world masonry repairs and restoration projects as the case-study library grows.
View Case Studies