Crumbling Mortar
Joints that turn to powder, fall away easily or have clearly lost cohesion are candidates for removal back to sound material.
Proper repointing is not painting mortar over the face of an old joint. It is a controlled repair process: diagnose why the mortar failed, remove deteriorated material without damaging the masonry, choose a compatible replacement mortar, pack it into a properly prepared joint, match the joint profile and cure it correctly.
Done well, repointing preserves sound brick or stone and restores the joints that help the wall resist weather. Done poorly, it can change the appearance of the masonry, trap moisture or damage the units the repair was meant to protect.
The joint is part of the wall. Mortar has to bond to the adjacent masonry, accommodate appropriate movement and weather in a way that remains compatible with the brick or stone around it.
National Park Service guidance specifically warns against assuming that repointing alone will solve deterioration caused by leaking roofs, gutters, settlement, rising damp or severe weather exposure.
If a downspout is soaking one section of wall, a chimney crown is leaking, a lintel is moving or the foundation is settling, replacing the visible mortar without correcting the cause usually produces another failed repair.
The first inspection should therefore ask why the joints failed and whether the wall itself remains stable.
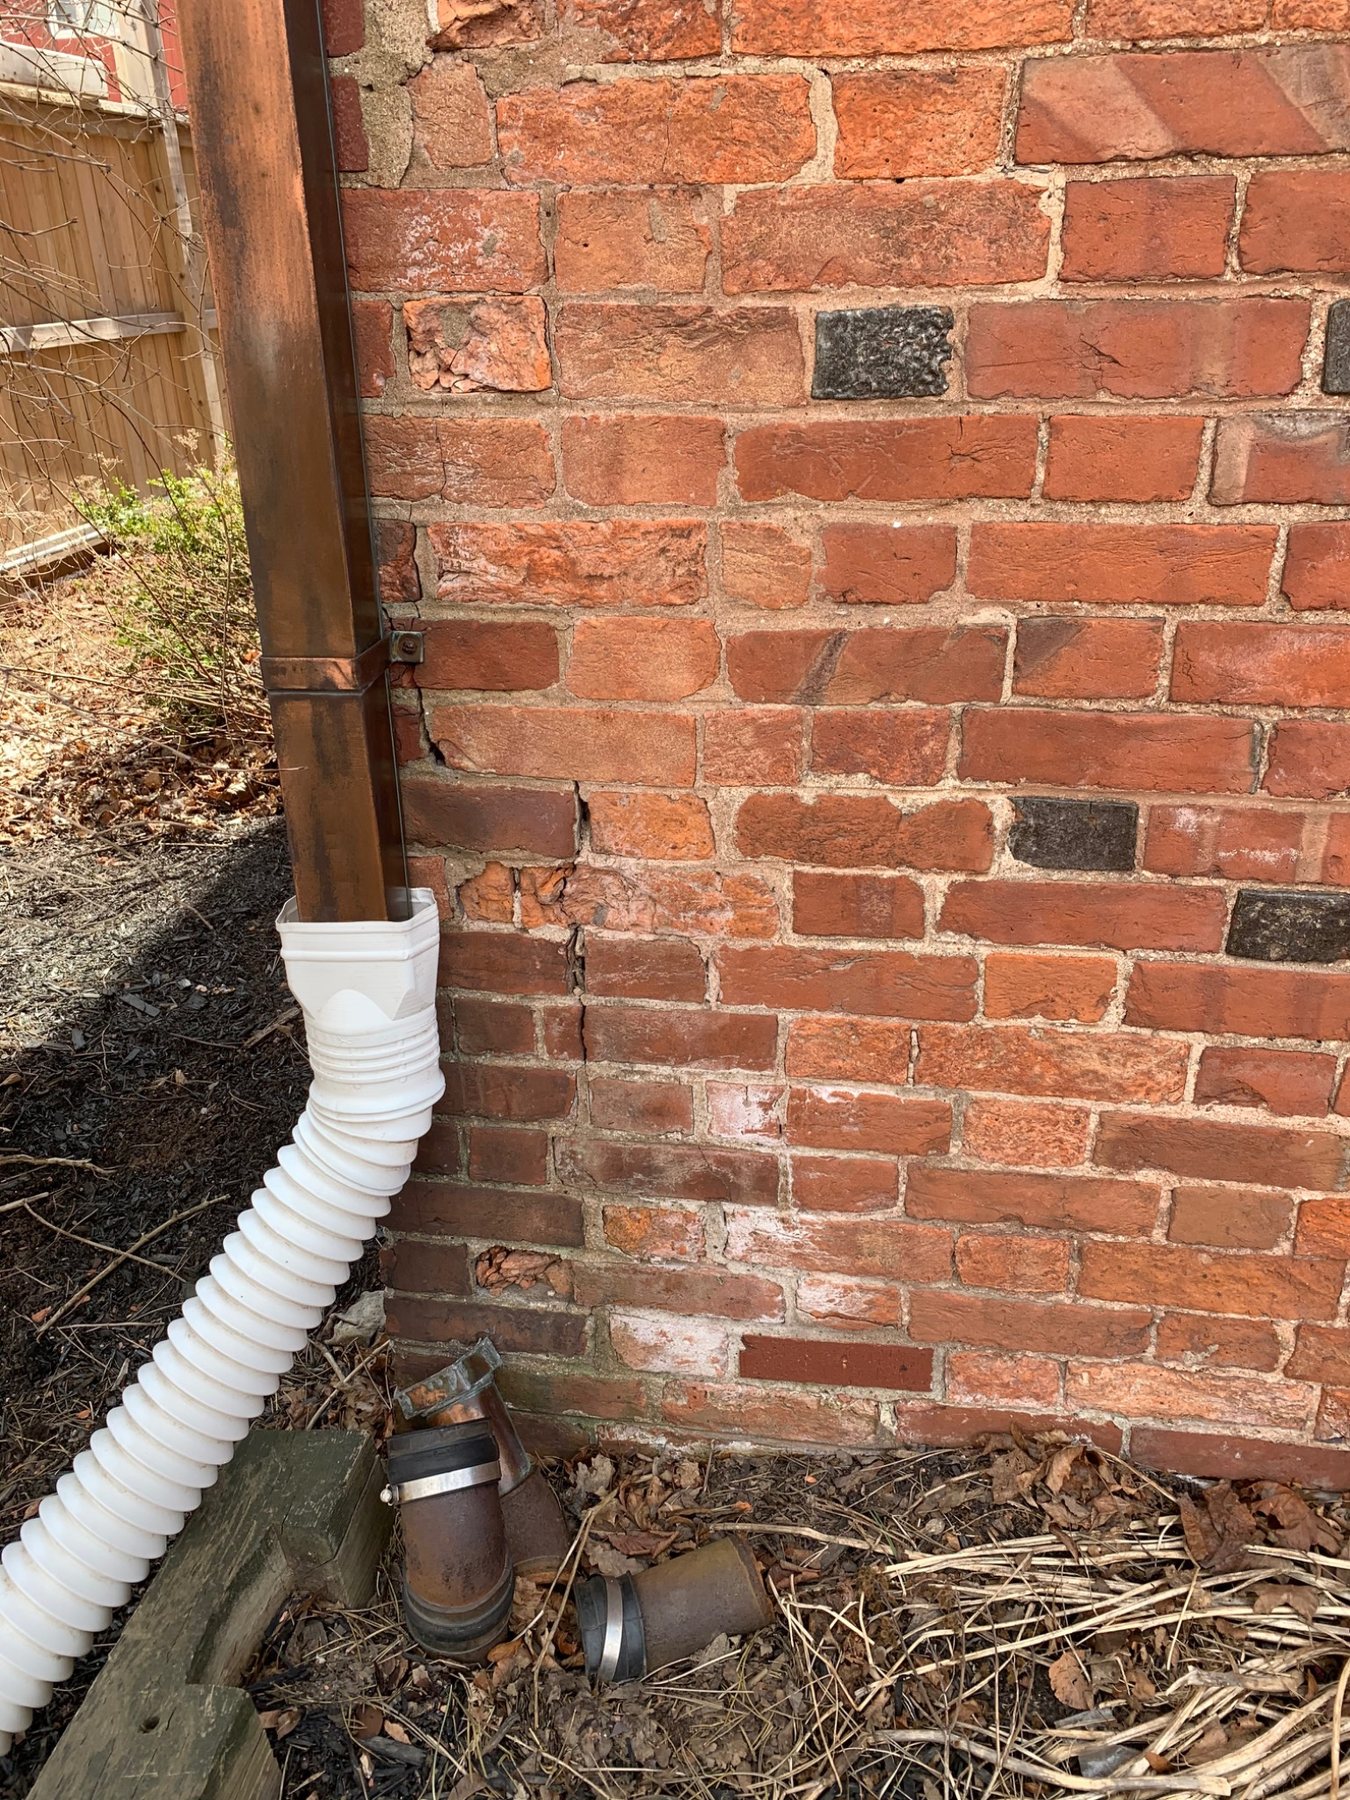
Repair the water source first. Repointing a wall that remains chronically saturated can improve the joints while leaving the reason they deteriorated completely unchanged.
Selective repointing is often better than wholesale removal of serviceable joints.
Joints that turn to powder, fall away easily or have clearly lost cohesion are candidates for removal back to sound material.
Substantial recession leaves edges exposed and can increase rain entry, especially on weather-facing walls.
Cracks between mortar and masonry or visible voids can create direct water paths and reduce the joint's effectiveness.
Thin overlays, incompatible hard patches and loose repair mortar should be evaluated rather than simply coated again.
One failed area does not automatically justify cutting every joint on the entire elevation.
A crack caused by continuing movement should be diagnosed before it is treated as ordinary mortar erosion.
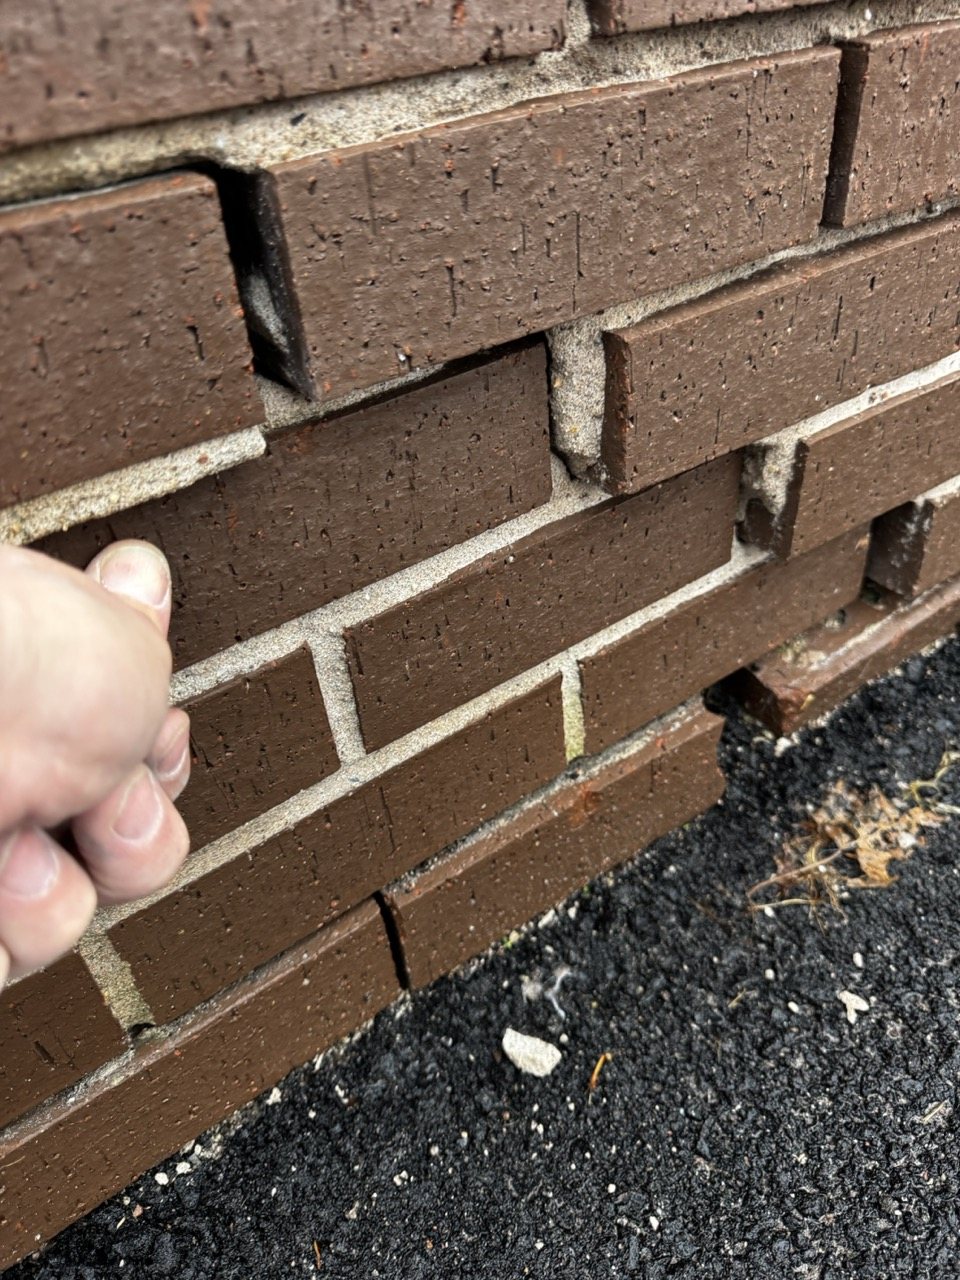
Repointing is not rebuilding. If units are loose or displaced, the repair may need brick or stone reset before the joint work is finished.
Stronger is not automatically better. Brick Industry Association guidance notes that compressive strength is often overemphasized when selecting mortar, and NPS guidance cautions against replacement mortar that is harder or less permeable than older masonry can tolerate.
On older buildings, the existing mortar may contain more lime and less portland cement than a modern high-strength mix. The replacement should be selected for the masonry, exposure, wall construction and historic character.
Appearance matters too. Sand colour and grading, binder colour, tooling and joint profile all influence how the finished work reads from a distance.
Read the mortar compatibility guide →Correct leaks, drainage problems, structural movement and other conditions that would cause the new mortar to fail again.
Determine suitable strength, permeability, colour, texture and joint profile. A small test panel can establish the expected finished standard.
Cut back to sound mortar at adequate depth without widening the joint, chipping brick edges or damaging stone faces.
Remove dust and loose particles so new mortar bonds to masonry rather than a layer of cutting debris.
Absorptive masonry should not pull water out of fresh mortar too quickly. The joint should be damp where appropriate, but not contain standing water.
Deep joints are filled progressively and compacted so the repair bonds to the back and sides rather than forming a shallow face plug.
The final joint is compressed and finished when the mortar has firmed enough to hold the intended profile without smearing across the masonry.
Fresh mortar is protected from rapid drying, direct sun, heavy rain and freezing so it can develop bond and durability properly.
NPS Preservation Brief 2 recommends removing old mortar to a minimum depth of about two to two-and-a-half times the joint width. Brick Industry Association guidance similarly states that removal depth should equal or exceed twice the mortar-joint thickness.
Those are general guides, not a command to stop at a fixed number. Loose or disintegrated mortar deeper in the joint should also be removed until sound material is reached.
The goal is a clean, adequately deep joint with sound sides and back, not a thin slot cut only into the exposed face.
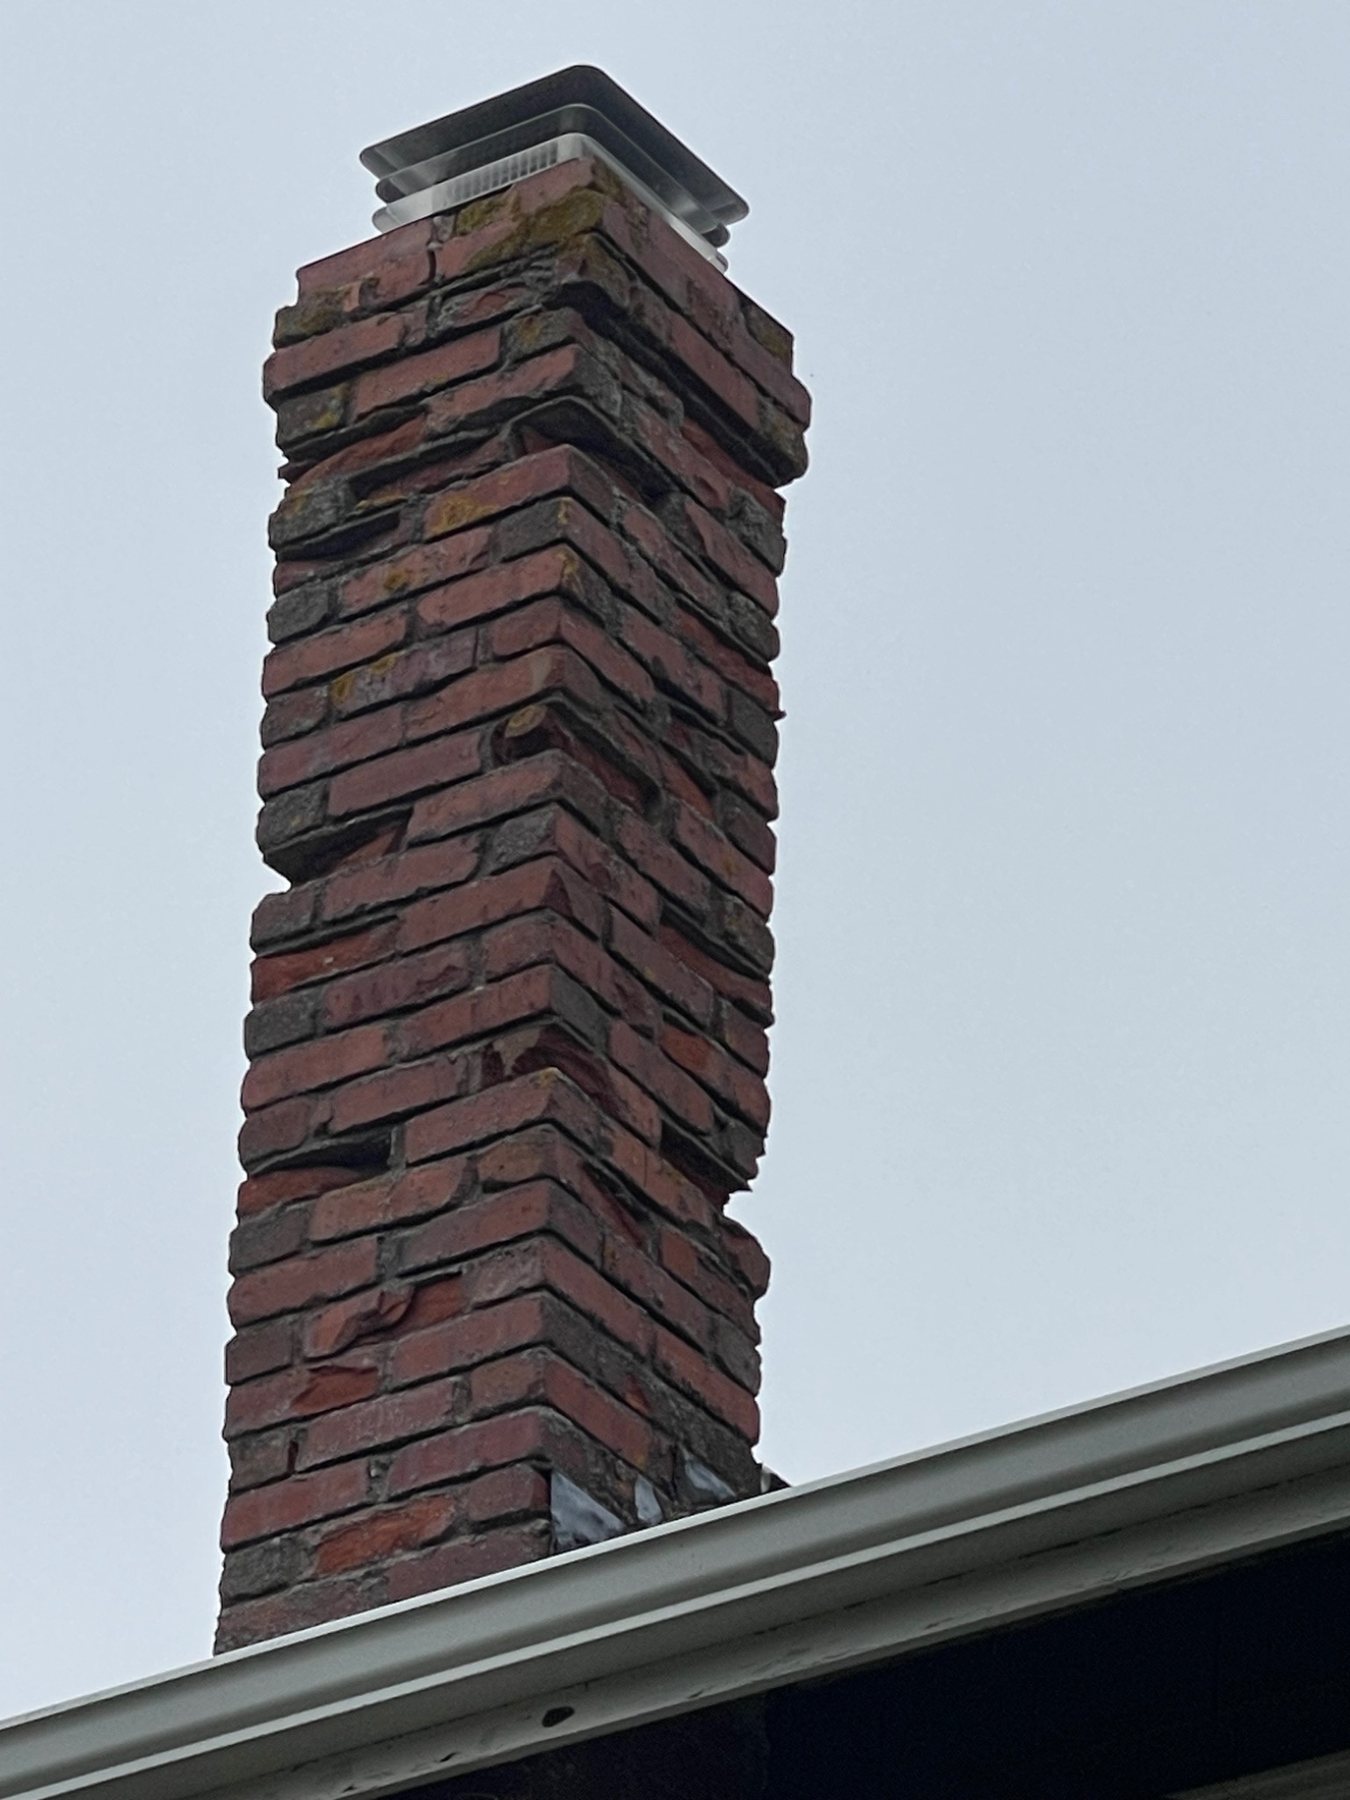
Depth follows condition. Where mortar has deteriorated deeply, the repair has to reach sound material rather than bridge over loose material behind it.
NPS guidance describes hammer-and-chisel removal as the least damaging traditional method for historic masonry and documents the brick-edge damage that uncontrolled grinders can cause.
Mechanical tools can have a place, particularly on appropriate hard mortar, wide horizontal joints or hard stone, but control and operator skill matter. Thin vertical joints and soft brick are especially vulnerable to overcutting.
The homeowner should judge the result, not merely the tool: joints should not become wider, brick arrises should remain intact and vertical head joints should not show grinder cuts extending into the units.
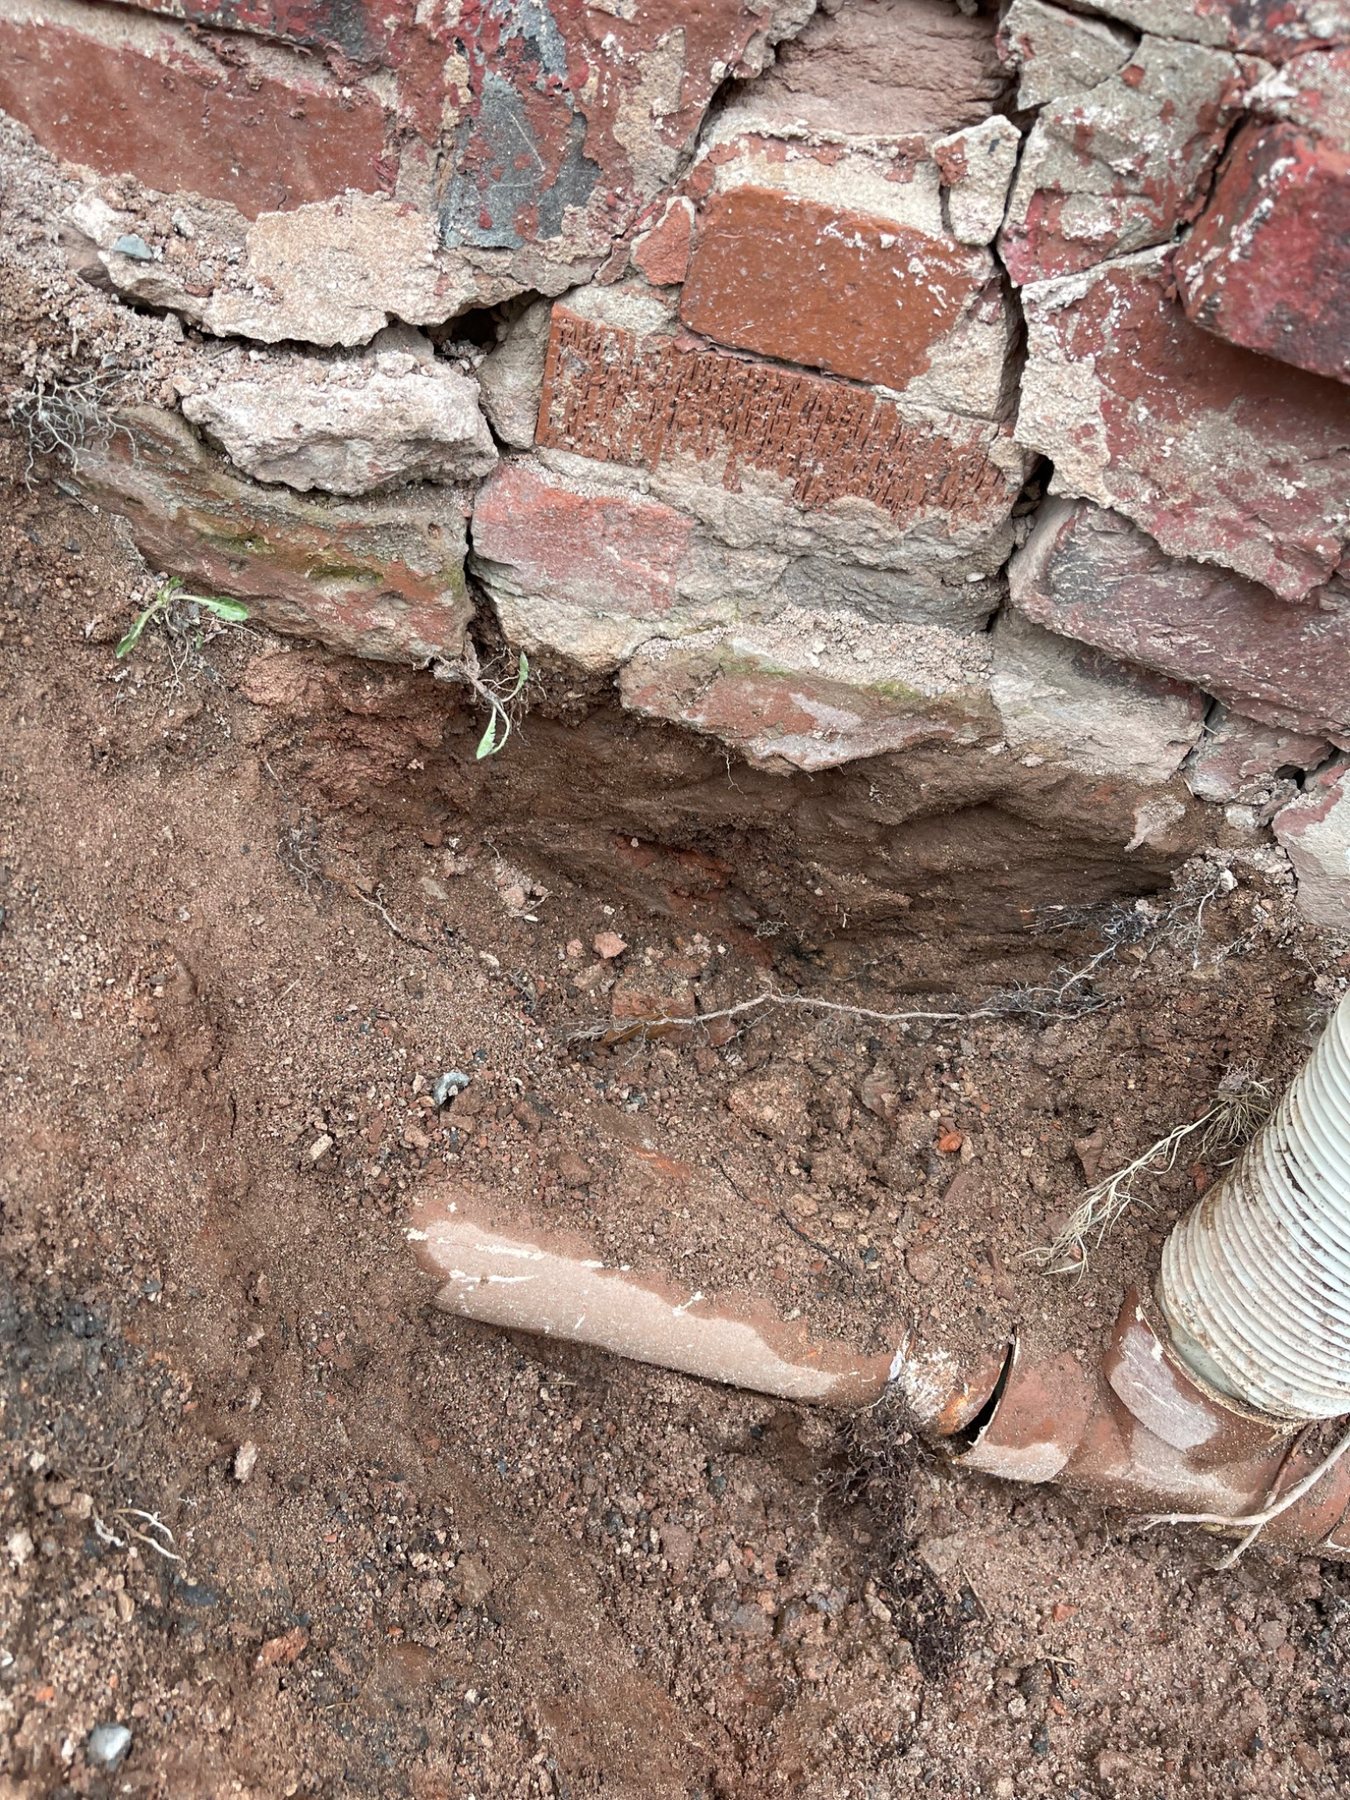
Brick and stone are not prepared identically. Wide stone joints can require much deeper removal and may expose voids or loose hearting that need repair before the face joint is finished.
Dust left by raking or grinding acts like a bond breaker. NPS guidance calls for loose particles and dust to be removed before filling.
Absorptive masonry may also need pre-dampening so brick or stone does not pull moisture out of fresh mortar too quickly. The joint should be damp at the time of filling where appropriate, but not contain standing water.
This step is easy to overlook because it disappears once the joint is filled, but bond quality depends heavily on what happened before the mortar went in.
NPS guidance recommends filling deeper joints progressively, compacting mortar into the back corners and allowing each layer to firm before the next is added. Layering helps control shrinkage while improving compaction.
The joint should be packed completely. Voids behind a neat-looking face leave a weaker repair and can create paths for water.
A thin surface smear is the opposite of repointing: it has little depth, poor mechanical key and often fails as a shallow shell over the original deteriorated joint.
Mortar can be placed into a prepared joint using different tools and techniques. The important issue is not whether a mason uses a grout bag, pointing trowel, hawk or another appropriate method. The important issue is whether the joint is completely filled and properly compacted.
A neat bead of mortar at the face of the wall does not prove that a deep joint has been filled behind it.
Mortar that is too wet simply to make it flow through an applicator can also change the behaviour of the mix. Joint depth, aggregate size, mortar consistency and the existing masonry all affect how the joint should be filled.
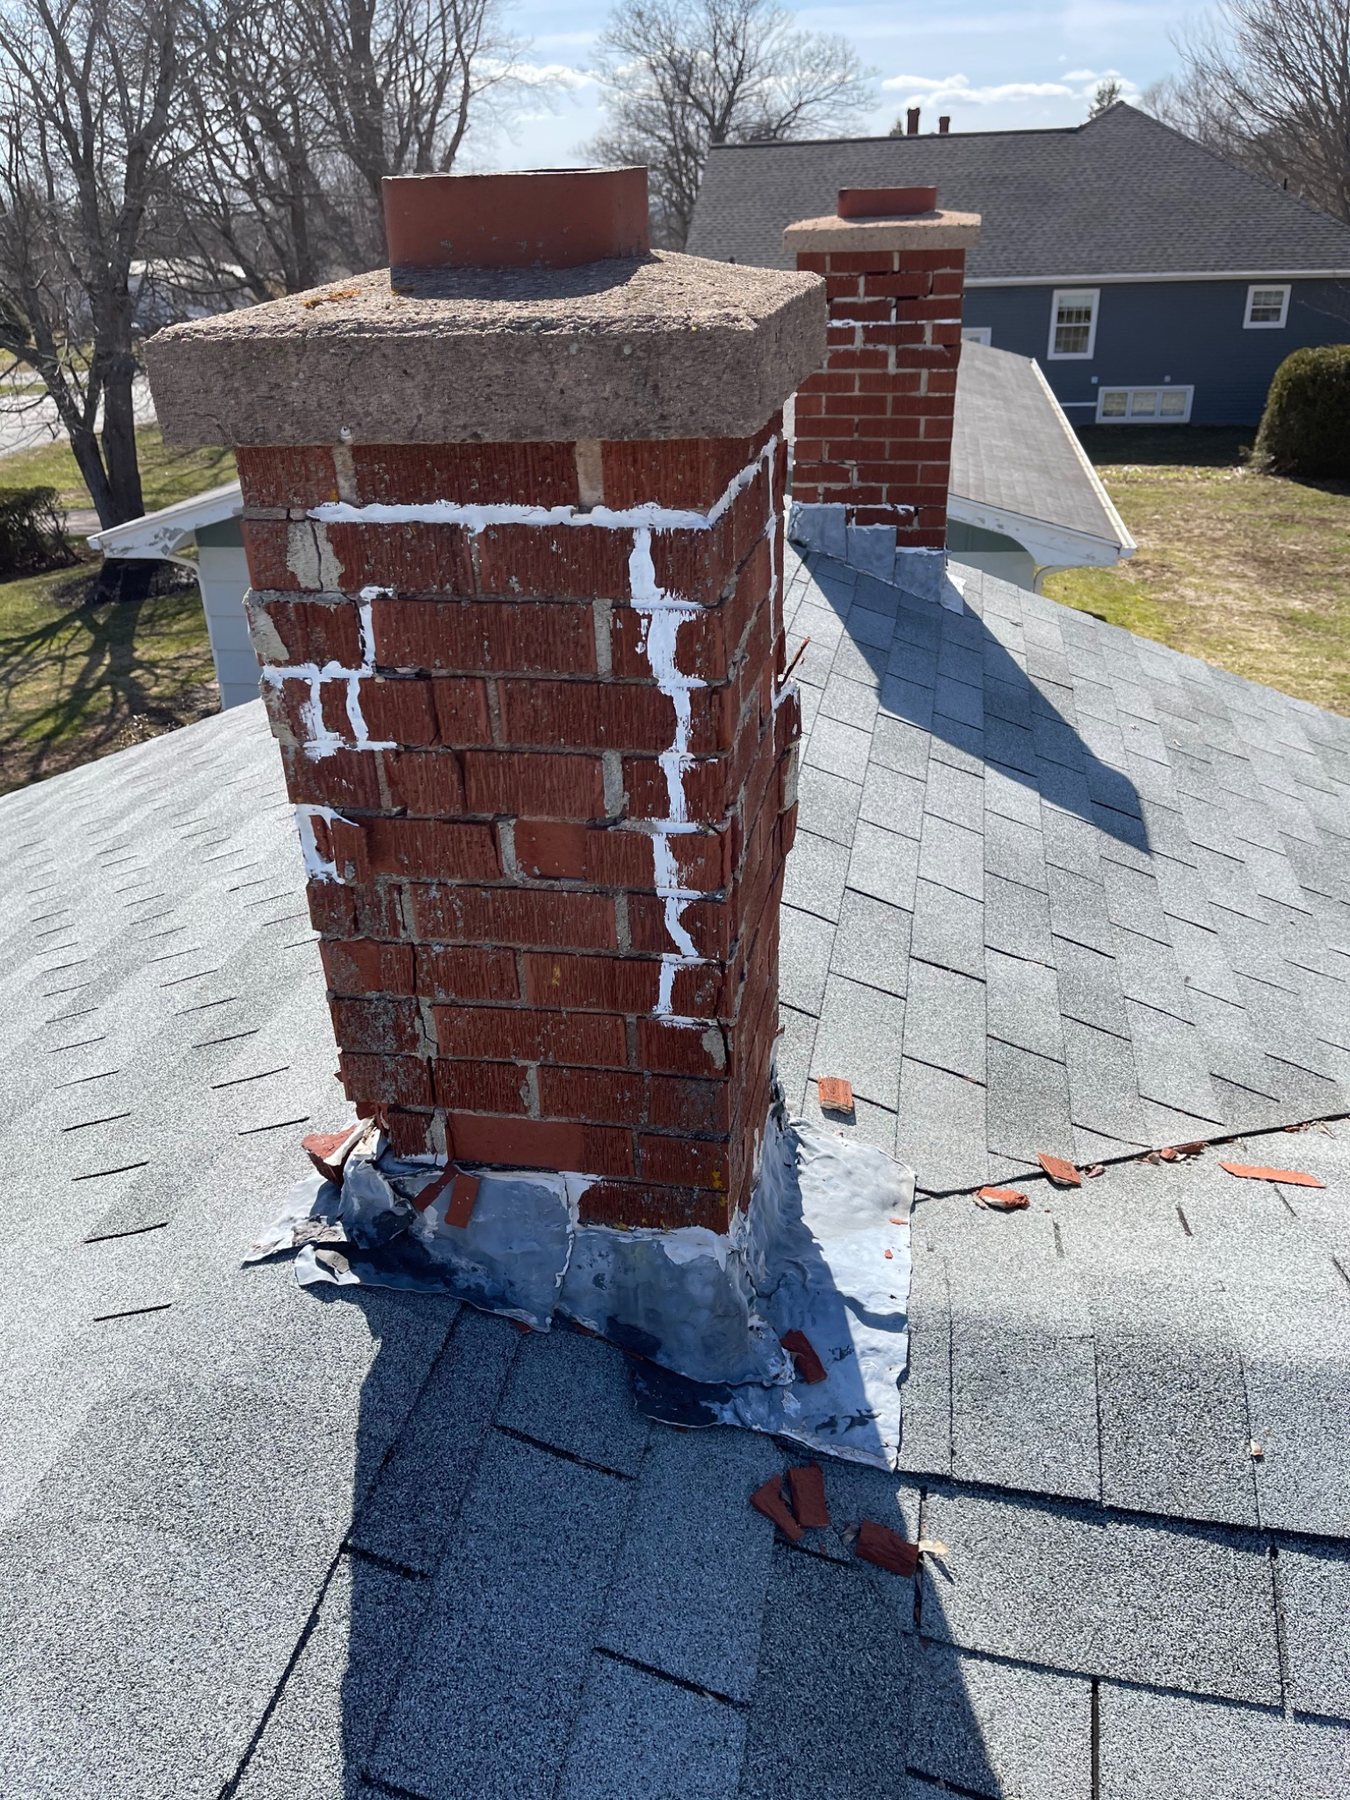
A smooth face does not prove a good joint. The hidden depth, bond and compaction matter as much as the visible finish.
The final layer is tooled when the mortar has firmed to the proper stage. NPS guidance describes tooling at thumbprint hardness and notes that timing affects colour, surface quality and bond at the masonry edges.
On exterior masonry, the joint profile should shed water and remain consistent with the existing or historic work. Flush, concave, weathered, struck, grapevine and other joint profiles do not all behave or look the same.
Smearing mortar over brick faces or creating oversized joints changes the wall visually and can make later cleaning much more aggressive than it should be.
See masonry joint terminology in the glossary →
Consistency matters. Colour, depth and tooling should read as part of the masonry rather than as a patchwork of oversized new joints.
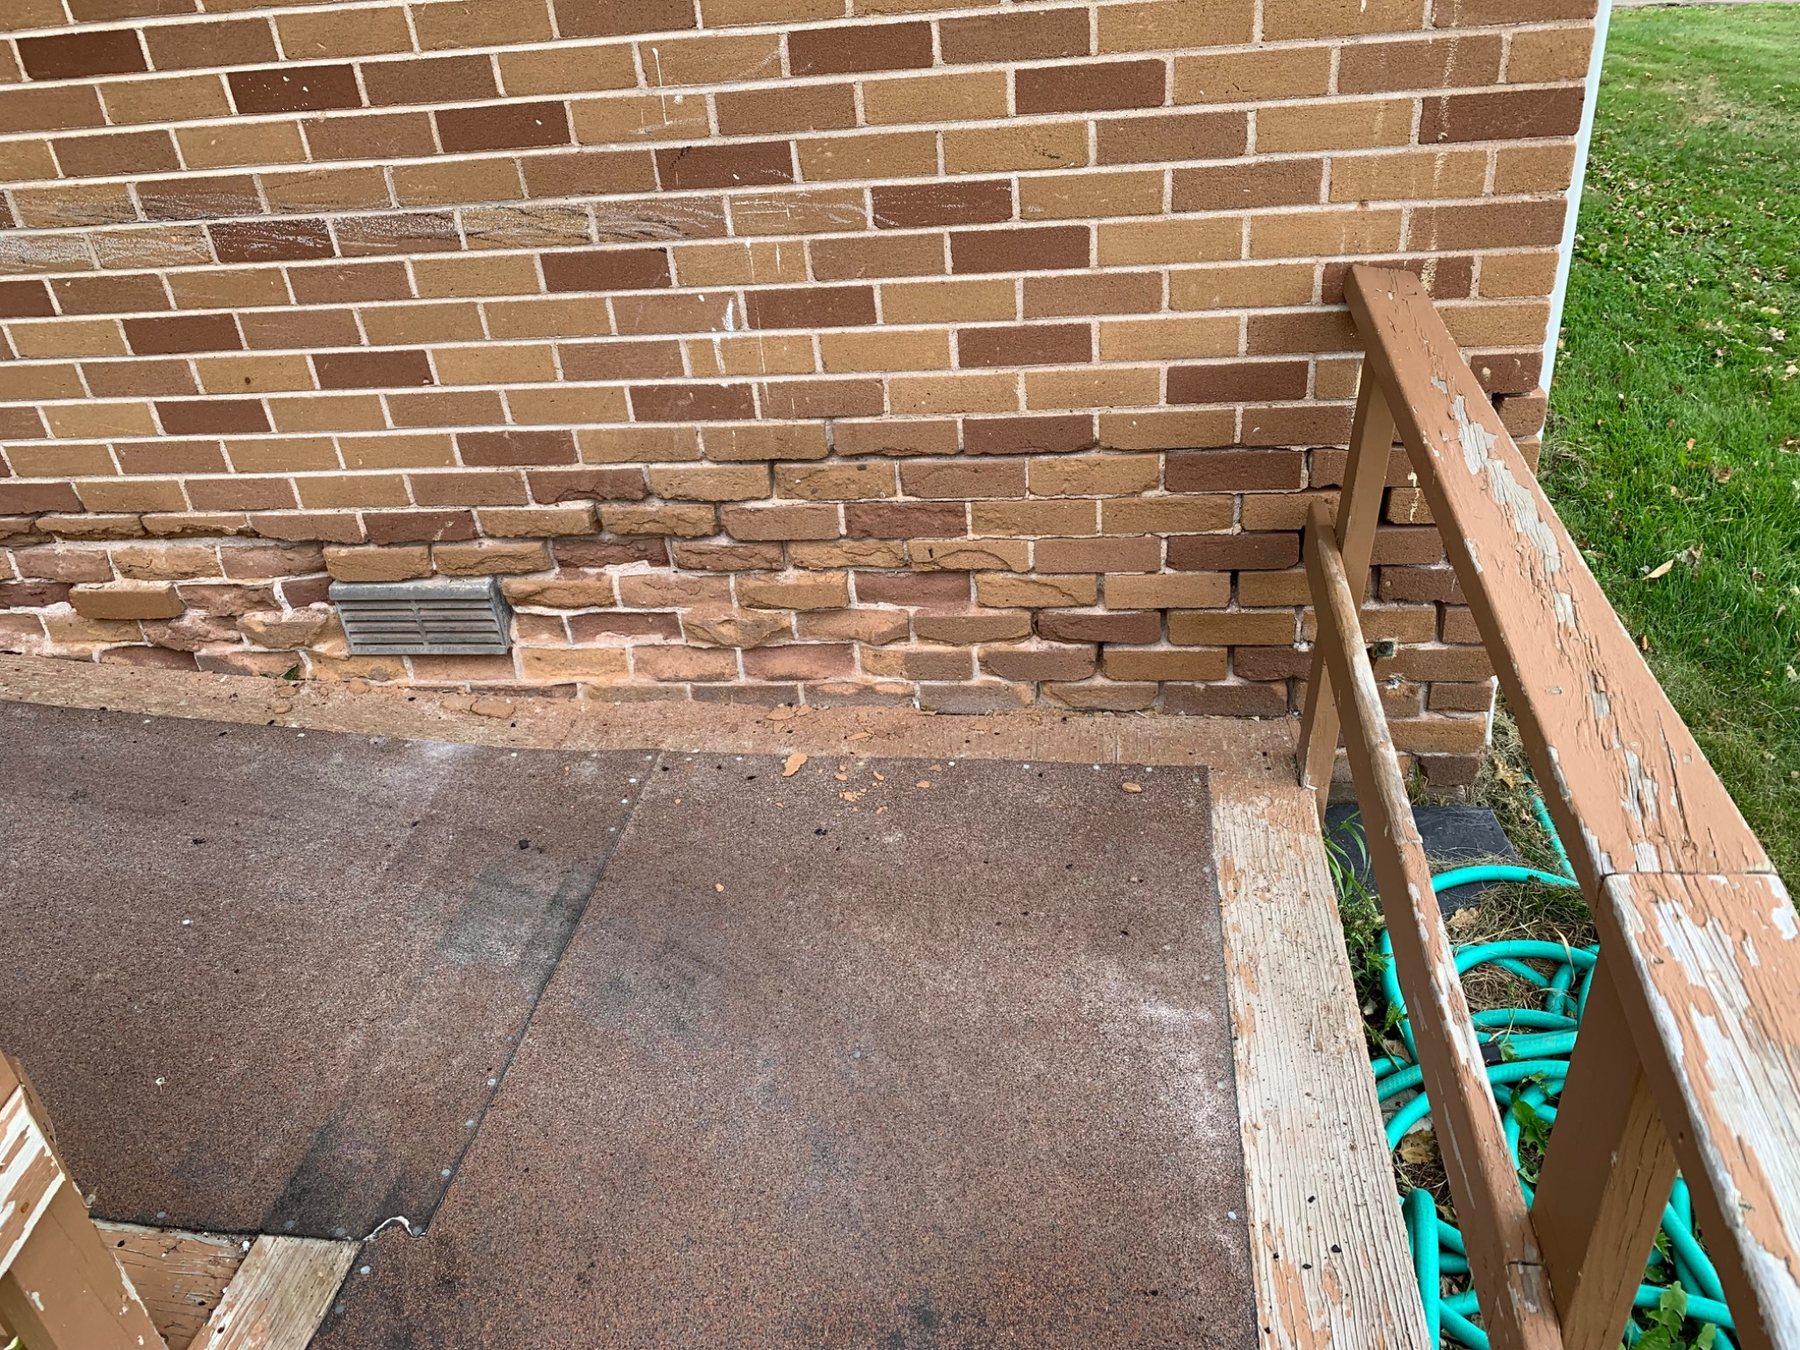
Fresh mortar is vulnerable. Rapid drying, rain and freezing can all interfere with a repair before it has developed proper bond and durability.
Fresh mortar needs appropriate moisture retention and temperature while it cures. High-lime mortars are particularly vulnerable to drying too quickly.
Depending on the mortar and weather, protection can include shade, damp curing, breathable covers and protection from heavy rain or freezing conditions.
This is one reason repointing should be scheduled around weather rather than simply performed whenever the wall is accessible.
Read the seasonal masonry maintenance guide →Applying a thin layer over old mortar instead of removing failed material to adequate depth.
Widening joints, cutting into head joints or damaging the edges of brick and stone.
Choosing a high-strength mix without considering the age, softness and permeability of the masonry.
Pointing around brick or stone that should first be reset or rebuilt.
Packing new mortar against cutting dust and loose debris rather than a clean joint.
Leaving fresh mortar exposed to rapid drying, driving rain or freezing immediately after placement.
NPS guidance recommends test panels that use the same materials, removal methods, joint profile and workmanship proposed for the rest of the project.
A sample lets the owner judge colour, texture, tooling, cleaning and whether the mortar removal method damages the masonry before hundreds of joints are altered.
On heritage work, a mock-up also creates an agreed visual standard that can be referred back to as the project progresses.
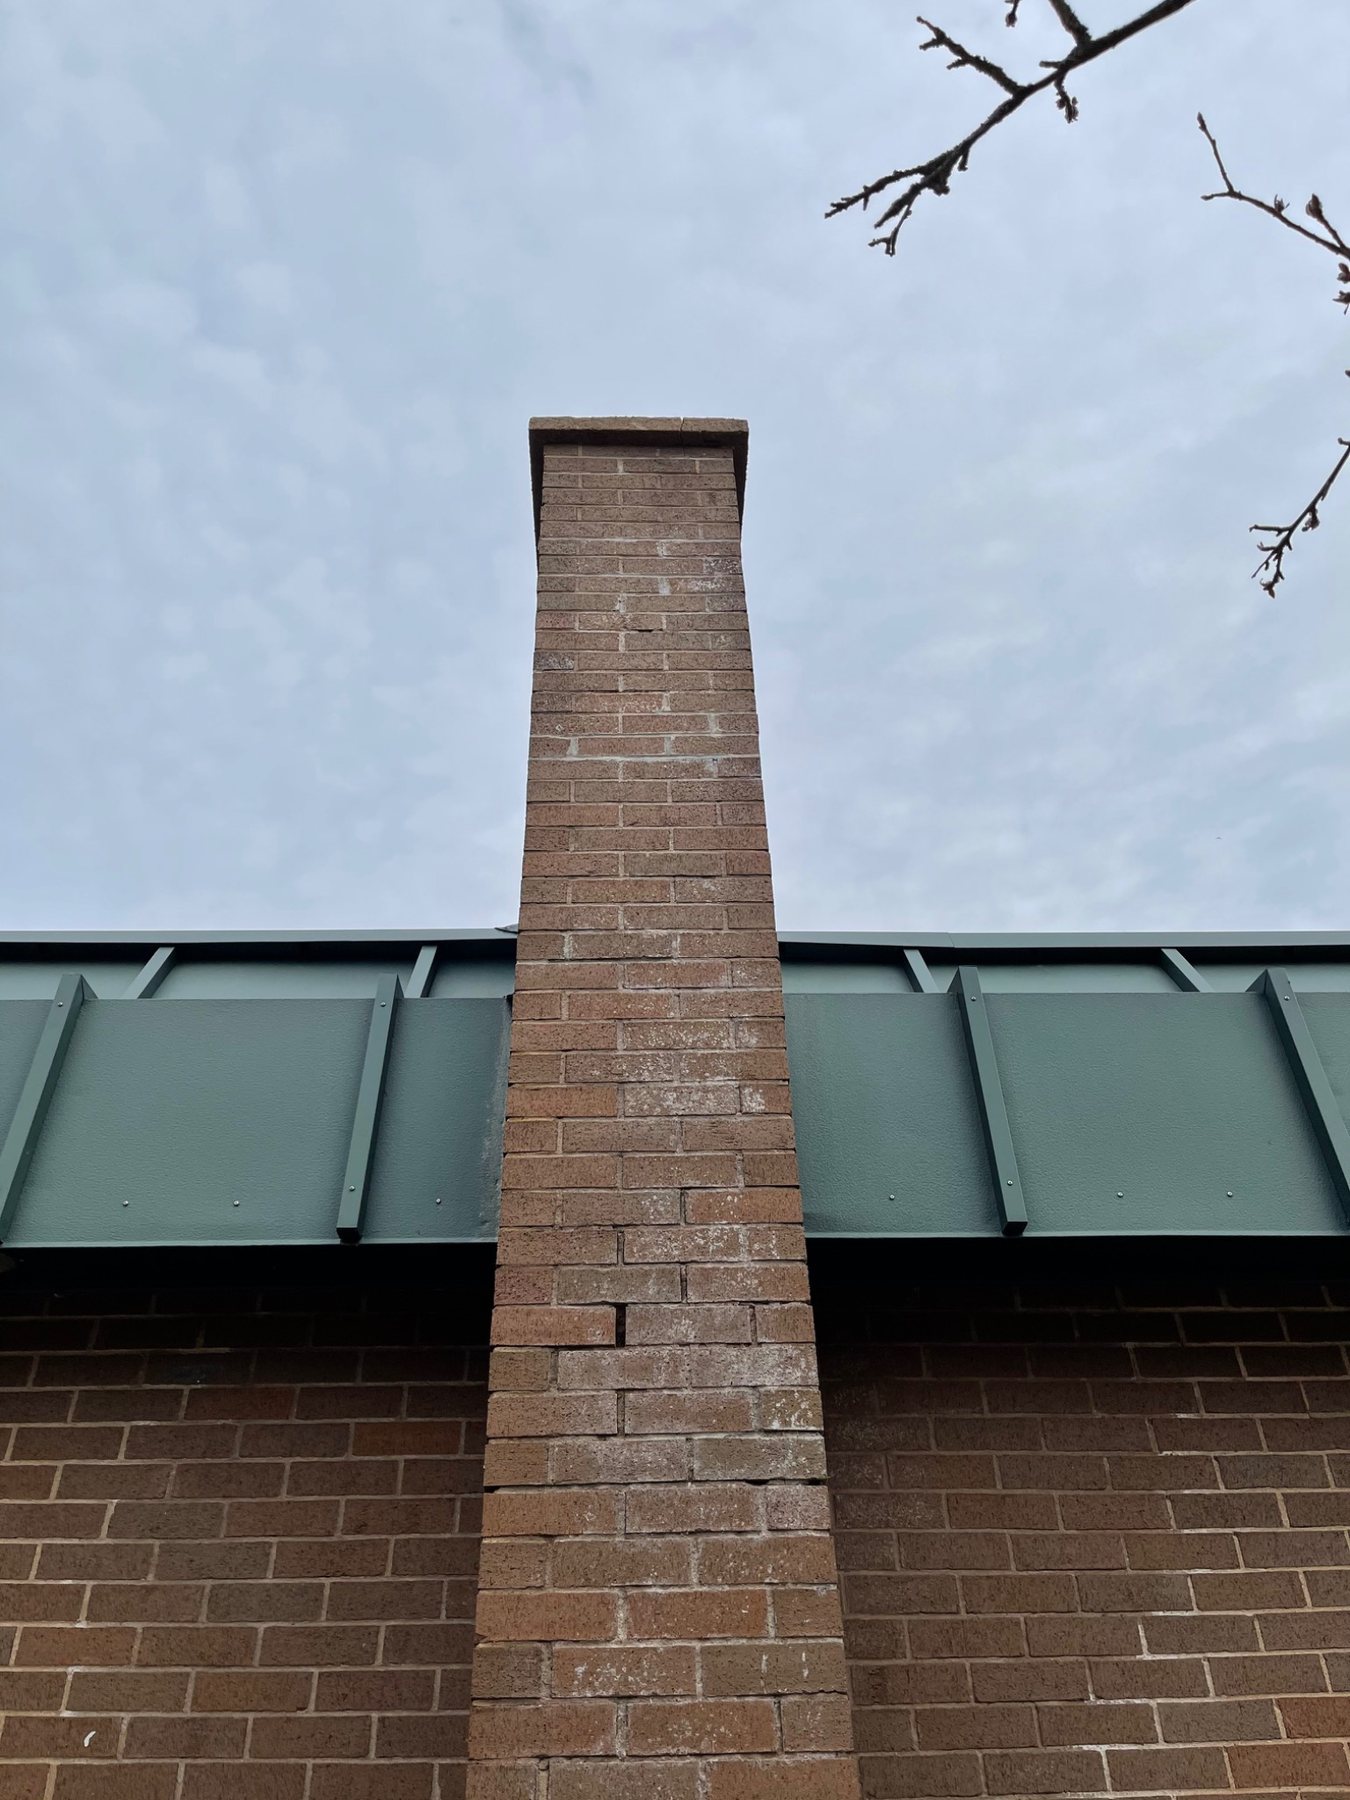
Moisture clues still matter after repointing. Efflorescence, recurring dampness or new cracking can indicate a water source or movement problem that joint repair alone did not address.
Fresh mortar often changes colour as moisture leaves and the binder cures. Slight visual differences from weathered old mortar can soften with time.
What should not appear quickly are widespread shrinkage cracks, hollow edges, mortar falling from joints or immediate recurrence of the same movement crack.
The wall should also remain clean. Extensive acid cleaning or aggressive abrasion after repointing can damage both the new joints and adjacent masonry.
Across Prince Edward Island, Nova Scotia and New Brunswick, exterior masonry can experience wind-driven rain, wet snow, spring saturation and repeated freezing and thawing.
That makes three things especially important: fixing concentrated water before repointing, choosing mortar that remains compatible with the existing masonry, and giving the fresh repair appropriate curing conditions before cold or wet weather.
Older Atlantic Canadian buildings also contain a wide range of brick, local stone and historic mortar types. A one-mix-fits-all repointing approach is not appropriate for that variety.
The goal is to preserve the masonry units. Mortar is the maintainable part of the wall and should not become the element that damages older brick or stone.
Does the contractor explain how the replacement mortar will be matched to the masonry and exposure?
Does the scope explain how defective mortar will be removed without damaging brick or stone?
Is the joint being prepared to adequate depth rather than receiving a shallow cosmetic overlay?
Is the intended tooling or historic joint profile identified?
Does the contractor account for temperature, sun, rain and curing conditions?
On larger or heritage work, is there a way to approve the finish before the entire wall is completed?
National Park Service Preservation Brief 2 provides detailed guidance on diagnosis, mortar matching, test panels, joint preparation, careful removal, dampening, layered placement, tooling and curing of historic masonry joints.
Brick Industry Association's Repointing Brick Masonry brief states that defective mortar should be removed to a depth equal to or greater than twice the joint thickness, and emphasizes cleaning, layering, compaction and careful craftsmanship. BIA Technical Notes 8 and 8B explain mortar properties and reinforce that stronger mortar is not automatically better.
Parks Canada's Standards and Guidelines for the Conservation of Historic Places in Canada provide the broader Canadian conservation principle: evaluate the existing condition, use the gentlest means possible and make repairs physically and visually compatible with historic materials.
NPS Preservation Brief 2: Repointing Mortar Joints →
Brick Industry Association: Repointing Brick Masonry →
Brick Industry Association: Technical Notes 8 & 8B on Mortar →
Dean is a third-generation mason with more than 20 years of hands-on experience working with brick, natural stone, chimneys, foundations, repointing and masonry restoration in Prince Edward Island.
The DinoMac Masonry Knowledge Centre uses PEI field experience to explain masonry conditions that are also common across Atlantic Canada and other cold, wet climates.
Last reviewed: August 28, 2026
It is the removal of deteriorated joint mortar and replacement with new compatible mortar while preserving sound brick or stone.
General conservation guidance calls for roughly two or more times the joint width, plus removal of any deeper loose material.
No. A shallow face coating lacks the depth and preparation needed for durable bond.
Not automatically. The mortar should be compatible with the brick or stone, existing mortar and wall exposure.
No, but uncontrolled power-tool removal can damage masonry. The method must suit the joint, mortar, masonry and skill of the operator.
Shallow preparation, dust, poor compaction, incompatible mortar, bad curing or unresolved movement and moisture can all cause premature failure.
Include the brick or stone type, areas of deep mortar loss, previous repairs, nearby water sources, cracks or movement and the PEI property location. DinoMac can assess whether the masonry needs selective repointing, broader restoration or another repair before the mortar joints are addressed.