1. Whole Building or Elevation
Stand back far enough to show the entire wall, chimney or side of the building. This establishes height, location and access.
A close-up of damaged brick or mortar is useful, but it is rarely enough by itself. For an estimate or first review, a mason also needs to understand where the damage sits on the building, how large it is, what is above and below it, how the area can be accessed and whether water or movement may be involved.
A short, organized set of clear photos can often save several rounds of messages and make an initial estimate much more useful.
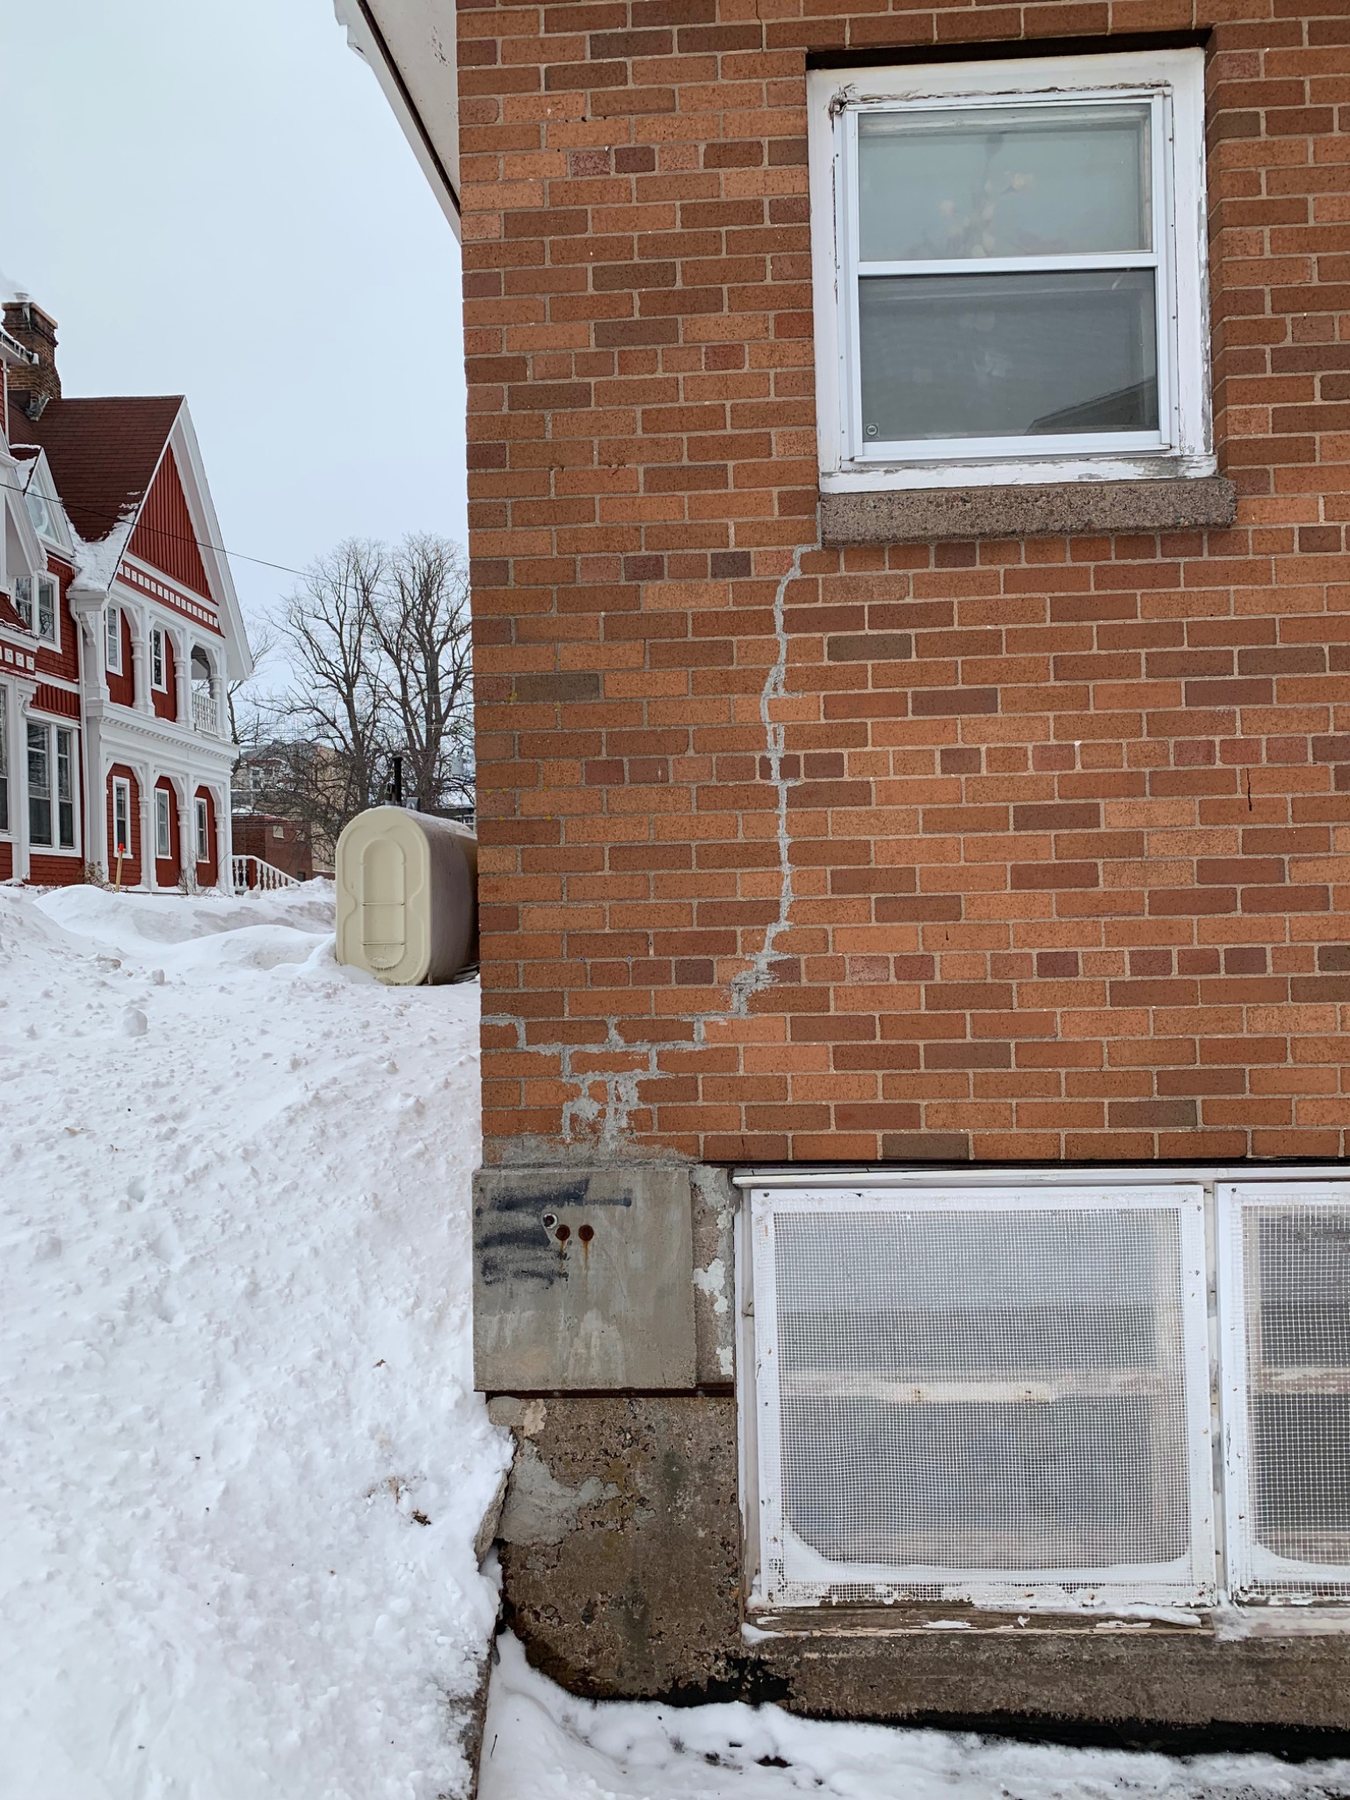
Do not send only this close-up. A useful estimate also needs to see the whole wall, the window above and below the crack, nearby grade or roof details, and enough of the building to understand access.
For most residential masonry inquiries, six to twelve good photos are more useful than thirty close-ups of the same defect.
Stand back far enough to show the entire wall, chimney or side of the building. This establishes height, location and access.
Move closer and show the damaged area with nearby windows, doors, roof edges, corners, grade or other relevant features still visible.
Show the mortar, crack, spalling, loose stone, staining or other defect clearly enough to see surface condition and depth.
Include a tape measure where practical or send approximate width, height, chimney dimensions or number of affected units.
Photograph gutters, downspouts, roof intersections, grade, sills or other conditions that may be directing water toward the masonry.
Show decks, fences, landscaping, roof slope, power lines, narrow side yards or anything else that changes how the repair can be reached.
A contractor pricing a repair needs to understand more than the damaged surface. Height, scaffold location, roof slope, nearby structures, access for materials and the amount of surrounding masonry can all change the scope.
A crack may also make more sense when seen in relation to a window, door, roof line or building corner. A water stain may become obvious when the wide photo shows a downspout immediately above it.
If you are not sure which photo matters most, send the wide one first.
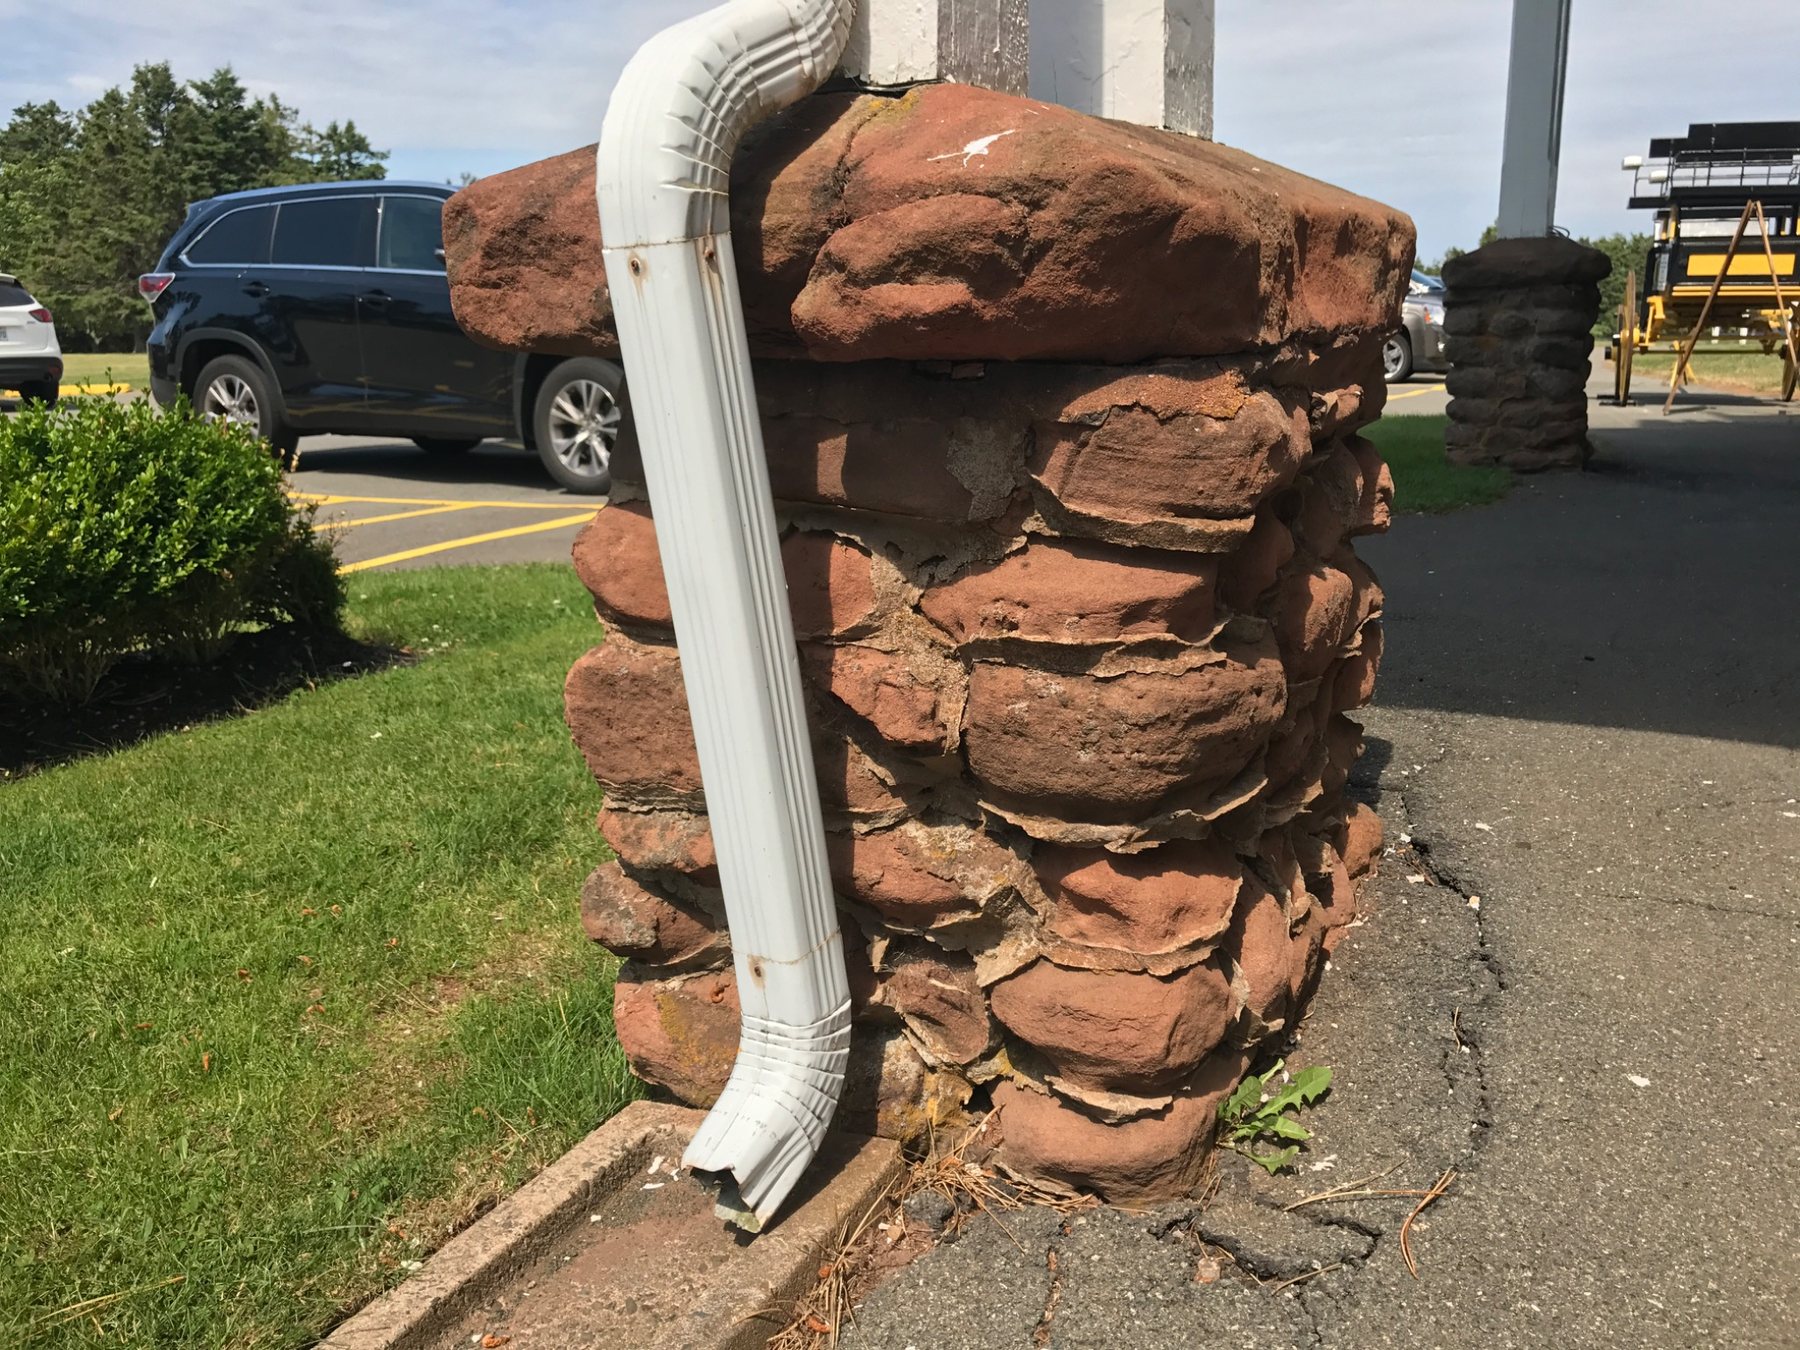
Context changes the question: A close-up might show damp stone or failed mortar. A wider photo can reveal that roof water is being discharged directly beside the same area.
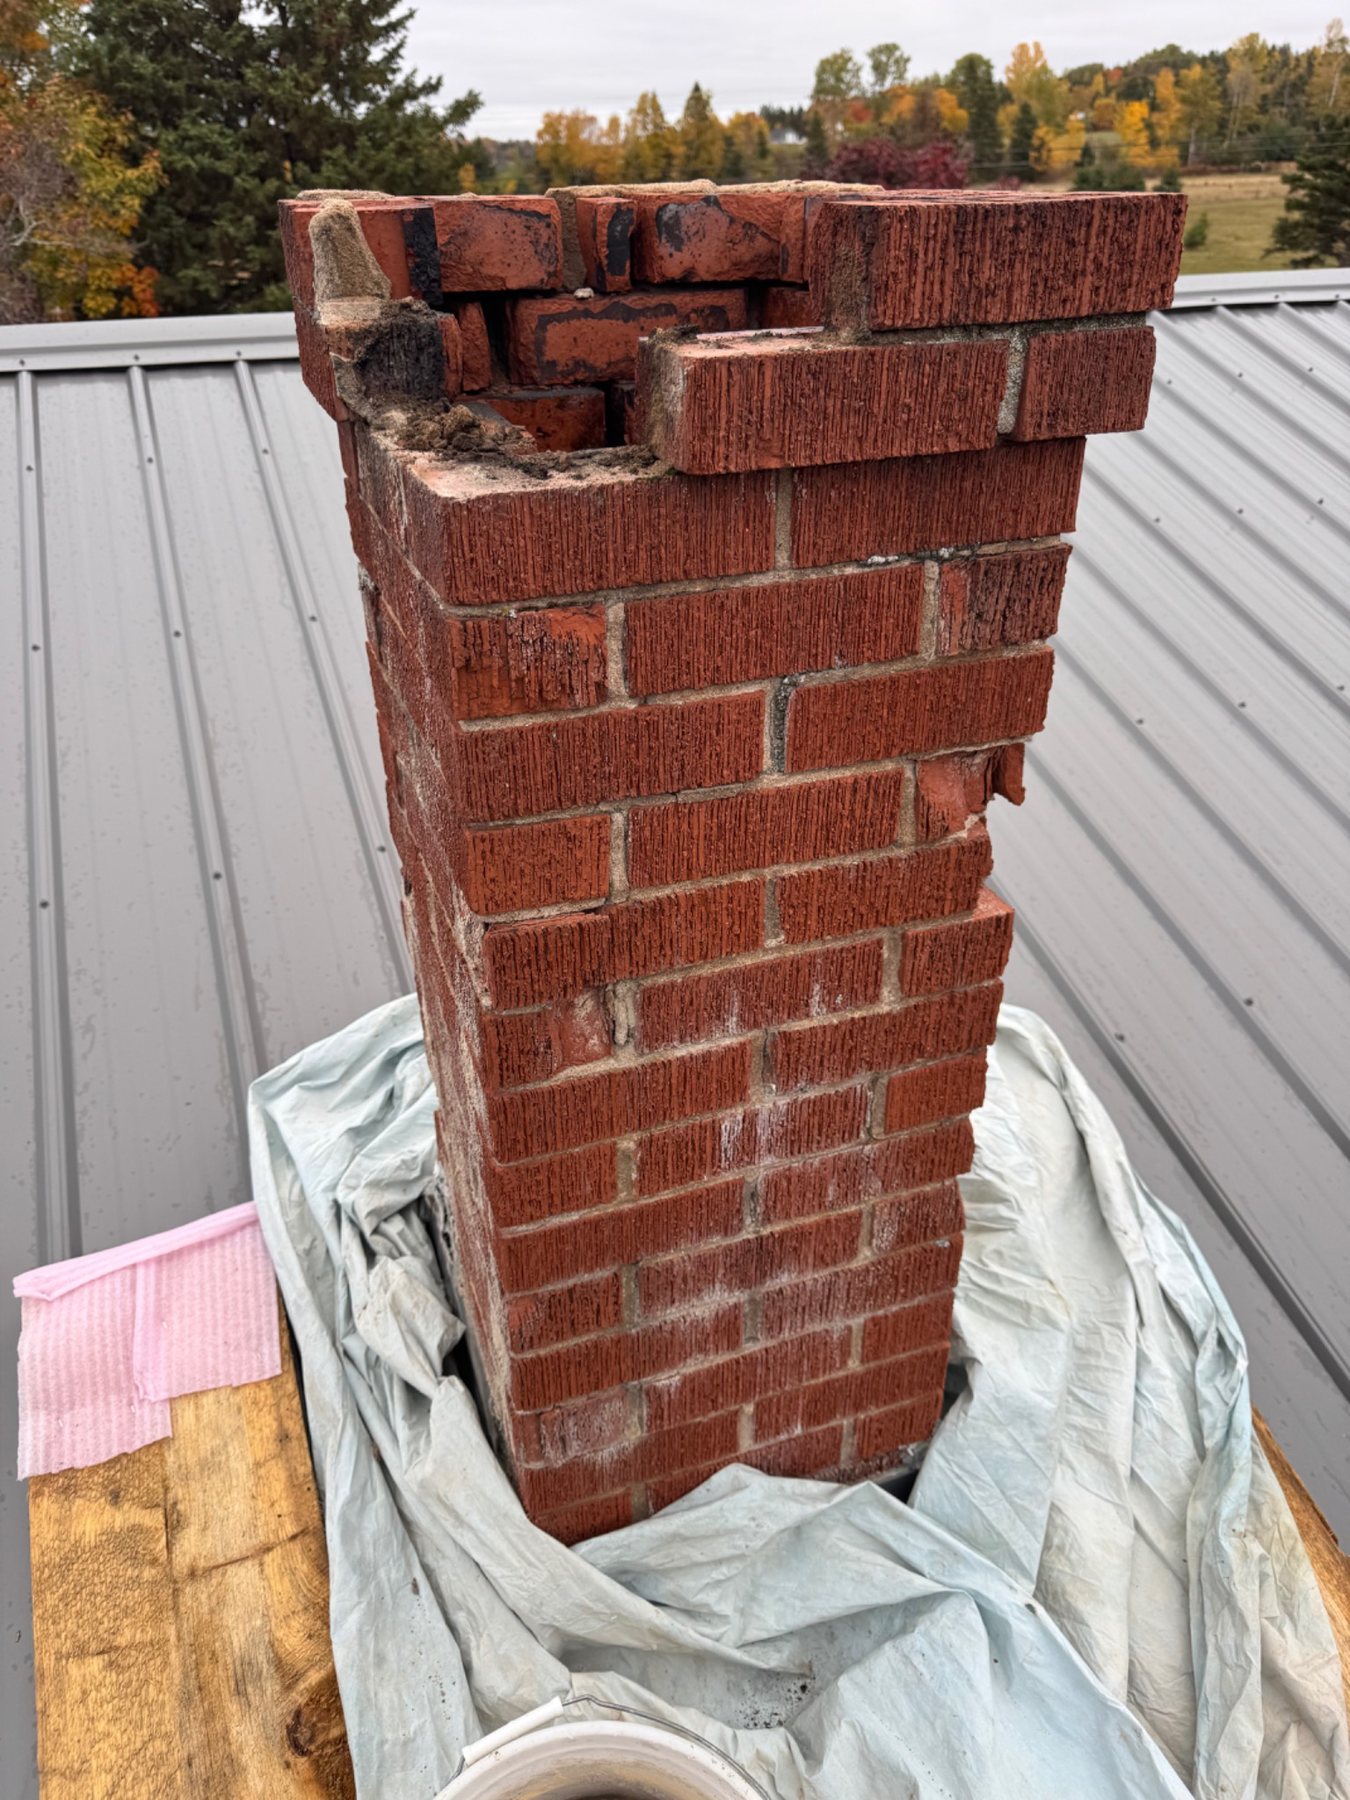
For chimneys: Include the chimney from roofline to top if possible. The repair may involve more than the damaged brick visible in one close-up.
If the inquiry involves flues, fireplace use, leaks or interior chimney condition, include interior photos too. Do not climb onto a roof just to take pictures for an estimate.
Show the full wall, damaged units, nearby openings, crack pattern, mortar joints and any obvious water source.
Show the overall stone pattern, damaged or displaced pieces, joint depth, wall thickness if visible and any matching stone available on site.
Photograph inside and outside where possible, plus grade, downspouts, cracks, bulging areas, dampness and the length of affected wall.
Include oblique close-ups that show joint depth, not only straight-on photos. Also show enough wall to estimate total repair area.
Show the entire staircase, side profiles, settlement, failed joints, railings, landing size and access for demolition or material handling.
Show the full fireplace or wall, hearth, opening, surrounding finishes, ceiling height and any proposed demolition limits.
Photographs distort scale. A wall that looks eight feet high may be twelve. A crack that appears large may only be a few millimetres wide.
For the first review, approximate measurements are usually enough. Include wall width and height, chimney width, number of steps, size of an opening or the approximate length of repointing.
A tape measure in one photo can also provide scale without requiring a long written description.
Scaffolding, ladders, lifts, material handling and demolition access can be a major part of a masonry job. A repair twenty feet above an open driveway is a different job from the same repair above a glass conservatory, steep roof or narrow landscaped side yard.
Include a photo taken from the road or driveway if it helps explain access. Show fences, decks, retaining walls, power lines, neighbouring buildings and any areas where equipment cannot reasonably go.
Good access photos make an estimate more realistic before anyone arrives on site.
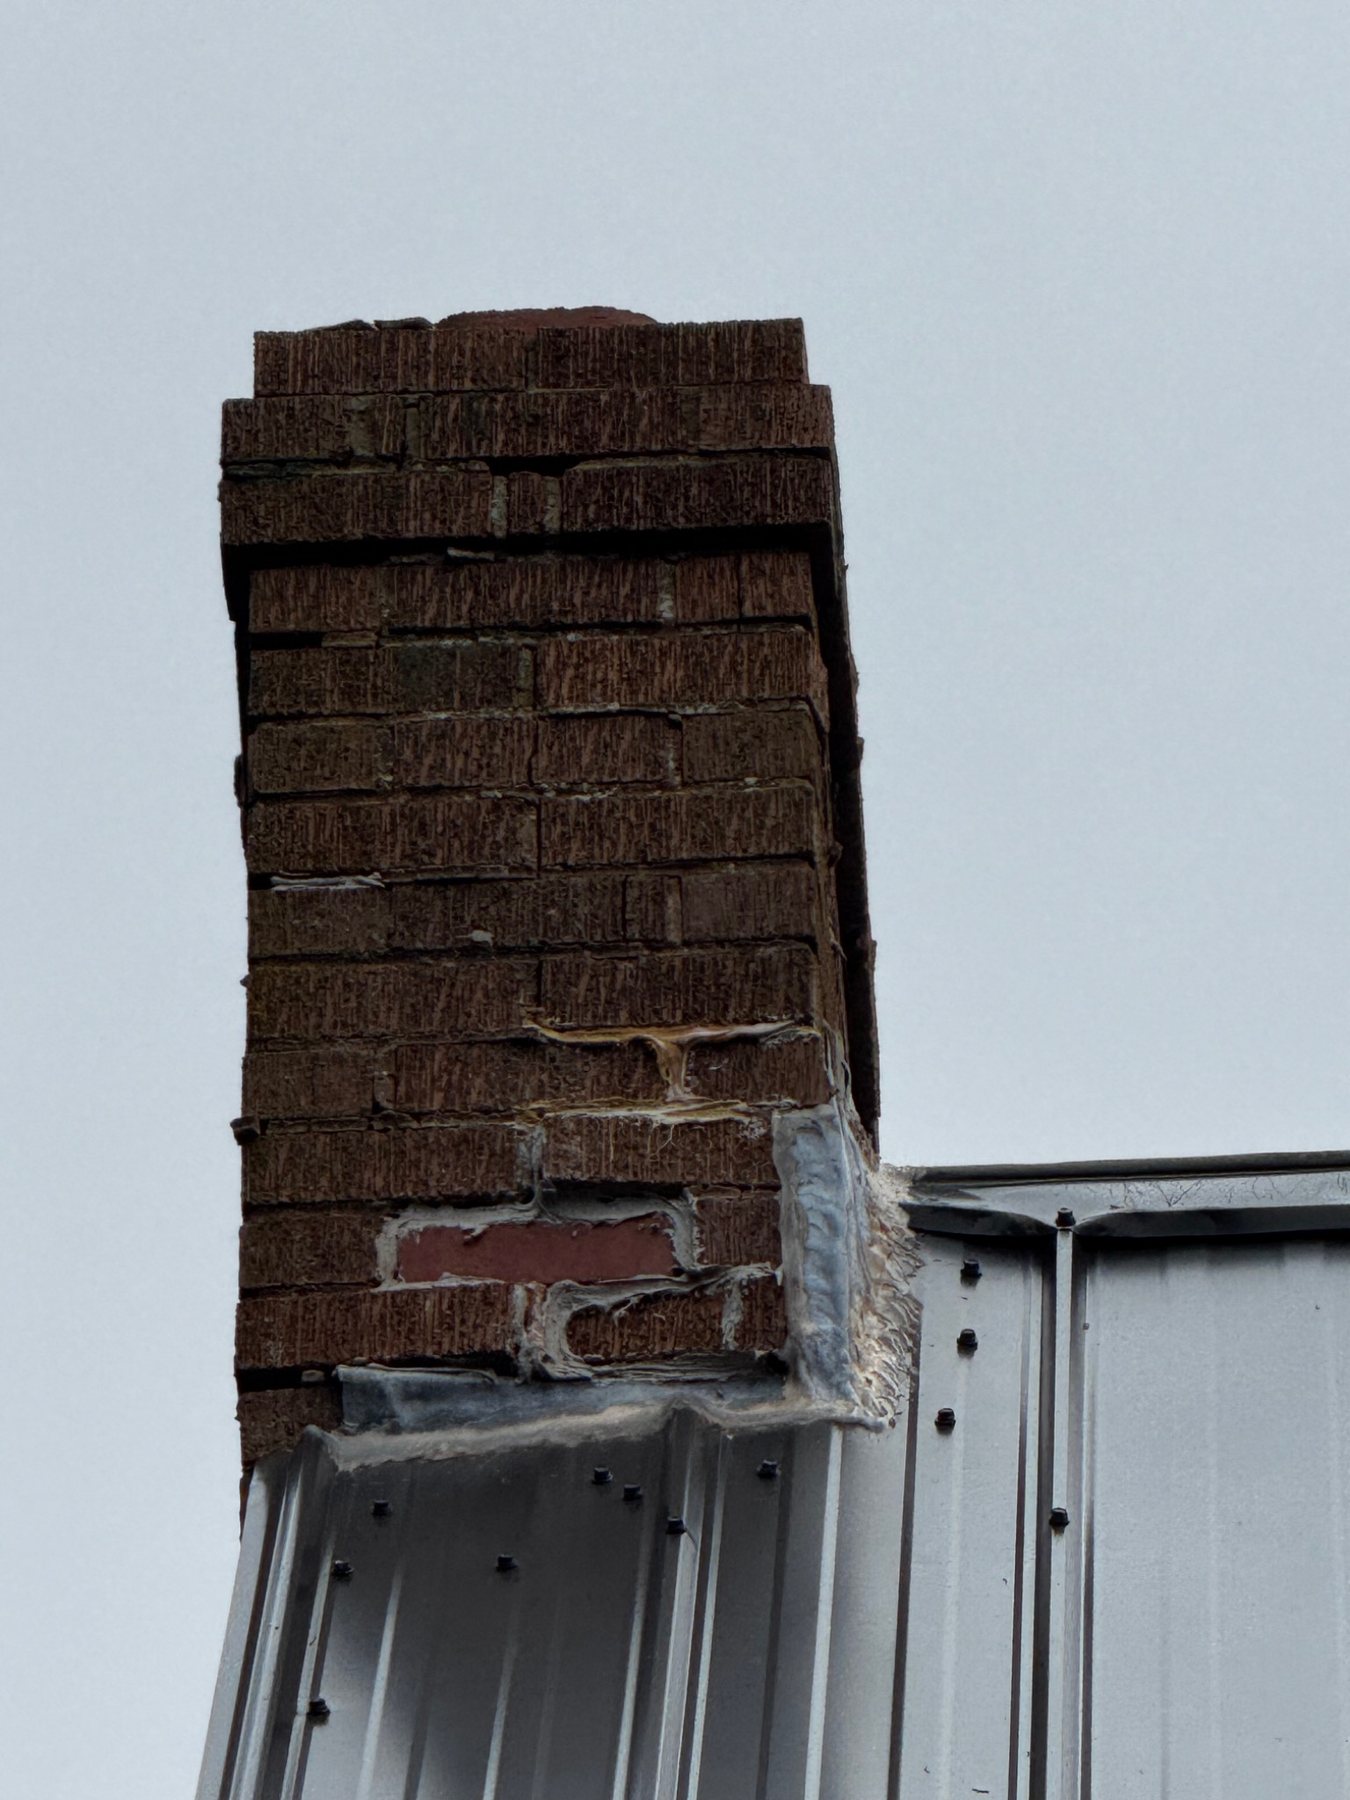
Same repair, different job: Roof pitch, height and surrounding access can change how scaffolding or fall protection must be arranged even when the masonry repair itself is straightforward.
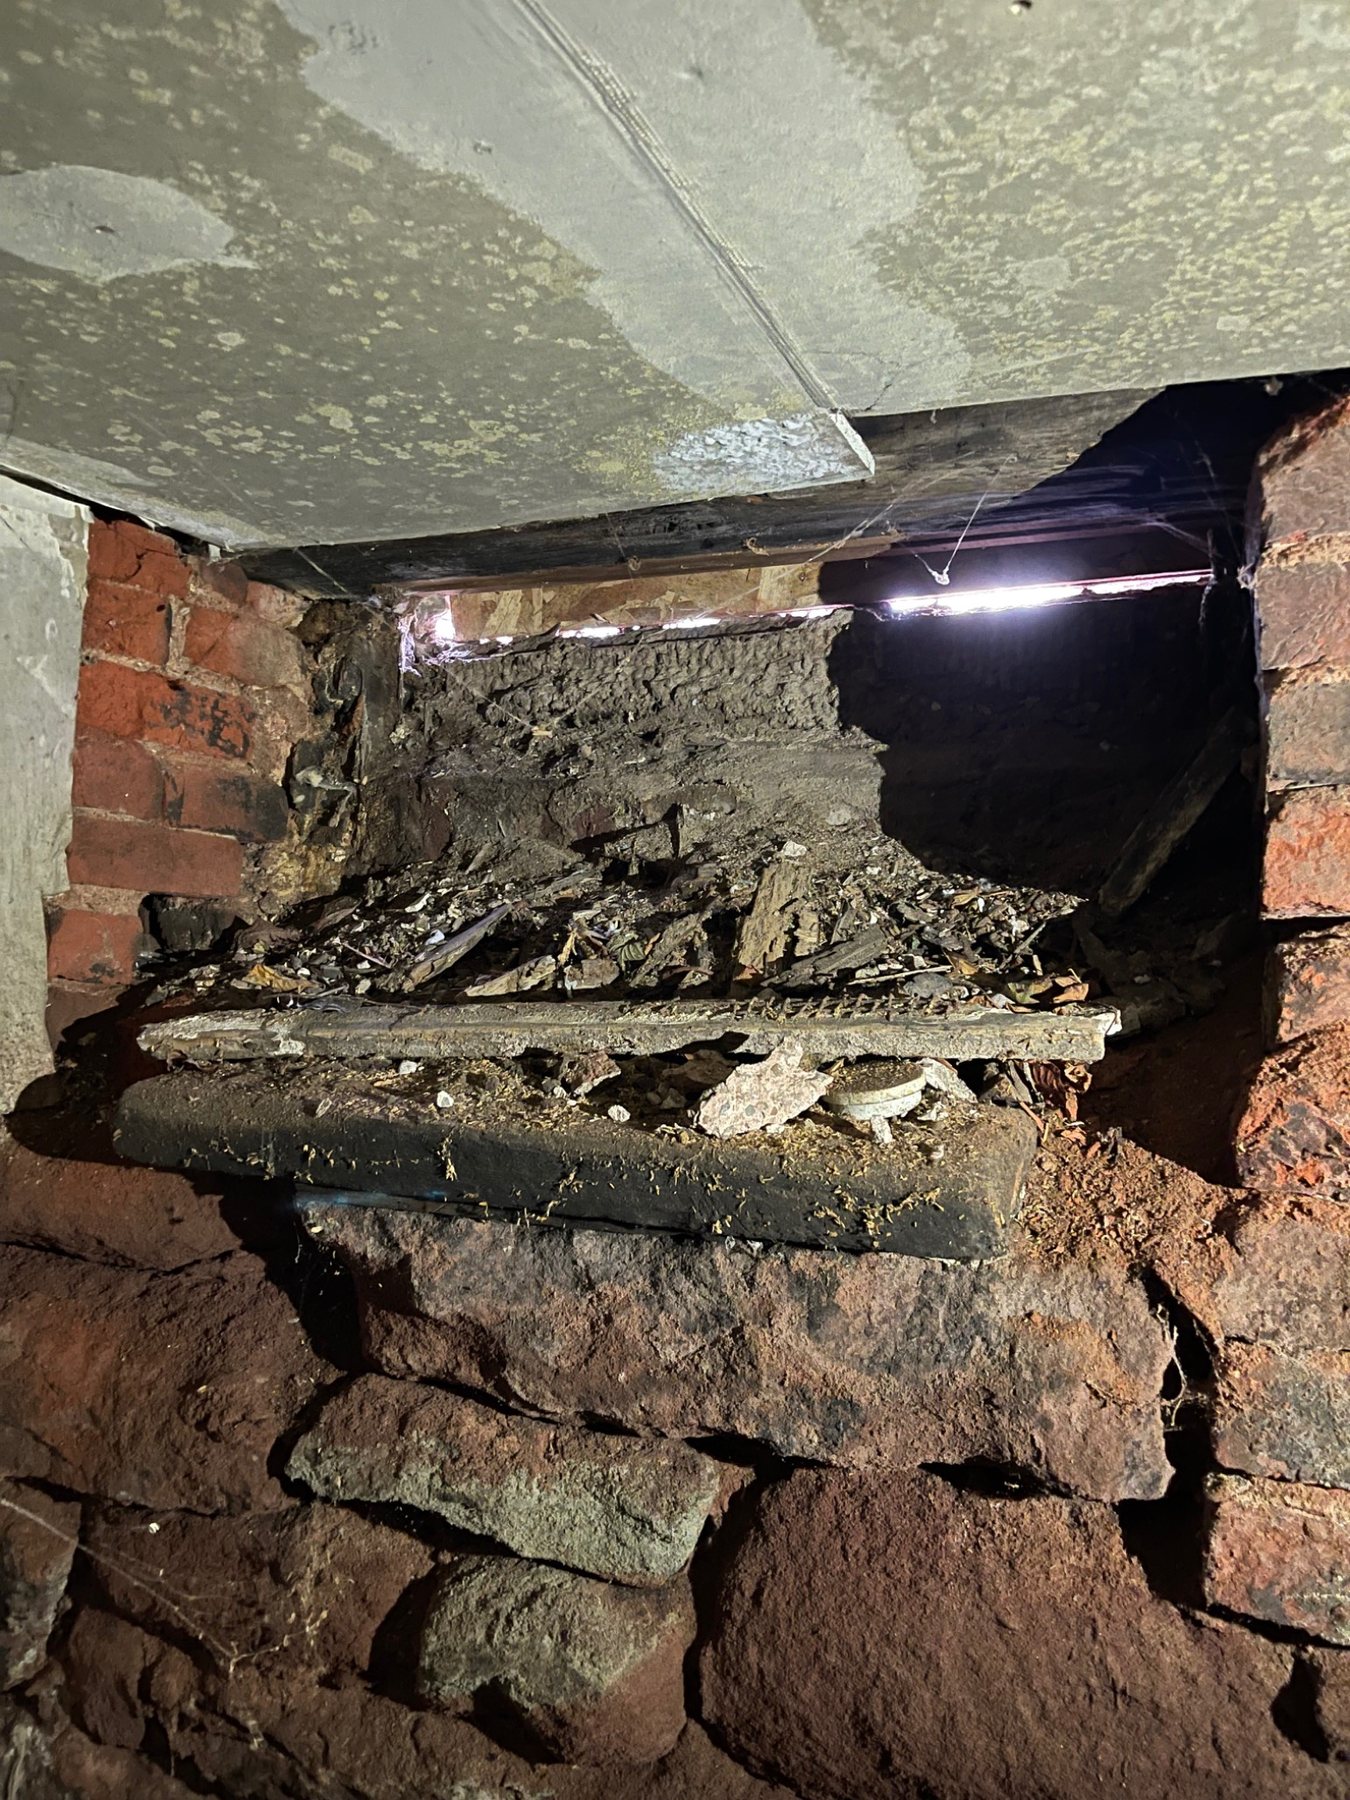
Photos have limits. Internal voids, concealed ties, hidden flashing, foundation depth and wall construction may only become clear after investigation or demolition.
Photographs are excellent for establishing the visible scope, but they cannot always confirm what is behind the surface.
Concealed wall ties, flashing, inner wythes, chimney flues, embedded steel, foundation depth, interior voiding and structural movement may require an in-person inspection or become clear only after work begins.
For that reason, photo-based pricing may be a preliminary estimate, budget range or scope confirmation rather than the final fixed quotation for every job.
The damage is visible, but there is no way to understand where it is on the building or how large the job is.
Flash can flatten texture and hide joint depth. Daylight usually provides a more useful record.
Zoom can remove detail. A wider clear photo plus a separate closer image is usually better.
For chimney work, roof pitch and access can matter almost as much as the masonry condition itself.
Grade, downspouts and splashback are often directly related to foundation and lower-wall deterioration.
Travel, access and service area matter. Include the town or property location when requesting contractor pricing.
You do not need to write a long explanation. A few clear facts are usually enough:
Property location: Town or community
Problem: What you noticed
Approximate size: If known
History: How long it has been visible or whether it changed recently
Goal: Repair, rebuild, repoint, investigate, replace, etc.
If you are unsure what the repair should be, say that. A homeowner does not need to diagnose the masonry before asking for help.
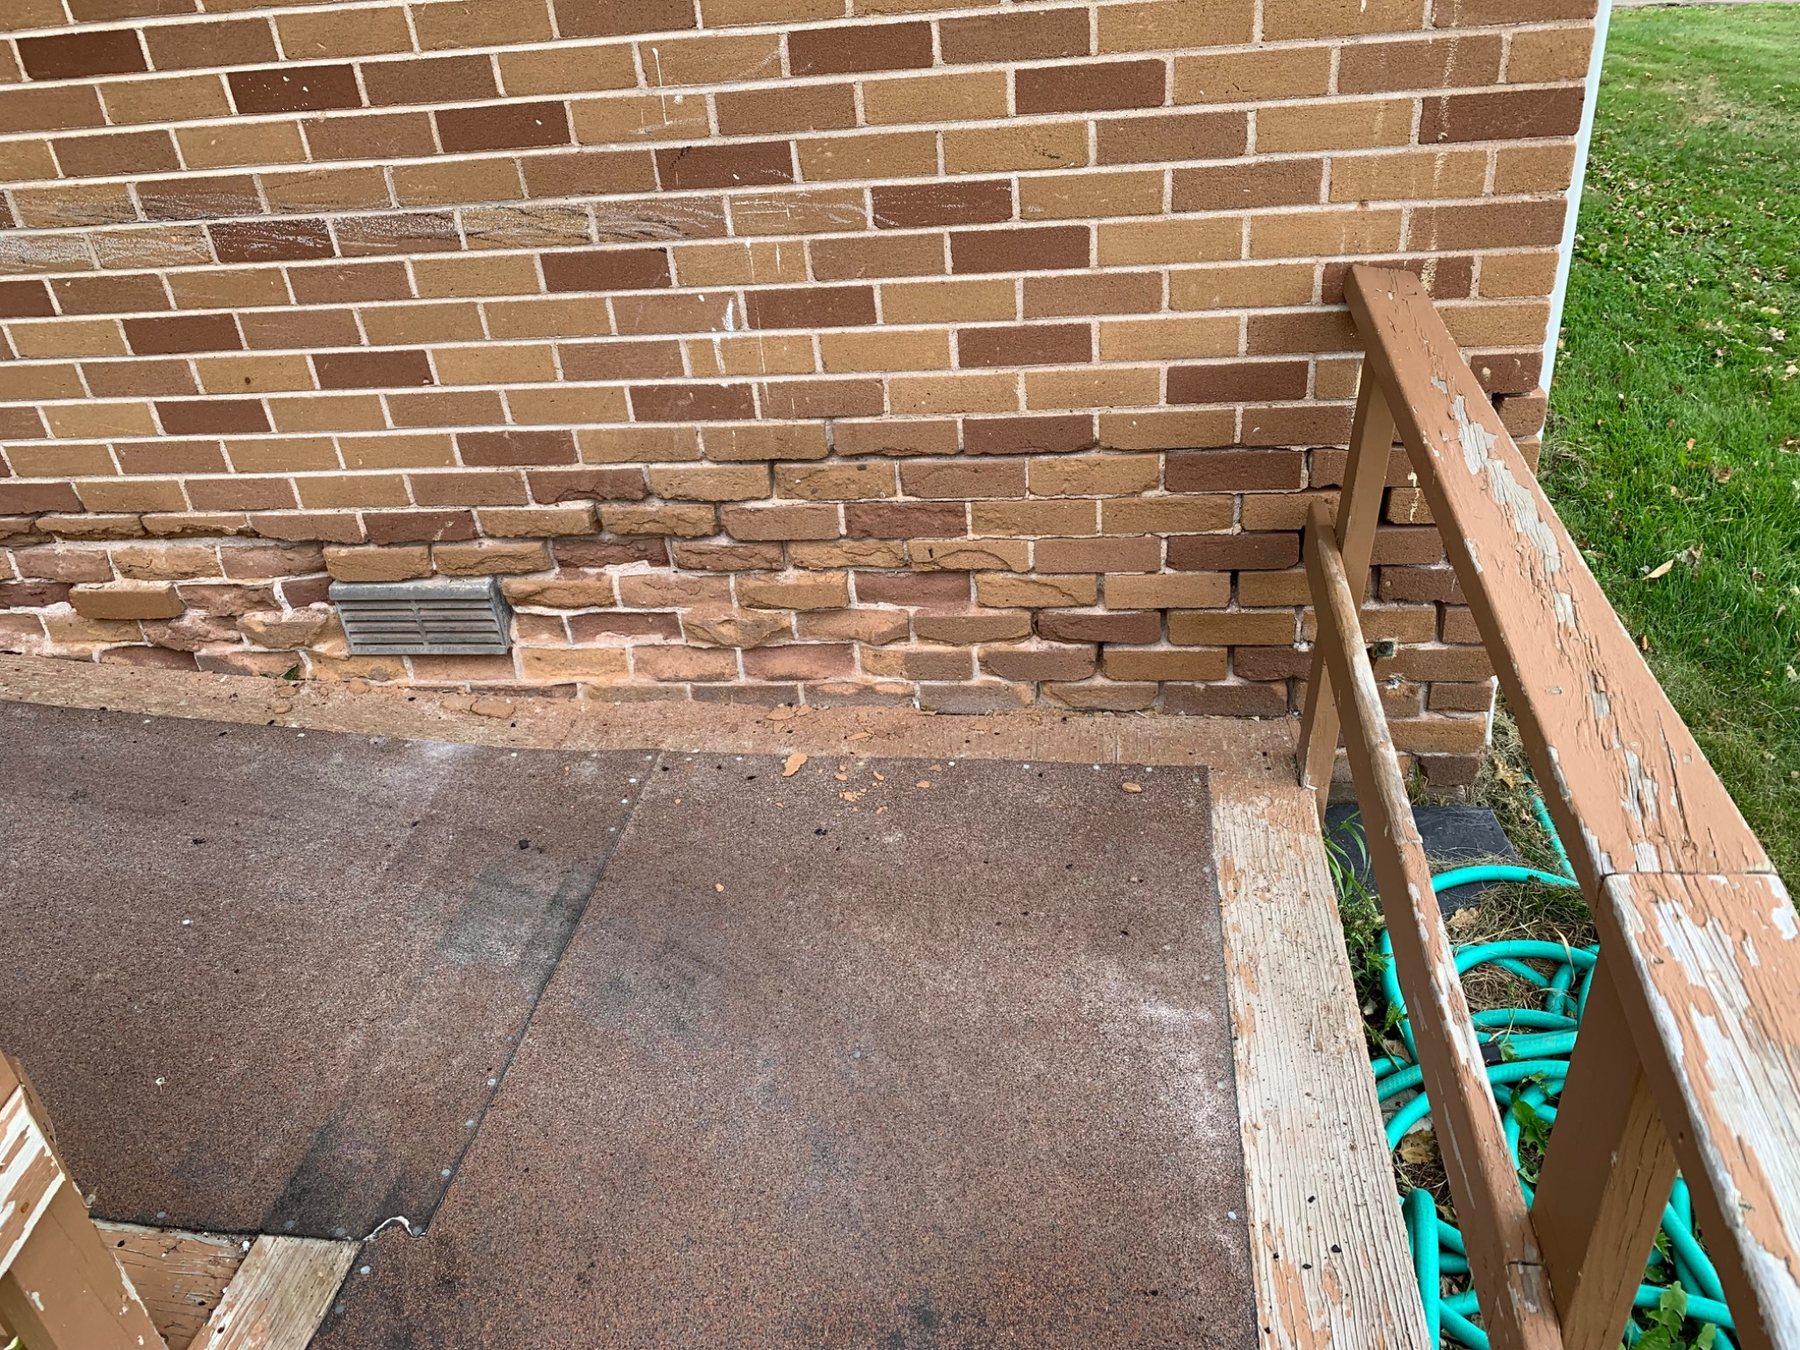
Useful context: “This area is on the north side below the kitchen window. The brick started flaking after last winter and the downspout is about two feet away.” That is much more useful than “How much to fix this?”
In Prince Edward Island, Nova Scotia and New Brunswick, masonry repairs are often connected to freeze-thaw exposure, wind-driven rain, wet shoulder seasons, snowmelt and coastal weather.
A photo showing the entire wall can reveal whether the damage is concentrated on one exposed elevation, below a roof edge, beside a downspout or near grade. That context can be as useful as the close-up itself.
For DinoMac inquiries, include the PEI property location so travel and site logistics can be considered along with the masonry scope.
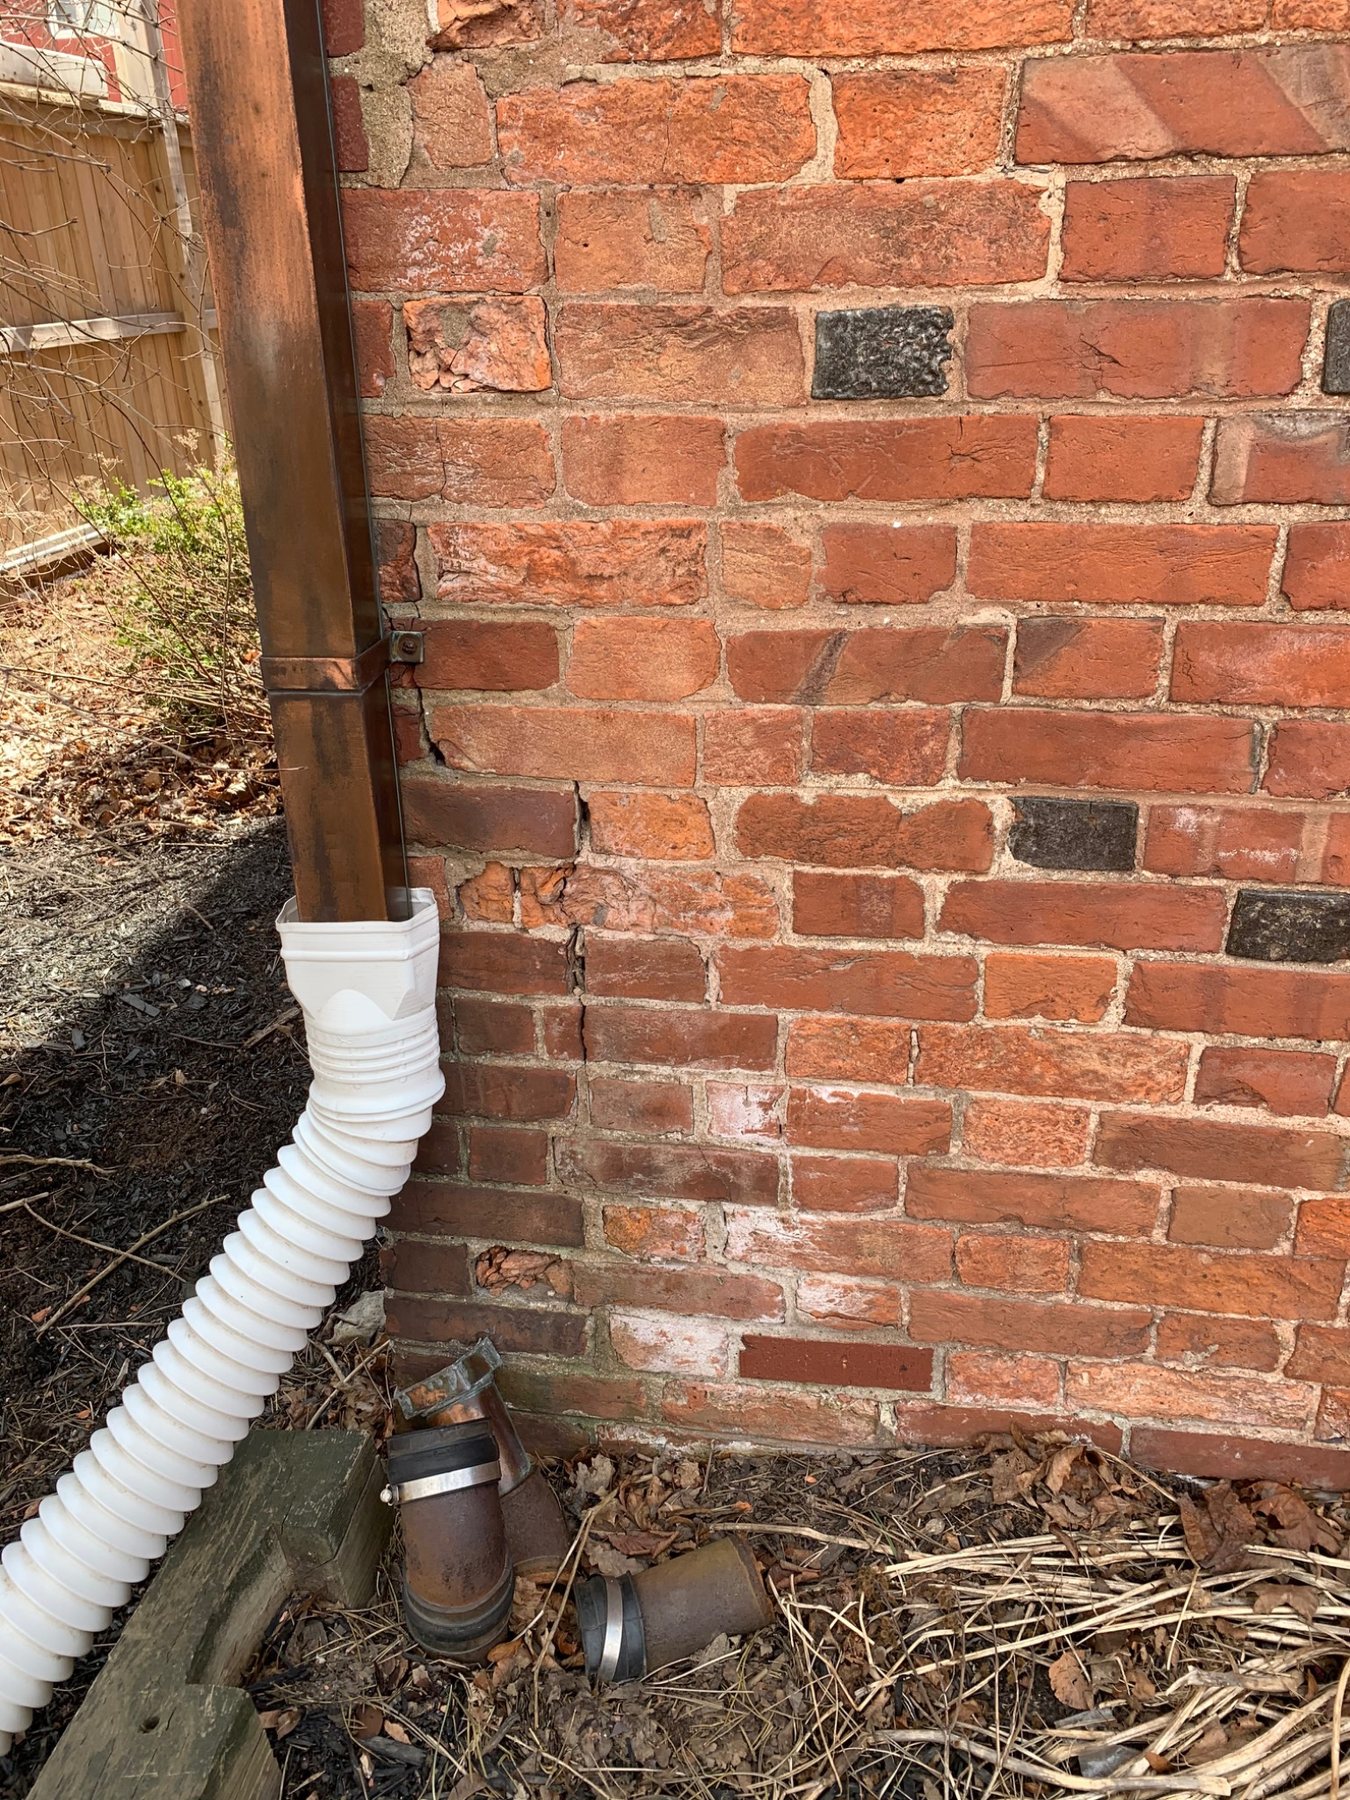
Show the cause as well as the damage. If the defect is beside roof runoff, grade, snow storage or another exposure condition, include it in the same photo set.
A contractor reviewing photos is trying to establish visible condition, quantity, height, access, water exposure, matching requirements and whether hidden conditions are likely to affect the repair.
This guide is intentionally practical rather than technical. Its purpose is to help homeowners send enough useful information for a productive first conversation without expecting them to diagnose the masonry themselves.
Dean is a third-generation mason with more than 20 years of hands-on experience working with brick, natural stone, chimneys, foundations, repointing and masonry restoration in Prince Edward Island.
Last reviewed: August 26, 2026
Usually six to twelve clear photos are enough for the first review if they include wide views, context photos and close-ups.
Take a close-up, but also send wider views. Context is essential for understanding the job.
Not always. Rough dimensions or a tape measure in one photo are often enough for an initial assessment.
Sometimes, but concealed conditions or access may require an in-person inspection before a final quotation.
Include the PEI property location, a short description of what you noticed, approximate dimensions if known, and the clearest wide and close photos you have. There is no need to diagnose the repair first.