Use the Same Route
Walk the building in the same direction each time so no wall, chimney or foundation area is forgotten.
Most homeowners can learn a lot from a careful visual walkaround. You do not need to diagnose the repair. You need to notice what has changed, where water is going, whether masonry is becoming loose or displaced, and which areas deserve a closer professional look.
This checklist is designed for brick, stone, chimneys, foundations and other exterior masonry. It works best when you take photos and compare the same locations over time.
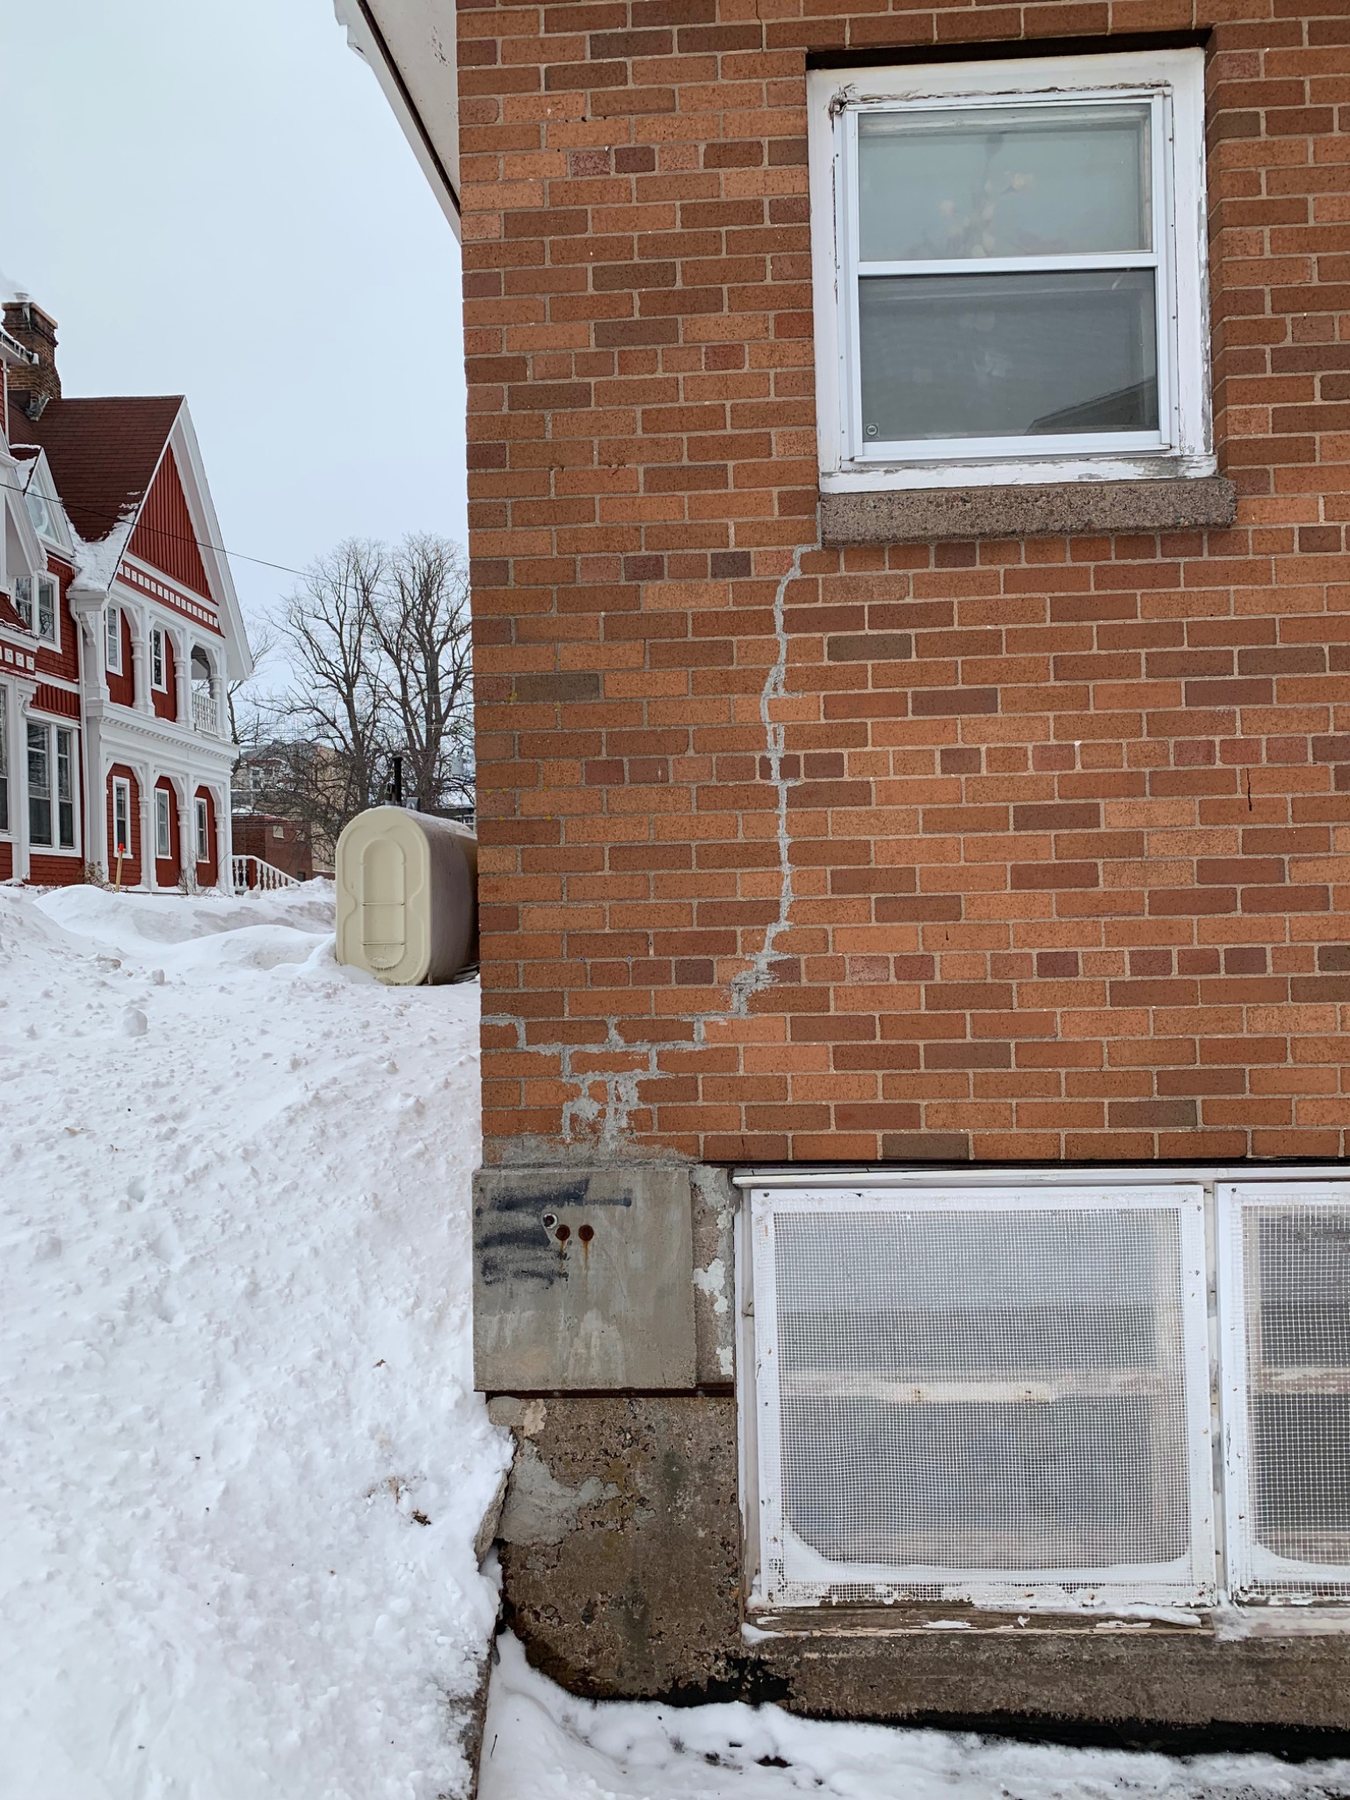
Inspection principle: Do not photograph only the crack. Include the window, wall area and surrounding masonry. The pattern around the defect often tells more than the close-up alone.
A five-minute photo record can become much more valuable a year later when you are trying to decide whether something has actually moved.
Walk the building in the same direction each time so no wall, chimney or foundation area is forgotten.
A close-up records the damage. A wide photo records the context and the nearby water, support or movement conditions.
Keep the inspection in one phone album or folder. Seasonal comparison is much easier when the photos are dated and organized.
Dry masonry makes staining, salt deposits, cracks and colour differences easier to compare accurately.
Strong wind, heavy rain, rapid snowmelt and freeze-thaw swings can reveal problems that are less obvious during stable weather.
Use binoculars or zoom photos for high masonry. Roofs, ladders and unstable masonry introduce safety risks beyond the purpose of a homeowner walkaround.
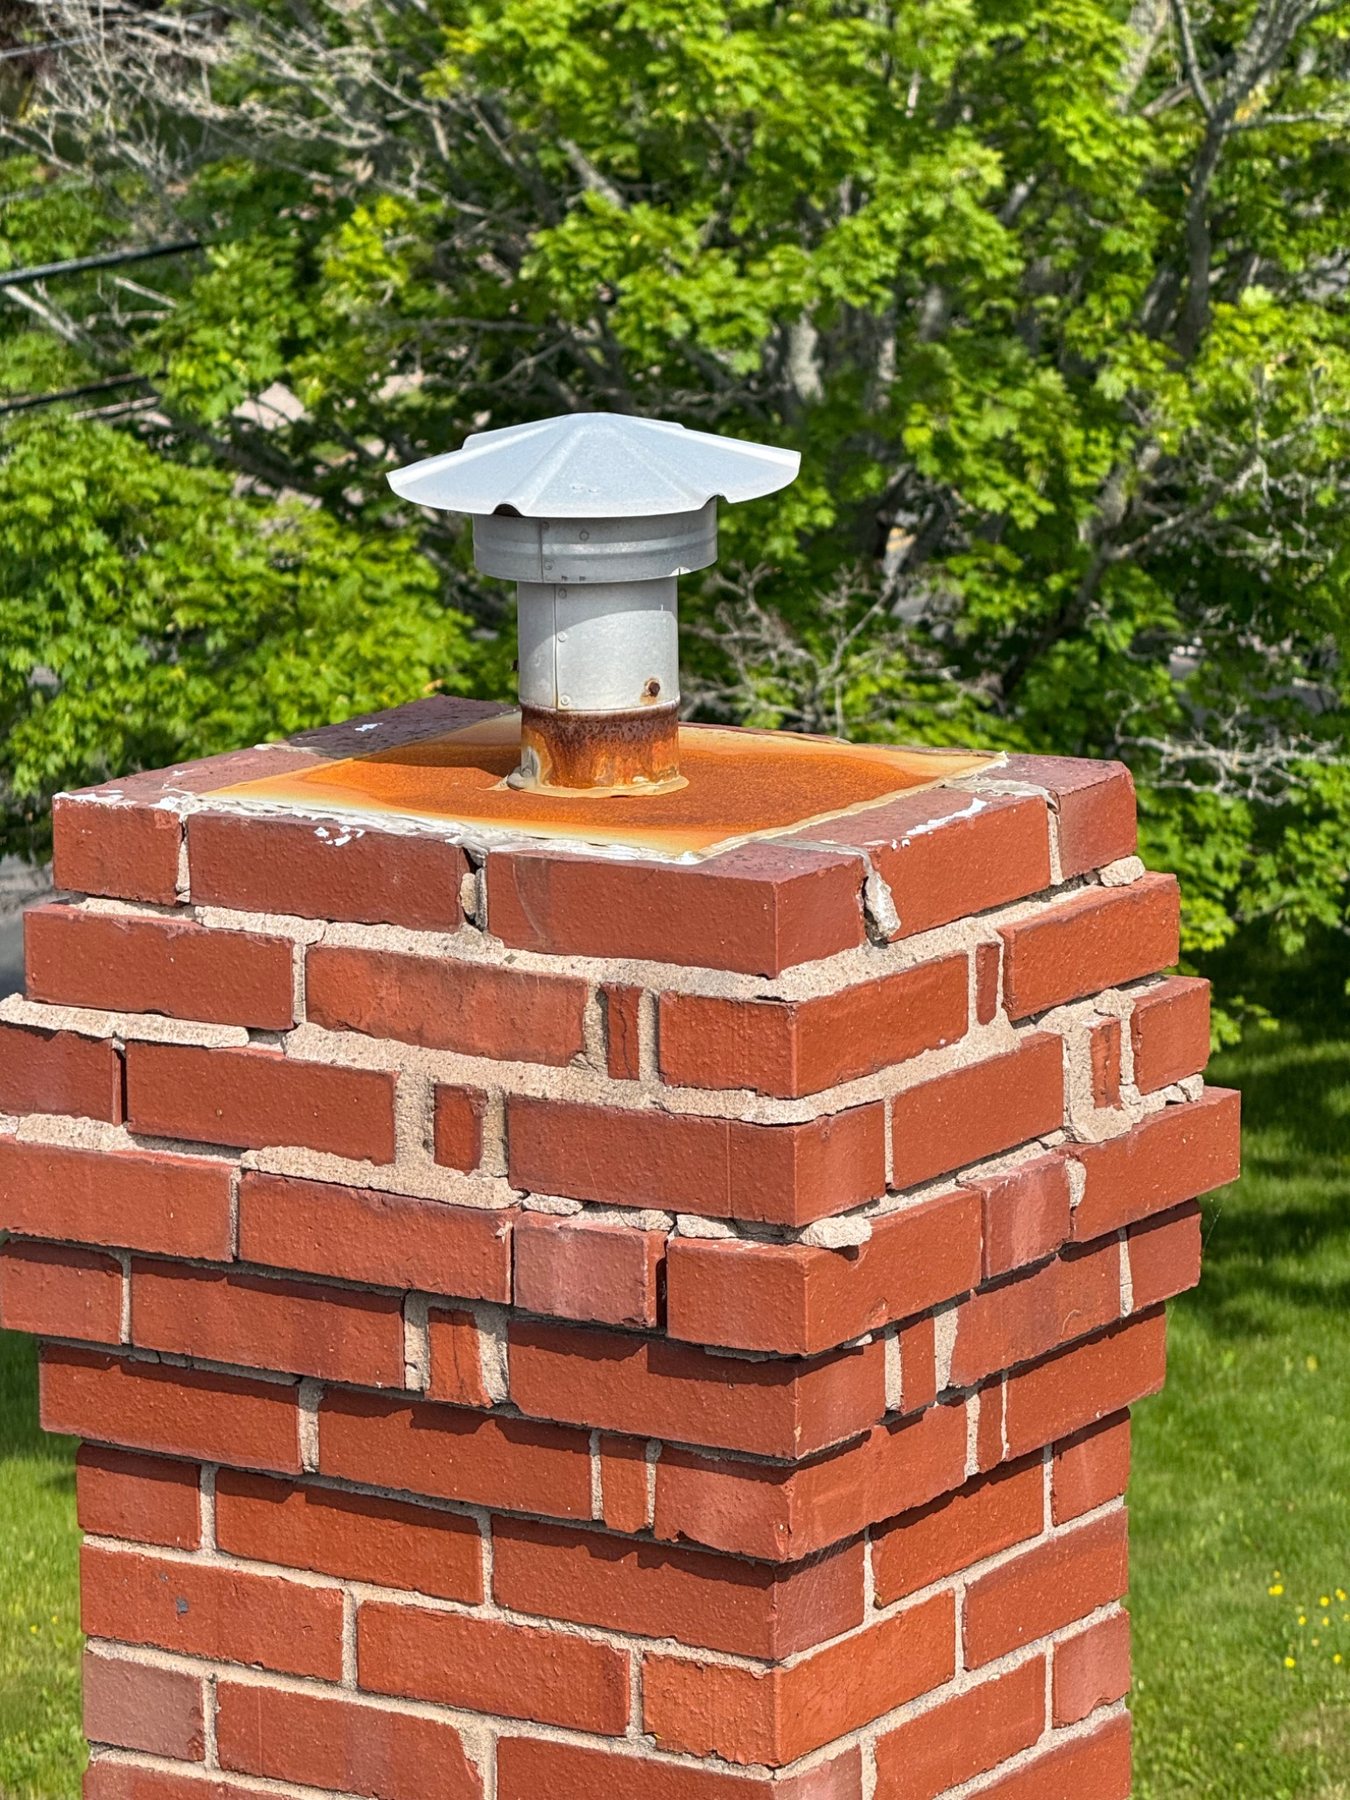
Why the top matters: Chimney crowns, caps and upper joints receive direct rain, snow and freeze-thaw exposure. Deterioration here can feed moisture into otherwise sound masonry below.
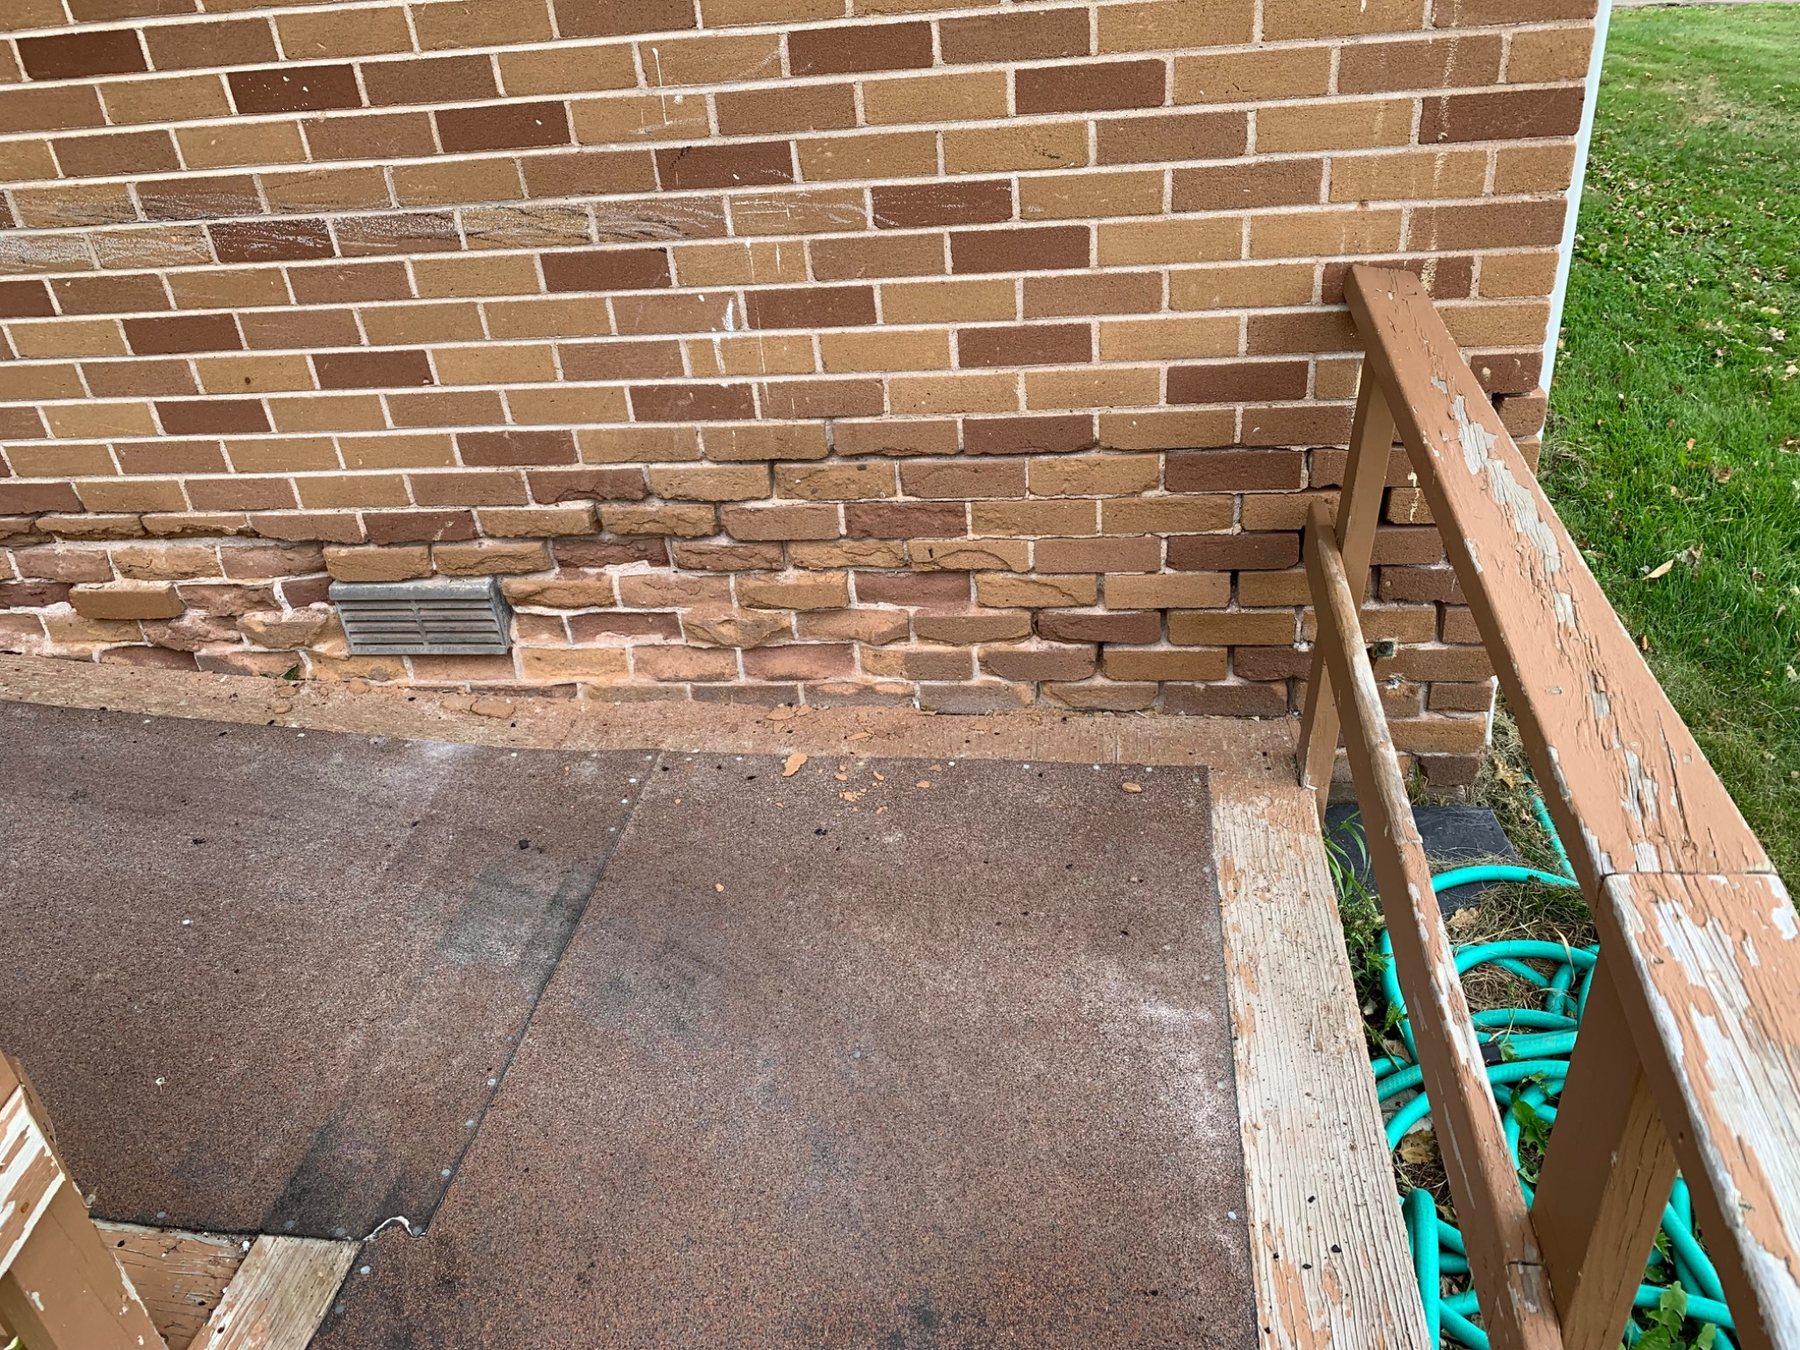
Surface loss is evidence. Note whether deterioration is isolated or concentrated below a sill, downspout, roof edge or another water source.
Shallow mortar weathering can be routine maintenance. Deep loss, loose units, recurring cracks or deterioration extending far into a thick wall may indicate that repointing alone is not enough.
Read the mortar compatibility guide →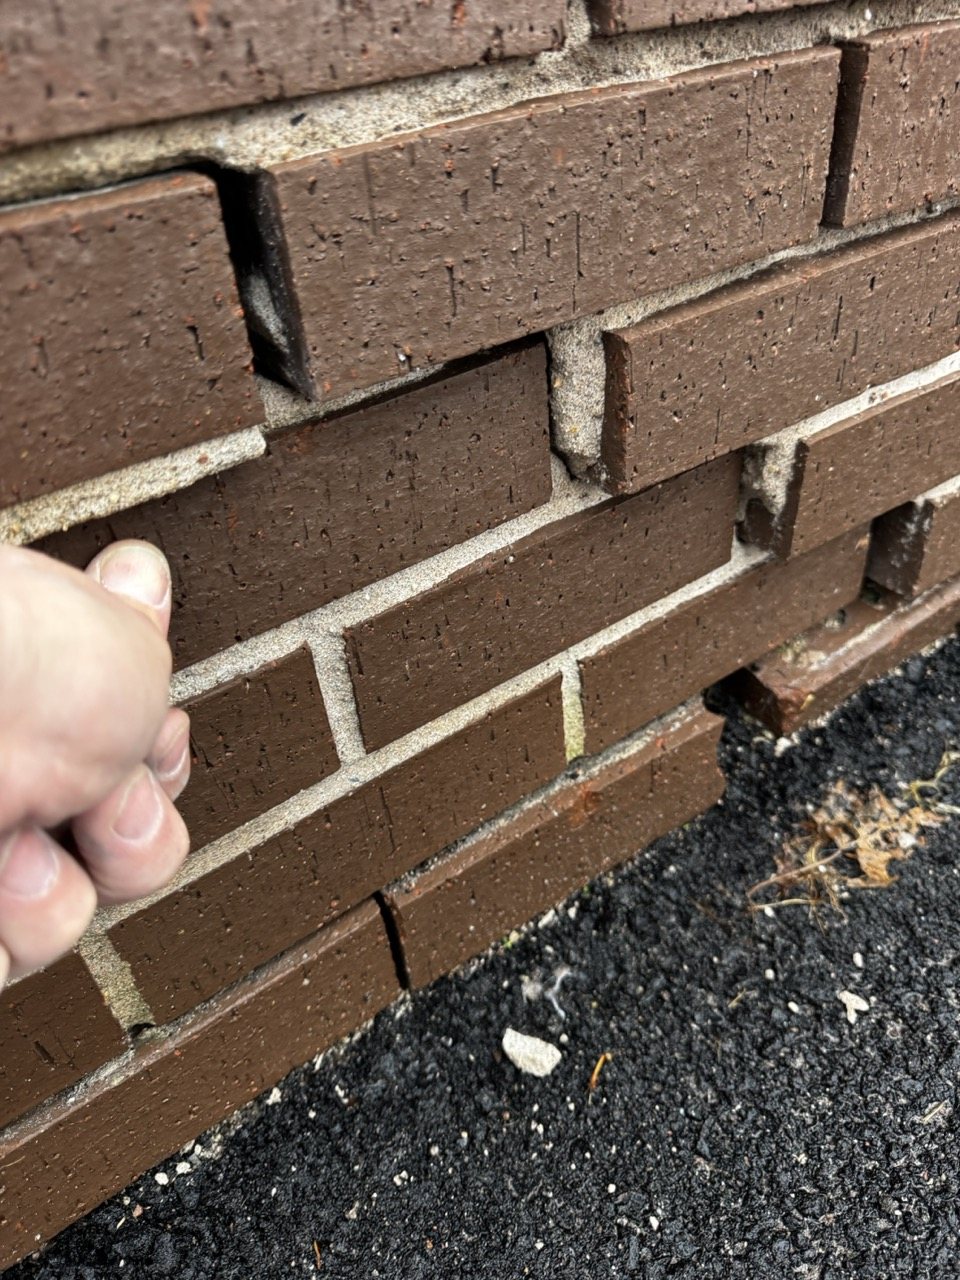
What to document: Take the photo from an angle that shows joint depth. Straight-on photos can make deep erosion look much less significant.
Opening-related cracks: Their direction and whether they return after repair can be more informative than their width at a single moment.
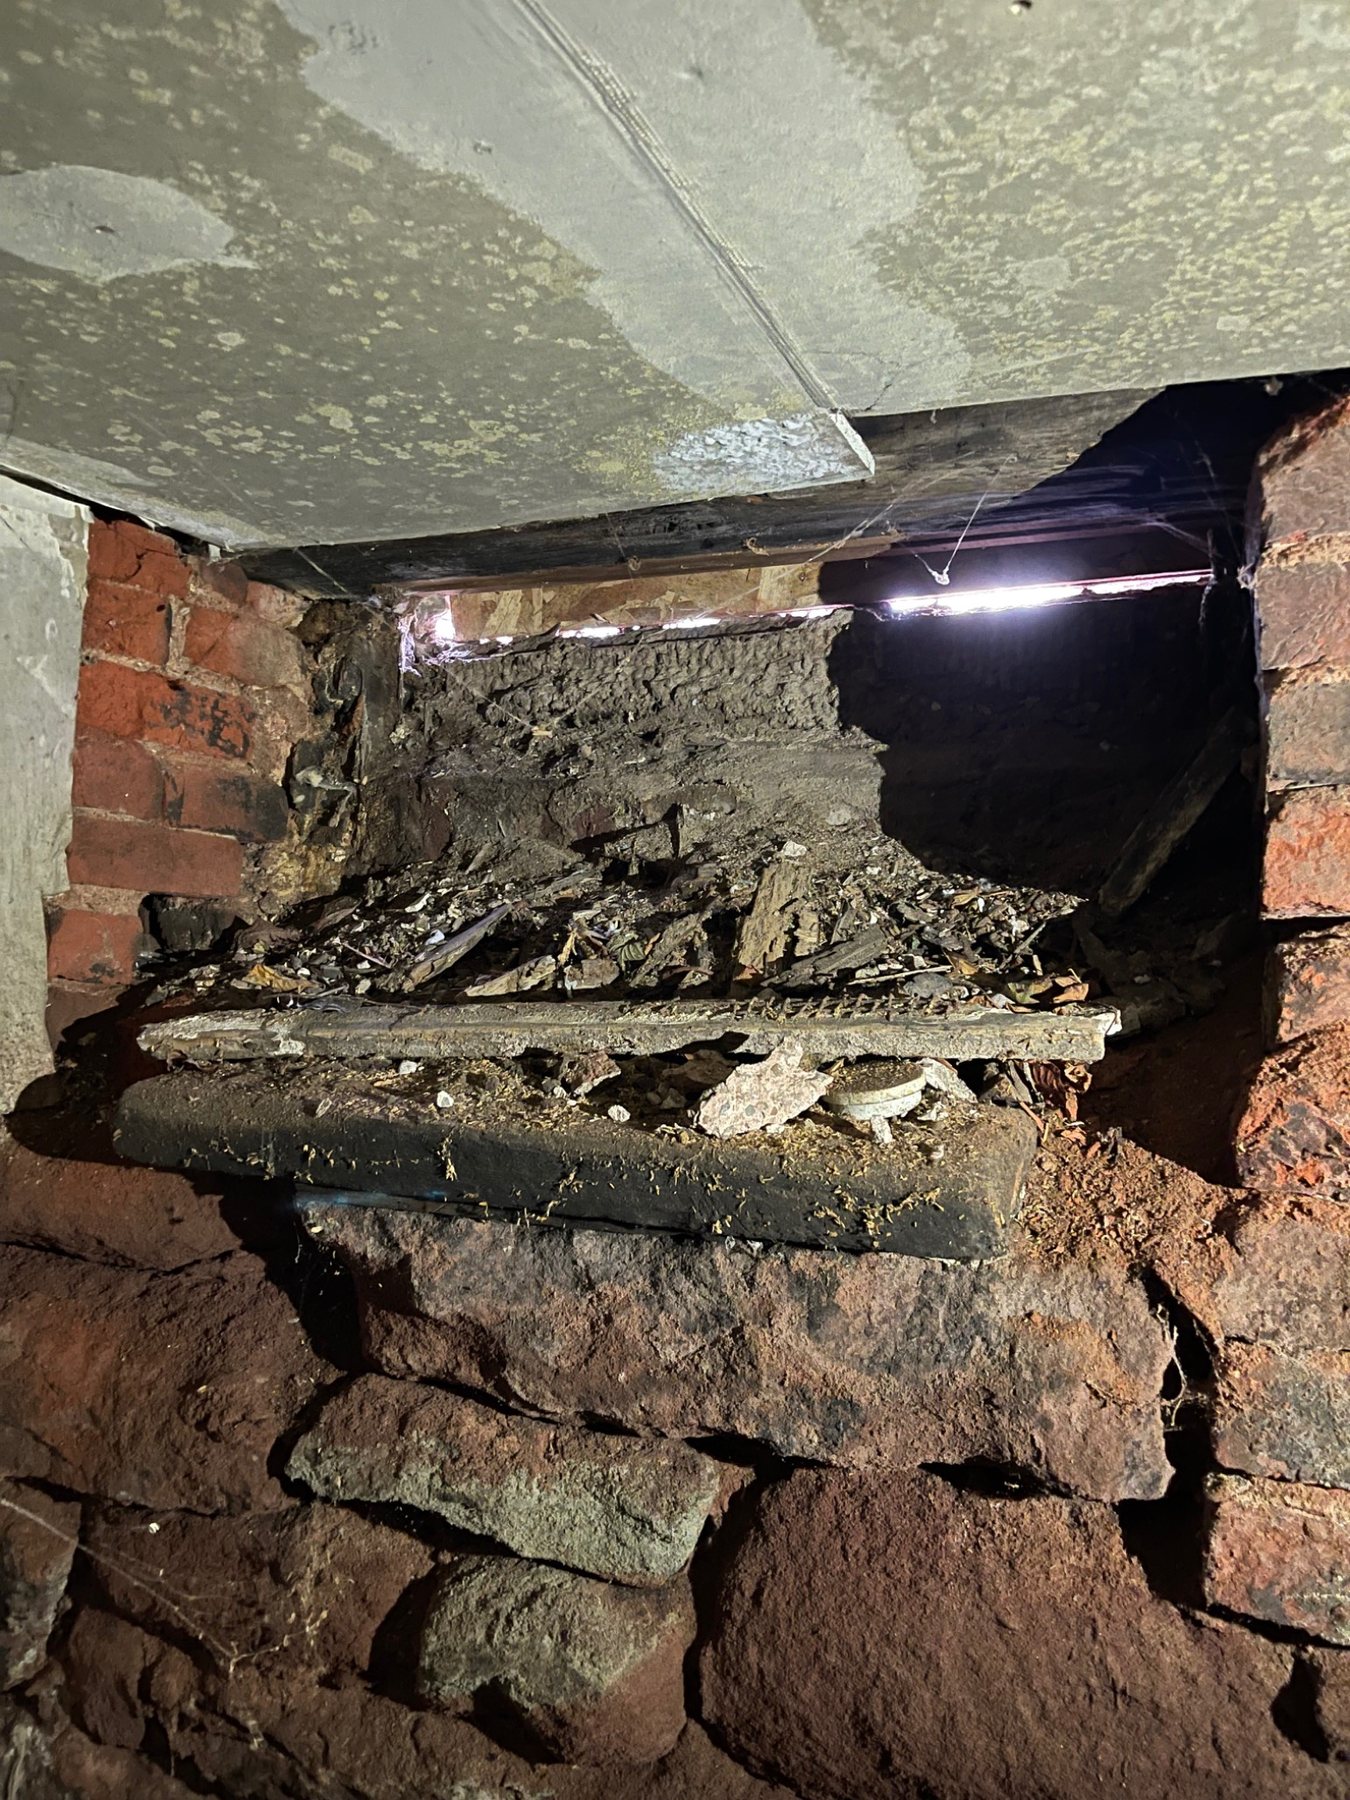
Older foundations: Surface condition is only part of the picture. Deep voiding, loose stone or internal loss can matter more than a neat exterior parge coat.
Correcting a concentrated water source can sometimes do more for masonry durability than repairing the same deteriorated joint over and over.
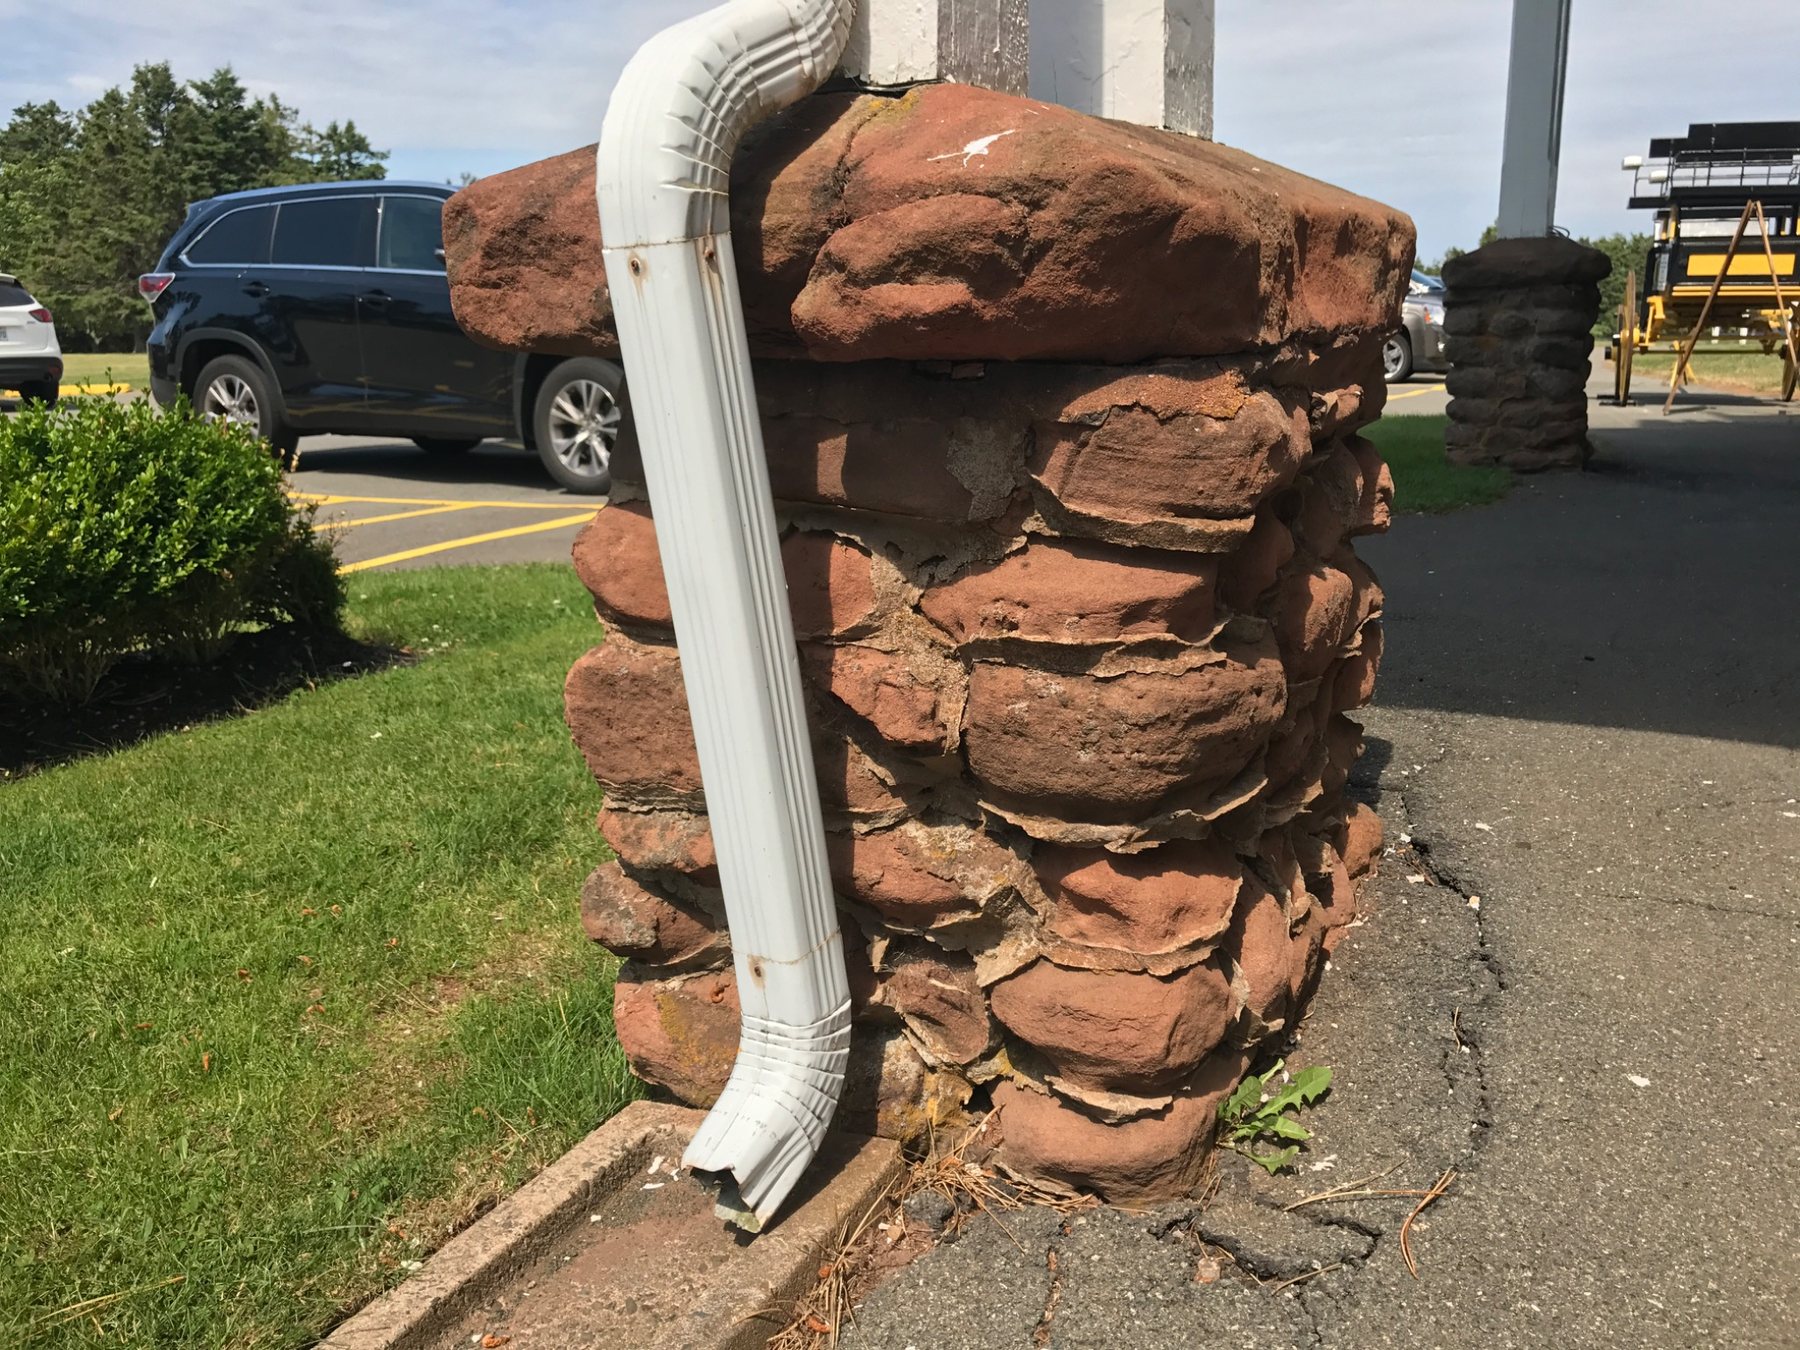
Easy inspection win: Roof runoff is visible and correctable. If a downspout repeatedly saturates one foundation corner, fixing that water source belongs in the repair plan.
Water enters from above too. If deterioration is strongest immediately below a crown, cap or sill, inspect the horizontal surface before treating only the masonry below it.
The purpose of homeowner inspection is to decide what can be monitored, what should be scheduled and what deserves faster assessment.
Conditions that are stable and not obviously allowing water or movement.
Conditions that are progressing or allowing water to continue working on the masonry.
Conditions where stability, falling material or active movement may be involved.
Take the same wide and close photographs at each inspection. If you are tracking a specific crack, include a ruler or another consistent scale in the frame without inserting anything into the crack.
A single photo cannot tell you whether movement is active. A sequence of photos taken from similar positions can.
If a condition changes quickly or becomes associated with bulging, loose material, water entry or structural distortion, move from monitoring to assessment.
Hidden wall ties, concealed flashing, interior wythes, foundation depth, structural bearing and subsurface drainage cannot always be assessed from the exterior face.
Some conditions require selective openings, moisture investigation, chimney inspection, engineering or other specialized assessment.
The checklist is useful because it helps you recognize when the visible condition is stable and when the pattern suggests there may be more happening behind it.
Prince Edward Island, Nova Scotia and New Brunswick combine wind-driven rain, wet shoulder seasons, snowmelt and repeated freeze-thaw cycling. Those conditions make seasonal comparison particularly useful.
A spring inspection can reveal damage that developed while masonry was wet and freezing through winter. A fall inspection is useful for finding water entry points before the next freeze-thaw season begins.
The checklist works anywhere, but Atlantic Canadian conditions make the annual inspection cycle especially relevant to older brick, stone, chimneys and foundations.
Spring comparison: Surface loss that was not present the previous fall is useful evidence that winter exposure changed the masonry.
National Park Service preservation guidance emphasizes regular maintenance, identifying moisture sources and correcting roofs, gutters, downspouts, flashing, cracks and open mortar joints before deterioration becomes more extensive.
NRC Canada research on freeze-thaw and rain penetration explains why saturation and repeated wetting are central to many masonry failures in cold climates.
Brick Industry Association technical guidance similarly treats drainage, flashing, mortar condition, movement and proper detailing as core parts of masonry performance rather than isolated cosmetic issues.
NPS Preservation Brief 39: Controlling Unwanted Moisture →
Dean is a third-generation mason with more than 20 years of hands-on experience working with brick, natural stone, chimneys, foundations, repointing and masonry restoration in Prince Edward Island. The Knowledge Centre uses that field experience to explain masonry problems that are also common across Atlantic Canada and other cold, wet climates.
Last reviewed: August 28, 2026
Once or twice a year is a useful baseline, especially after winter and after major wind or rain events.
New or widening cracks, stepped patterns, cracks associated with bulging, and cracks that repeatedly reopen after repair.
No. Depth, location, progression, loose masonry and water entry determine whether it is routine maintenance or a more significant repair.
A wide view, a medium context view and a close-up. Include nearby water sources, openings, roof details or grade whenever possible.
Include one photo showing the whole wall, chimney or foundation area, then add close-ups of the defect and nearby water or structural details. For DinoMac service work, include the PEI property location.