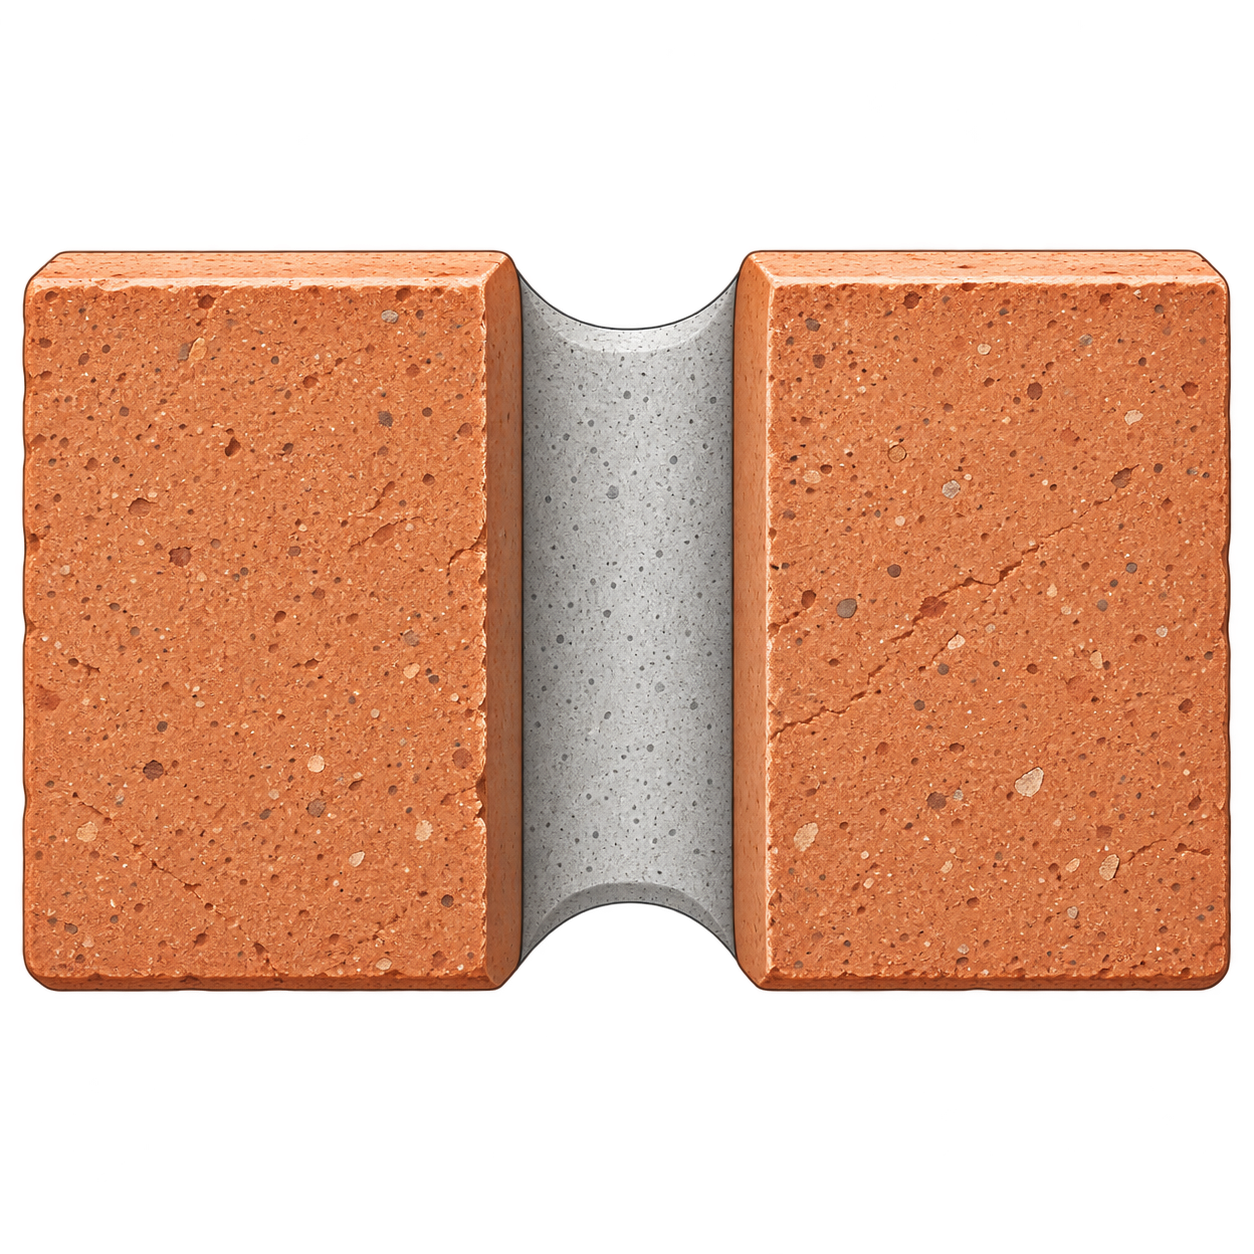
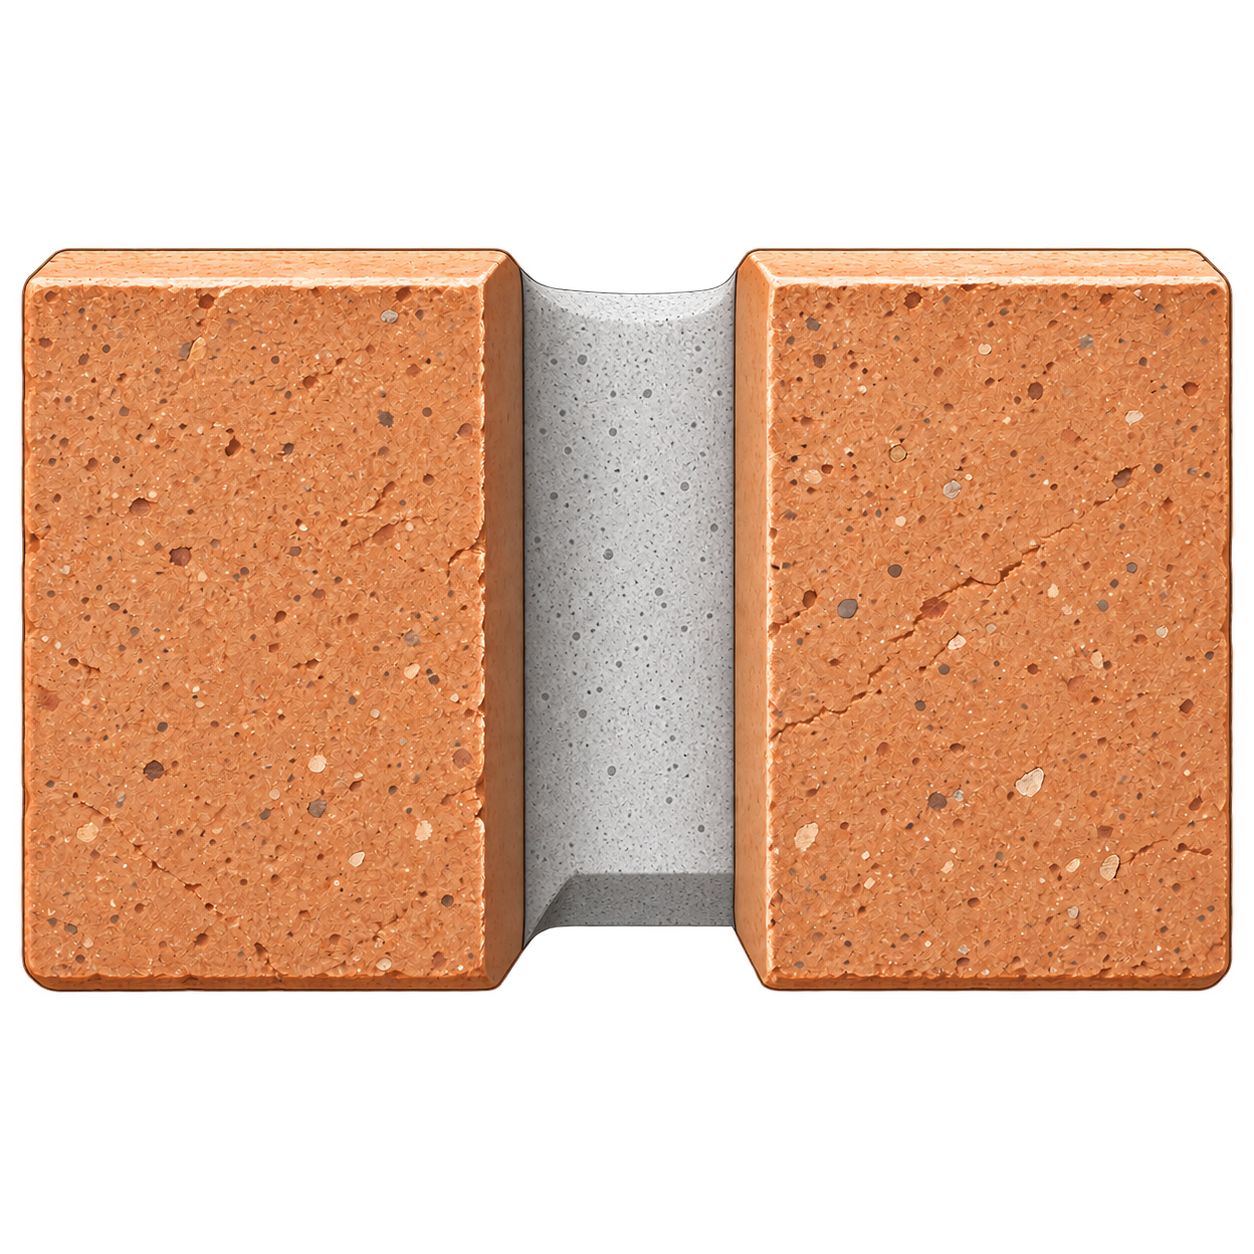
Concave
A rounded inward joint formed with a curved jointer. The tooling compacts the mortar and creates a smooth, weather-resistant face. It is widely used on exterior brickwork because it generally sheds water well.
Mortar joints are not just the spaces between brick or stone. Their shape affects how the wall sheds rain, how well the mortar is compacted, how the masonry reads visually and whether a repair looks like it belongs on the building.
The joint profile should suit the masonry, the exposure and, on older buildings, the original character. A good mortar mix with the wrong joint profile can still look wrong or weather poorly. A beautiful joint made with incompatible mortar is no better.
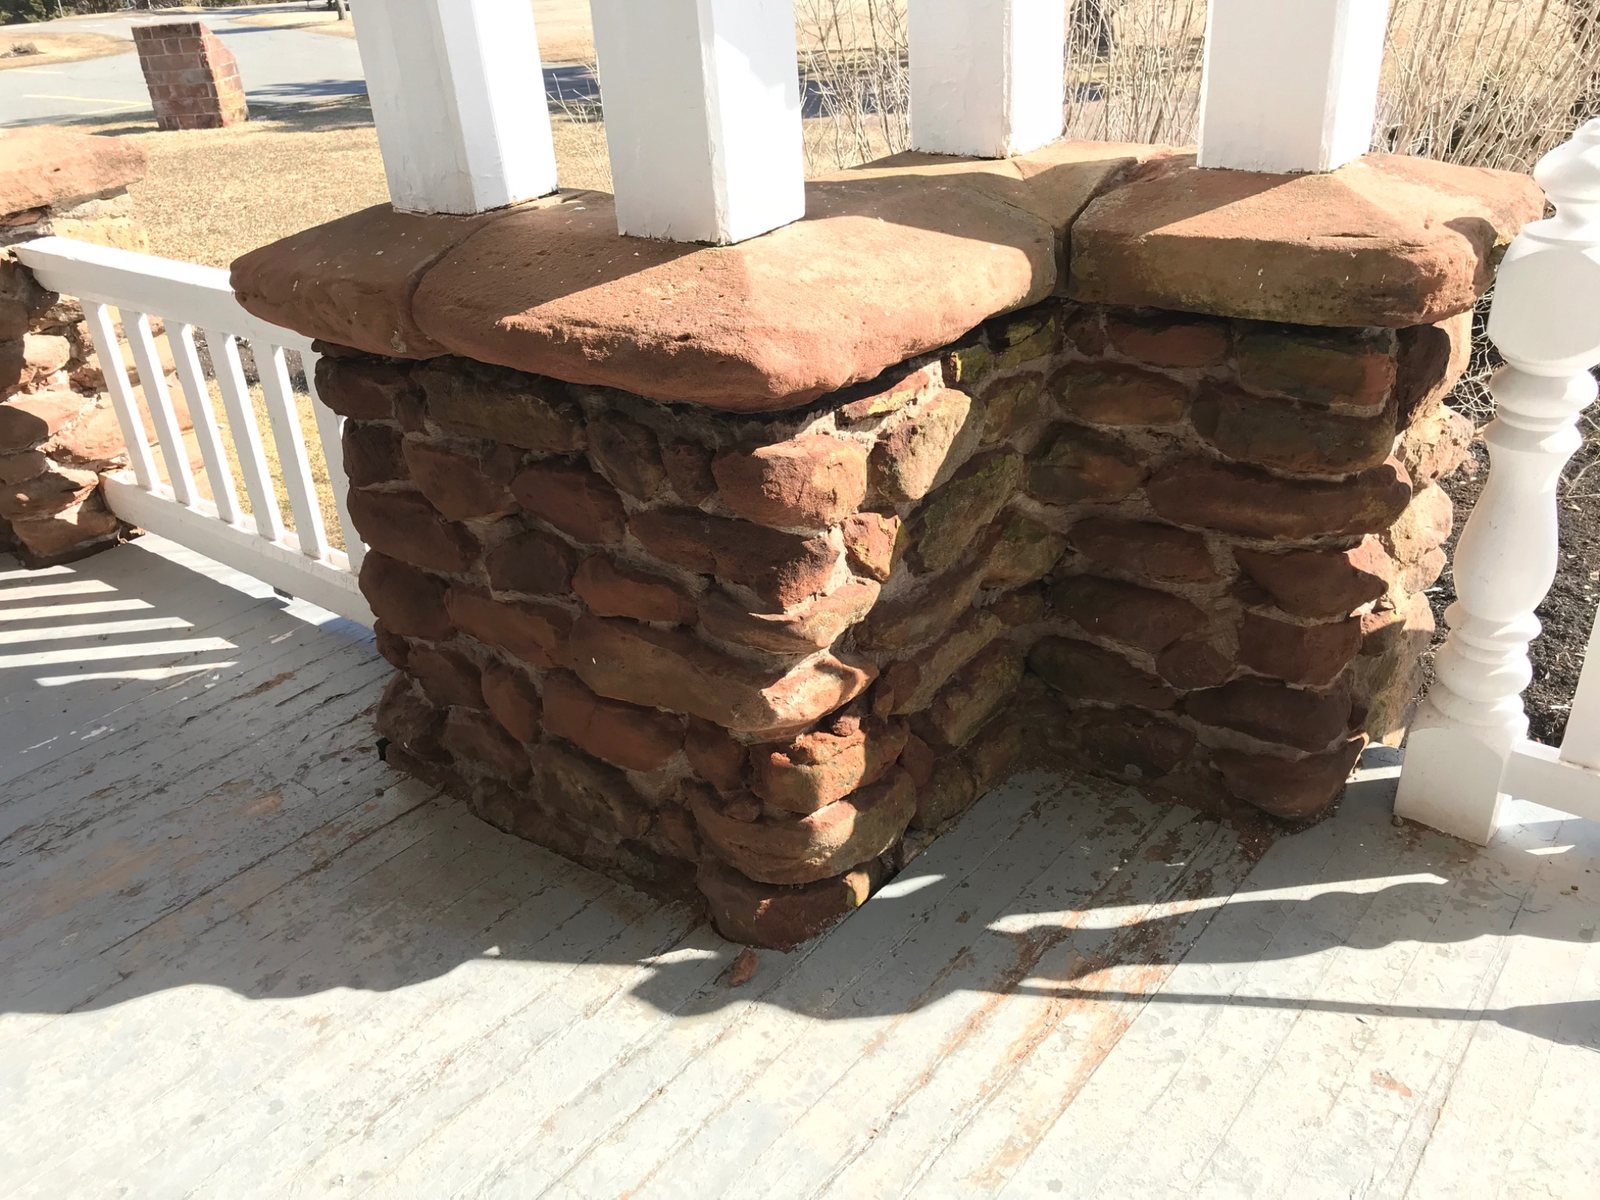
Profile and colour work together. On restoration work, joint width, tooling, texture and mortar colour all influence whether new pointing disappears into the existing masonry or announces itself from across the property.
When mortar is tooled at the right stage of curing, the tool compresses the joint surface and pushes mortar firmly against the masonry edges. That improves the finished surface and can increase resistance to rain penetration.
Some profiles naturally shed water better than others. Others create recesses, ledges or exposed edges that can hold moisture or make the joint more vulnerable on a highly exposed wall.
On historic buildings, the joint is also part of the architecture. Changing a fine beaded or narrow historic joint into a broad modern concave joint can change the entire appearance of the elevation even when the mortar colour is close.
These sketches are simplified cross-sections. Real joints vary with brick, stone, joint width and hand tooling.
A rounded inward joint formed with a curved jointer. The tooling compacts the mortar and creates a smooth, weather-resistant face. It is widely used on exterior brickwork because it generally sheds water well.
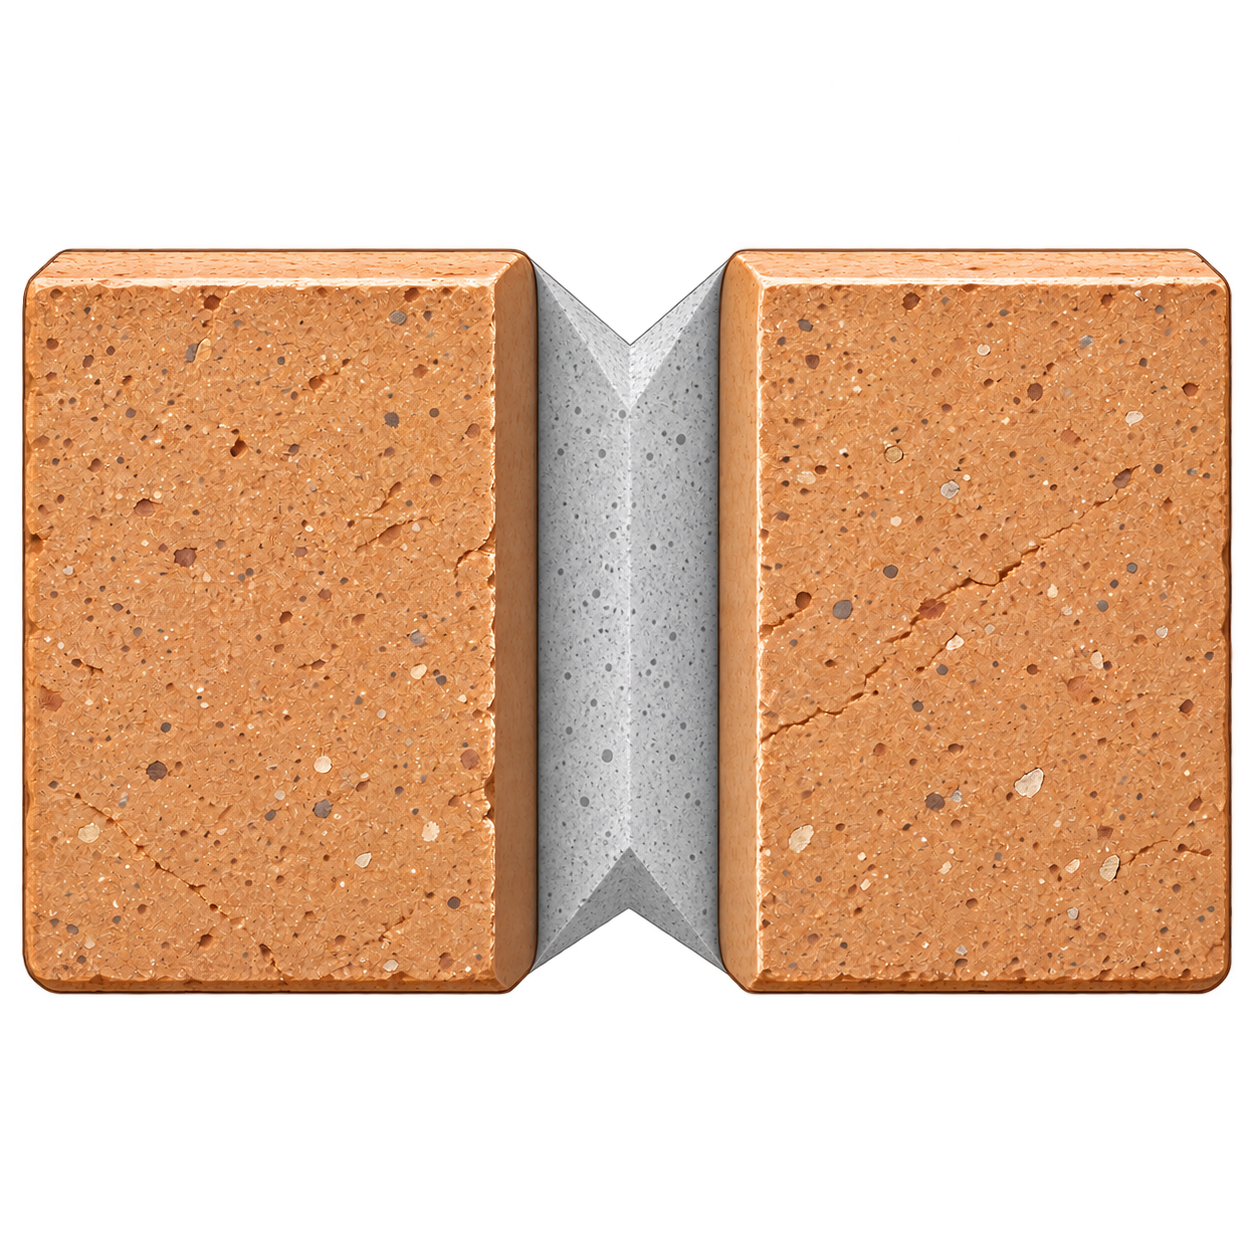
A V-shaped groove pressed into the mortar. Like a concave joint, it is tooled and compacted. The sharper shadow line can make the bond pattern more pronounced while still providing good weather resistance when properly executed.
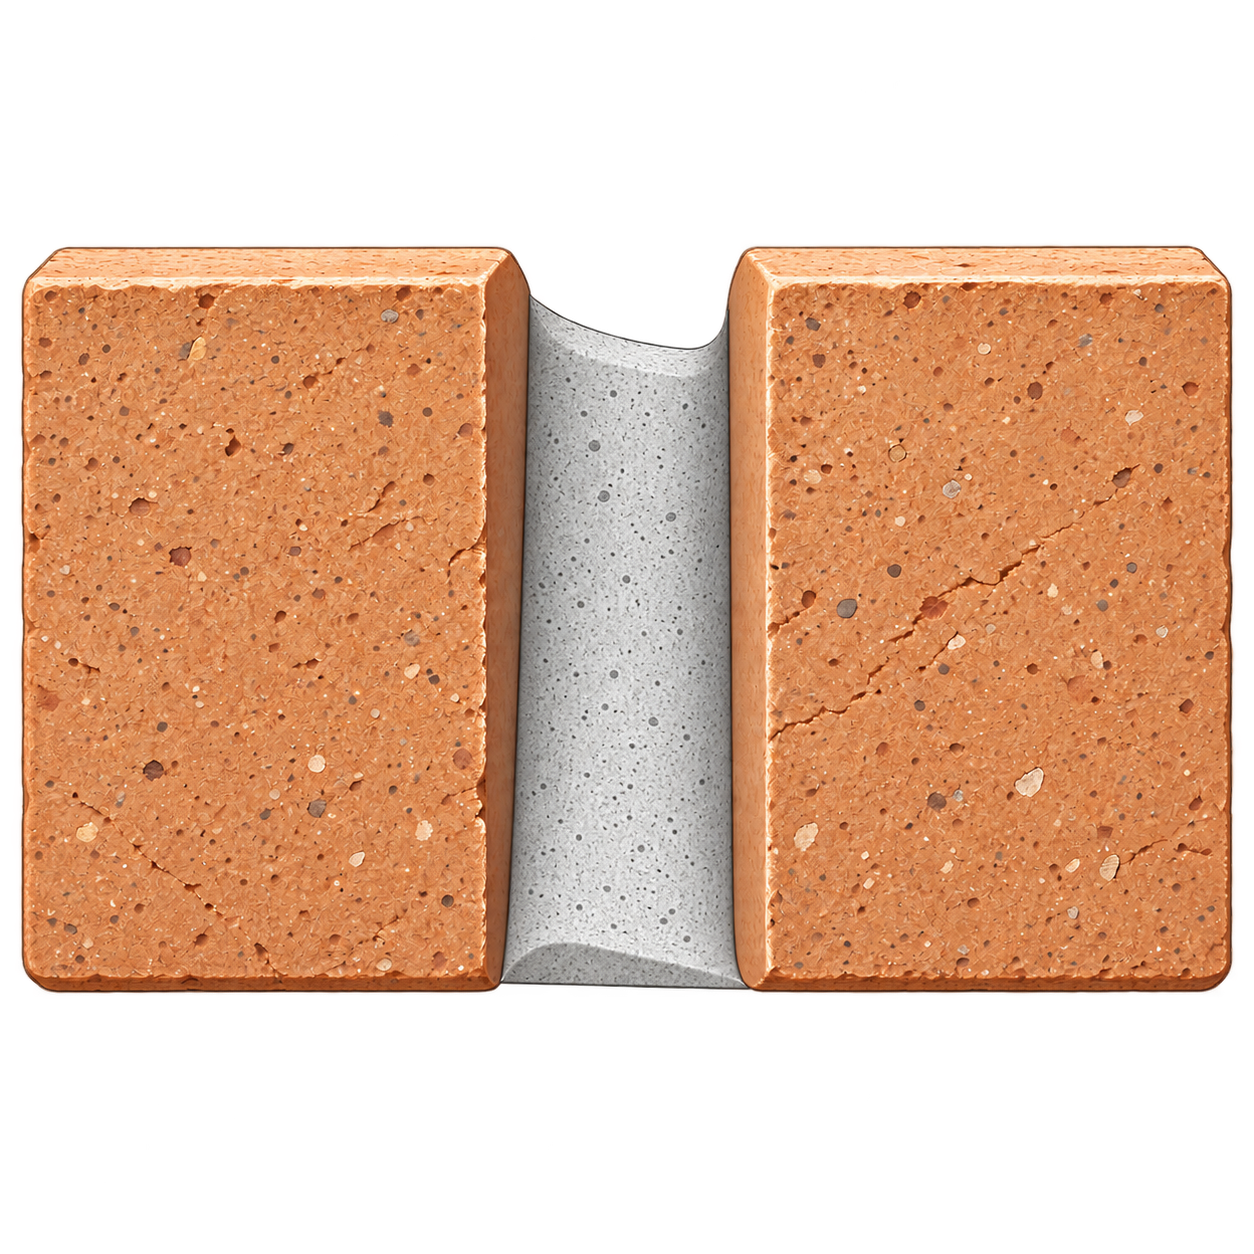
A sloped joint tooled so the face sheds water outward. It is one of the more effective trowelled profiles for exposed masonry when compacted properly.
A sloped joint in the opposite direction from a weathered joint. It creates a more pronounced ledge and generally sheds water less effectively, so exposure matters when choosing it.
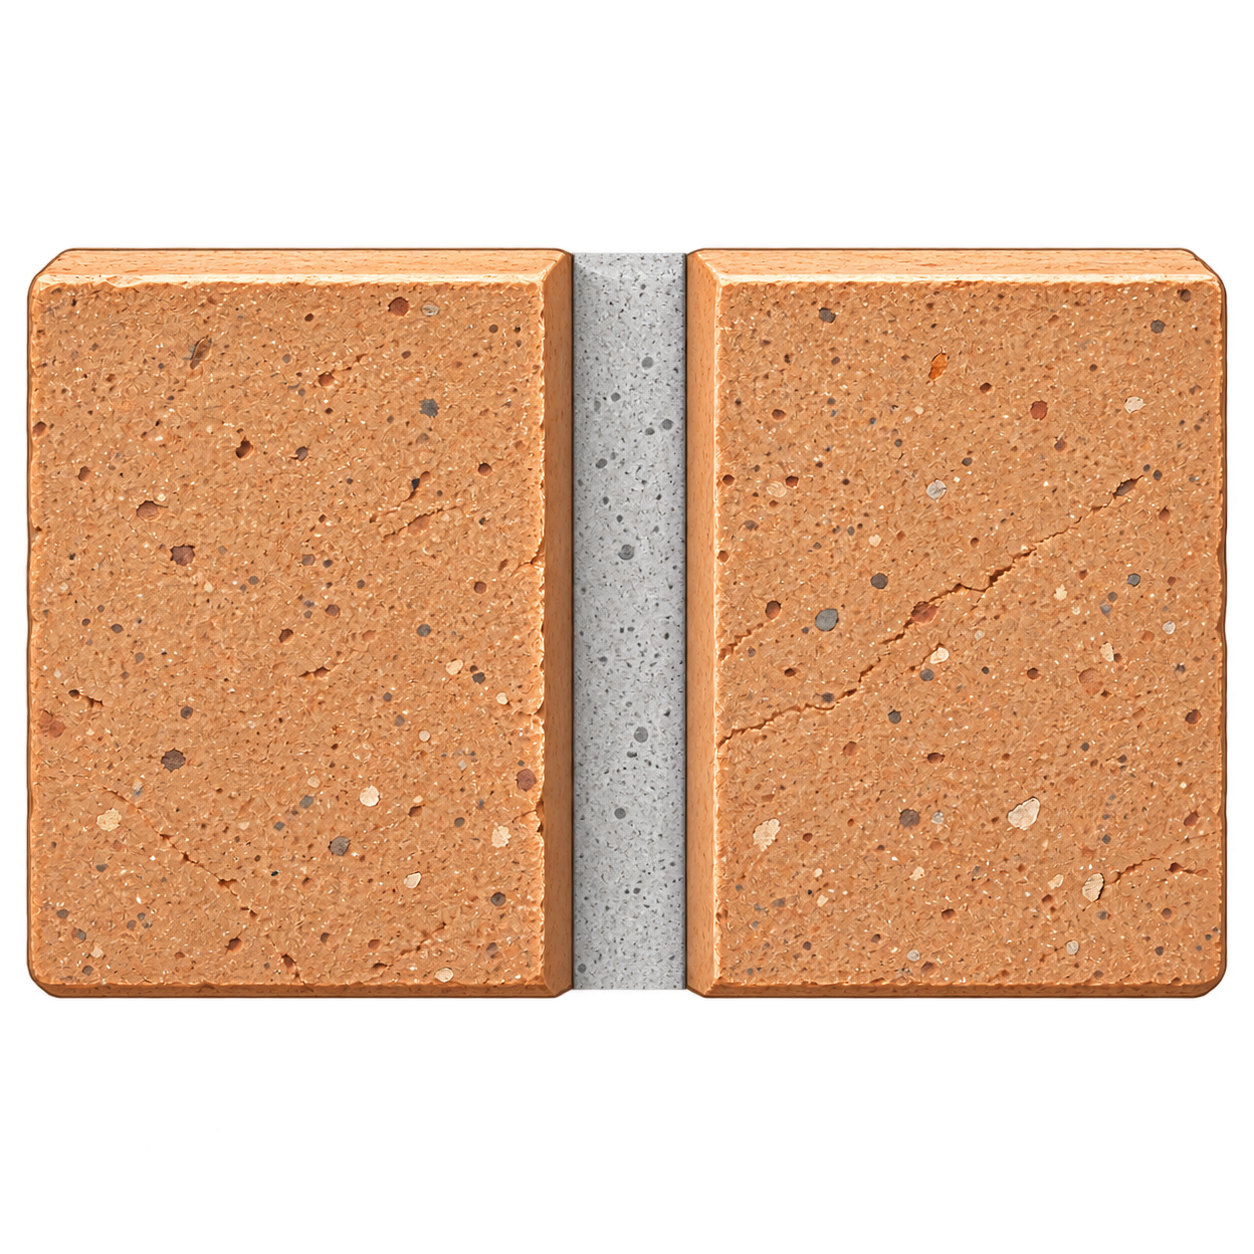
The mortar finishes approximately flush with the masonry face. Historic and architectural examples can be appropriate, but a simple cut-off flush joint may not be as densely compacted as a properly tooled joint.
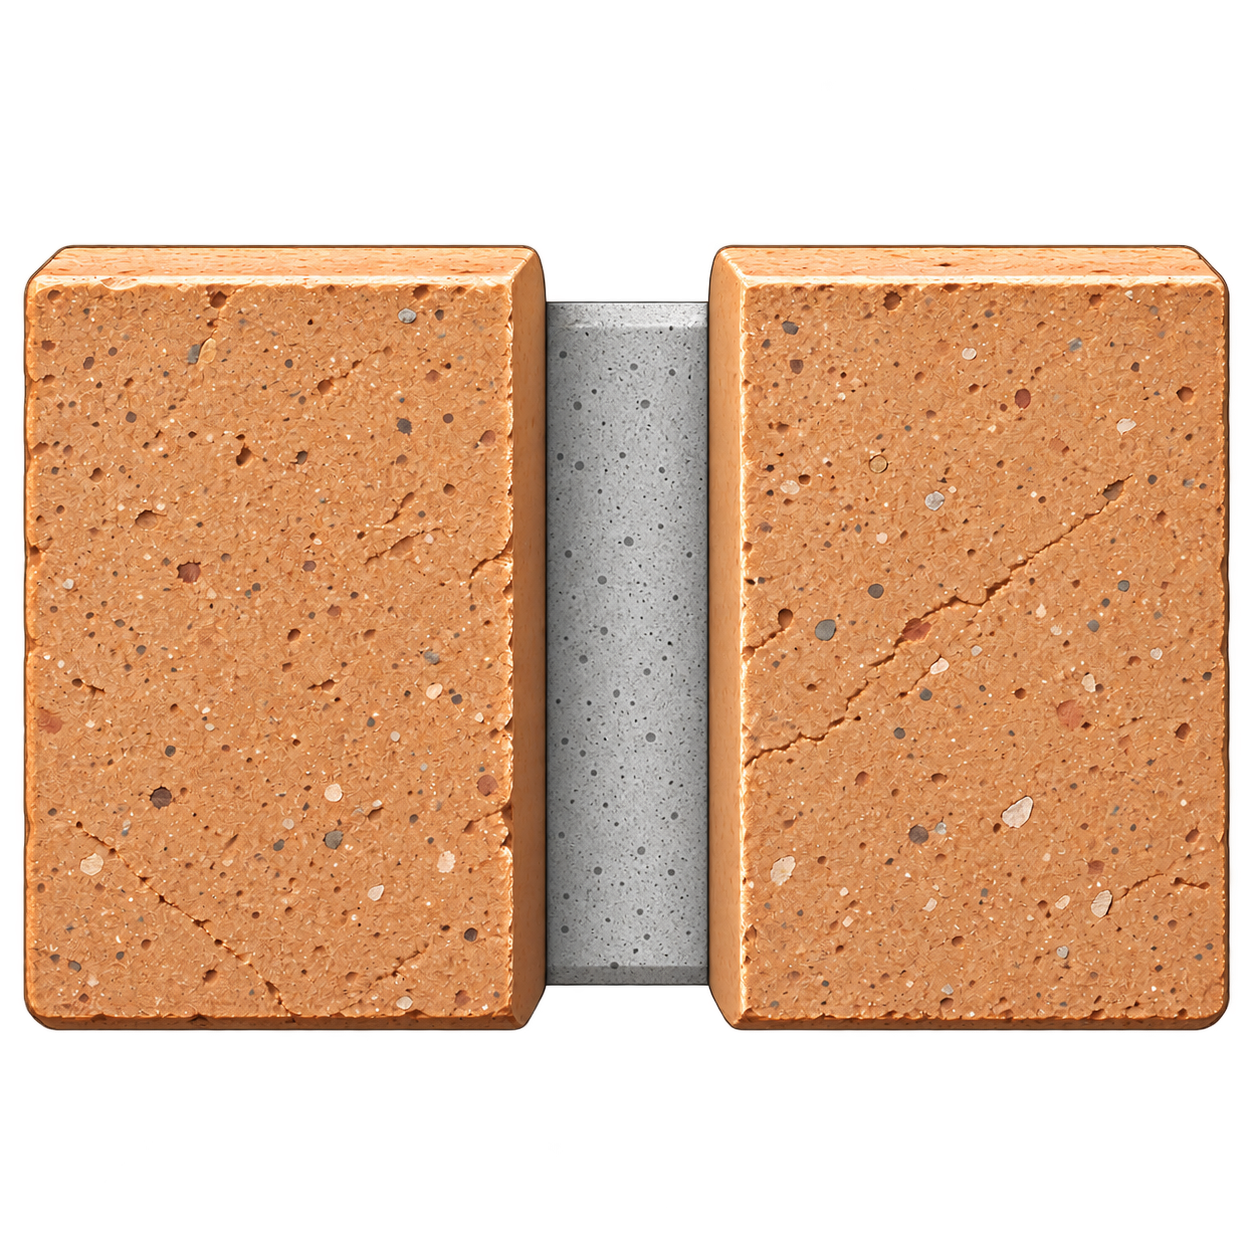
The mortar face is recessed behind the brick or stone. Raking creates strong shadow lines, but deep exterior raking can expose joint edges and create horizontal ledges that hold water.
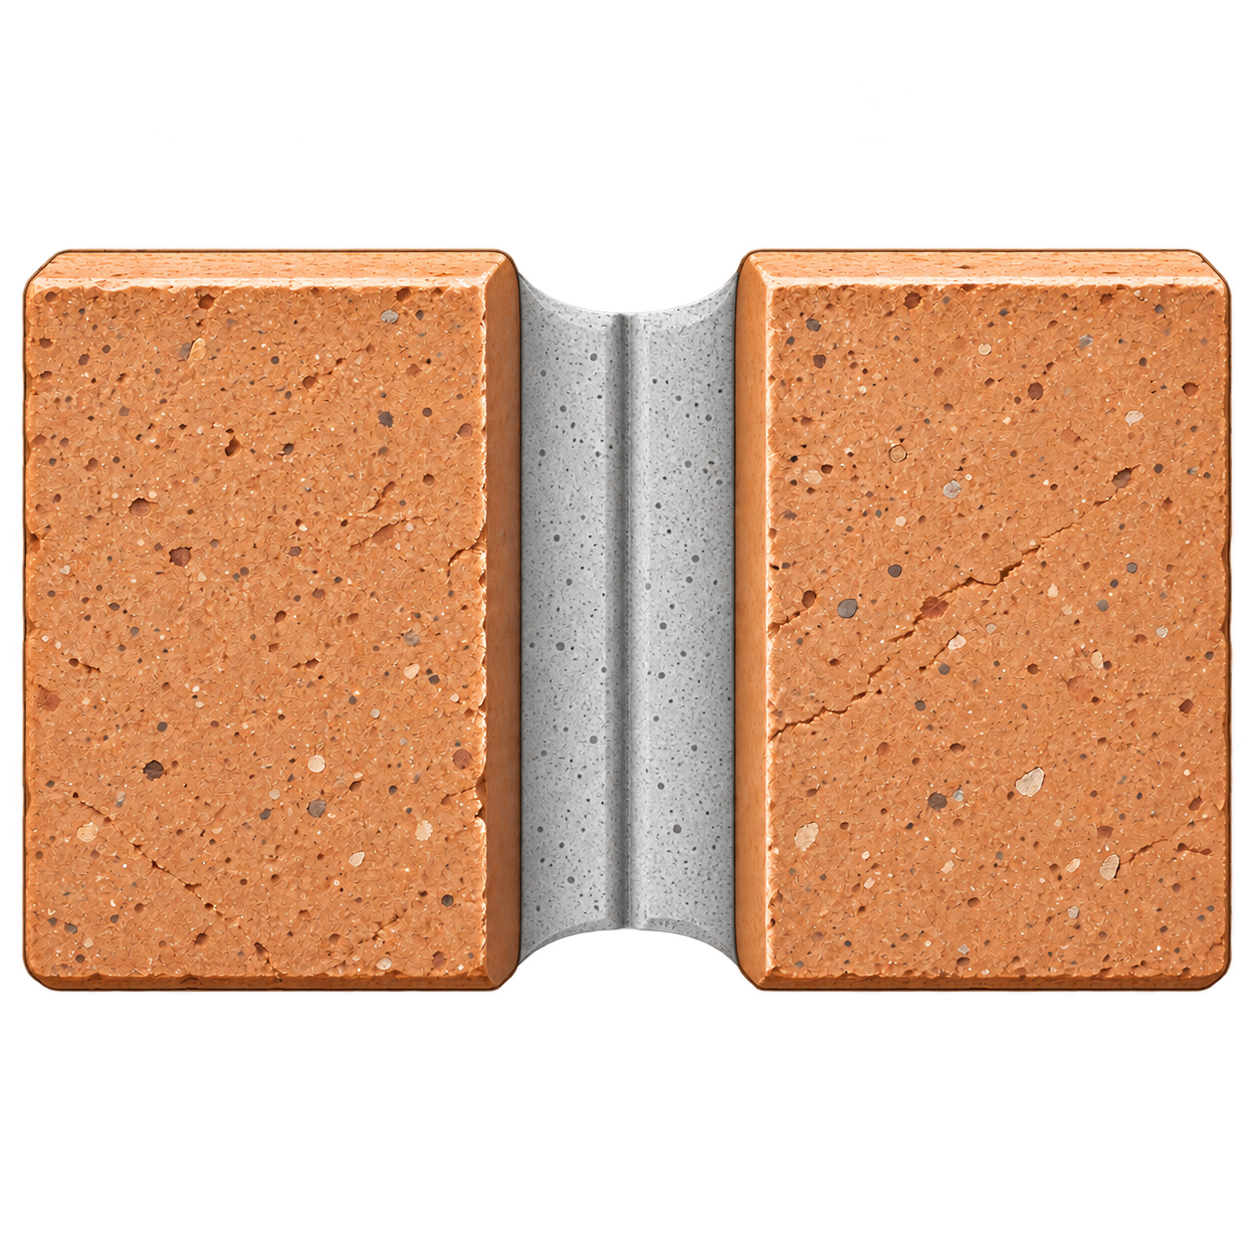
Usually a tooled joint with a narrow central indentation or line. The exact appearance and even the name vary regionally. On older masonry, the existing joint should be studied rather than assuming a modern interpretation is correct.
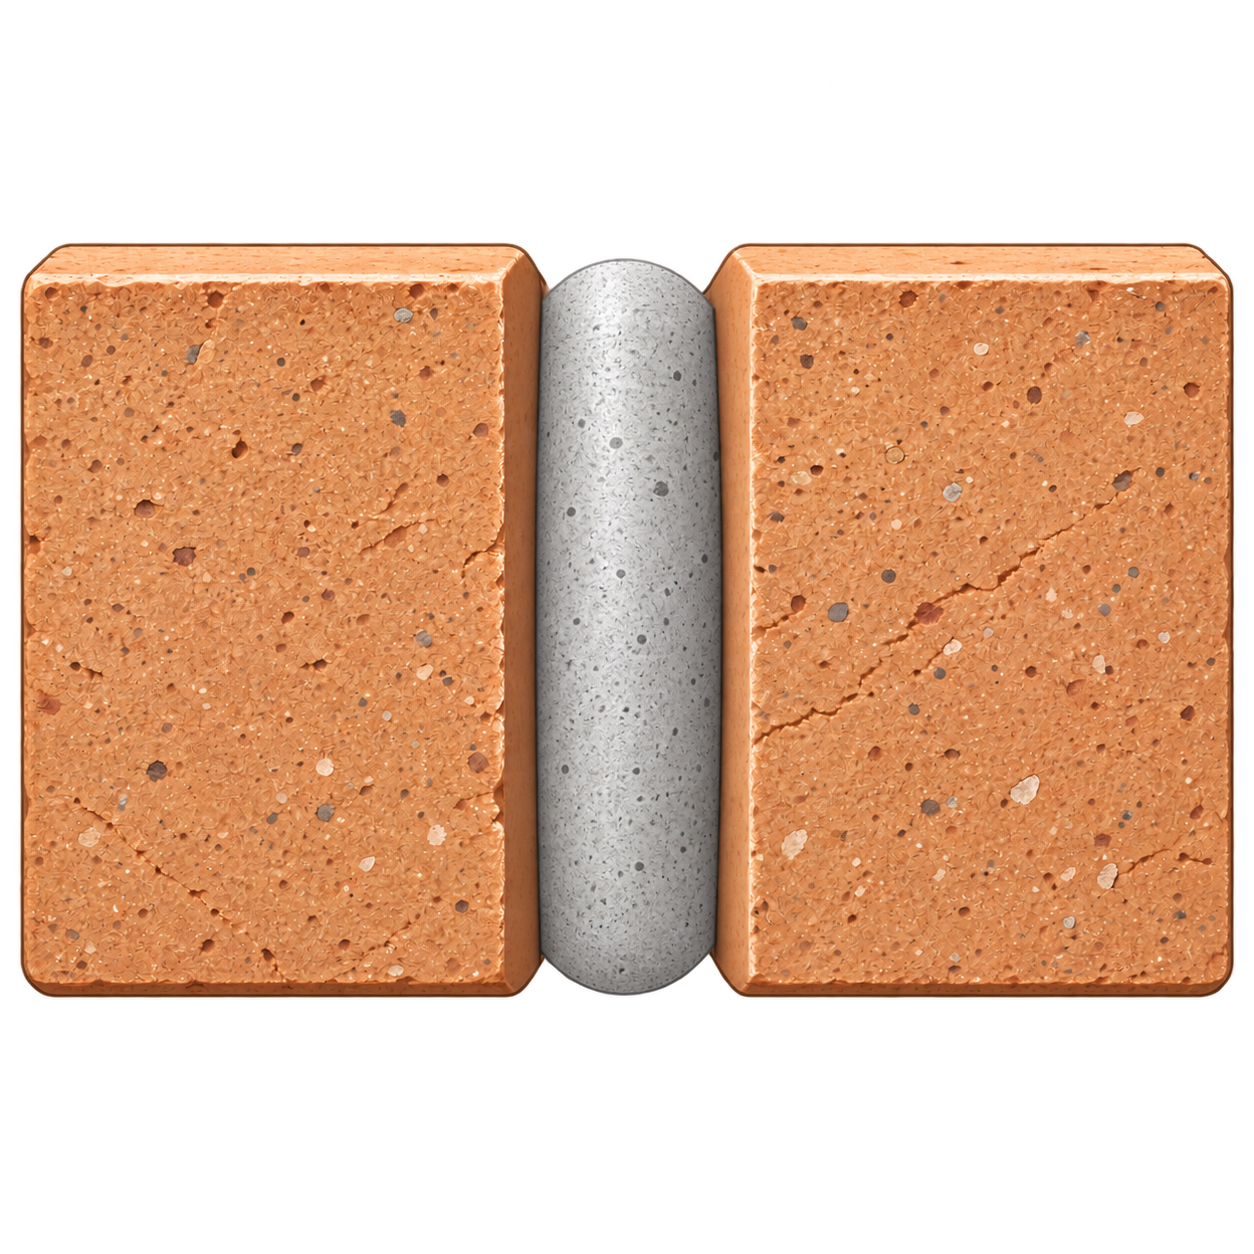
A raised rounded bead that gives strong light and shadow. It can be a character-defining historic detail, but because it projects from the wall it requires careful execution and may be more exposed to weathering.
Brick Industry Association guidance emphasizes the importance of filled, tooled joints for water resistance. Concave and V joints compact the exposed mortar surface as they are tooled, while a properly executed weathered joint also sheds rain efficiently.
By contrast, deeply raked or poorly struck joints can create ledges or leave the outer mortar less consolidated. That does not make every recessed joint a defect, but it means exposure and original design should be considered before choosing a profile.
In Atlantic Canada, where walls can see wind-driven rain followed by freeze-thaw cycling, a decorative joint that holds water deserves more scrutiny than it might on a sheltered interior wall.
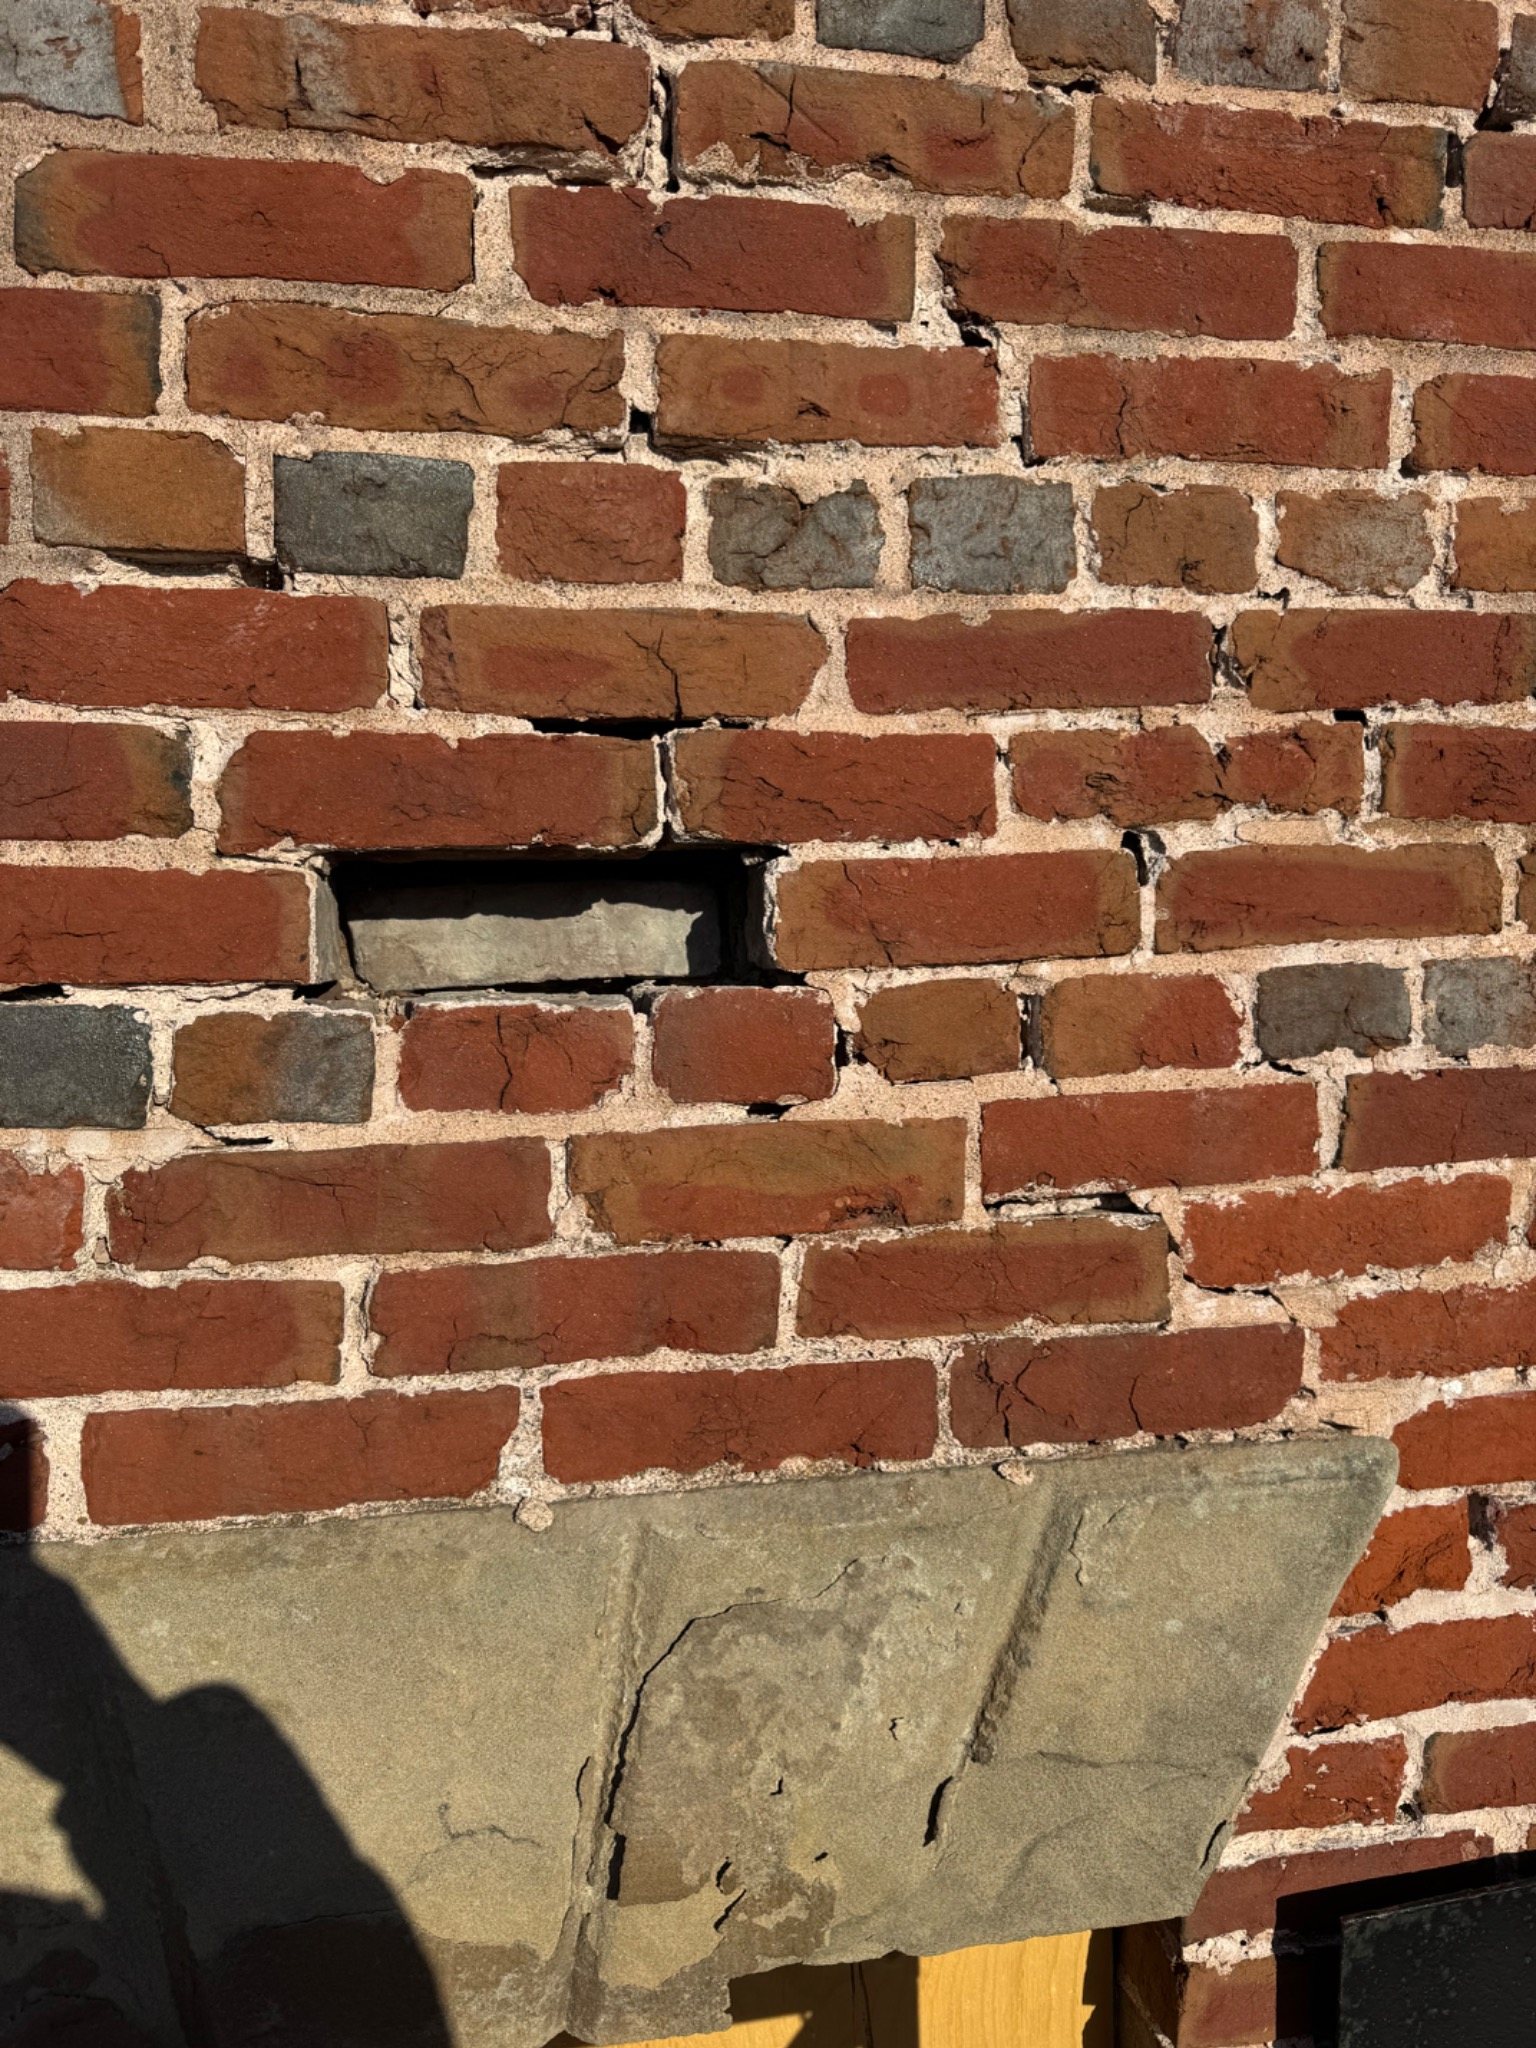
Depth matters. A joint that has weathered deeply back from the face is not the same thing as an intentionally shallow decorative recess. Open joints can admit water directly into the wall.
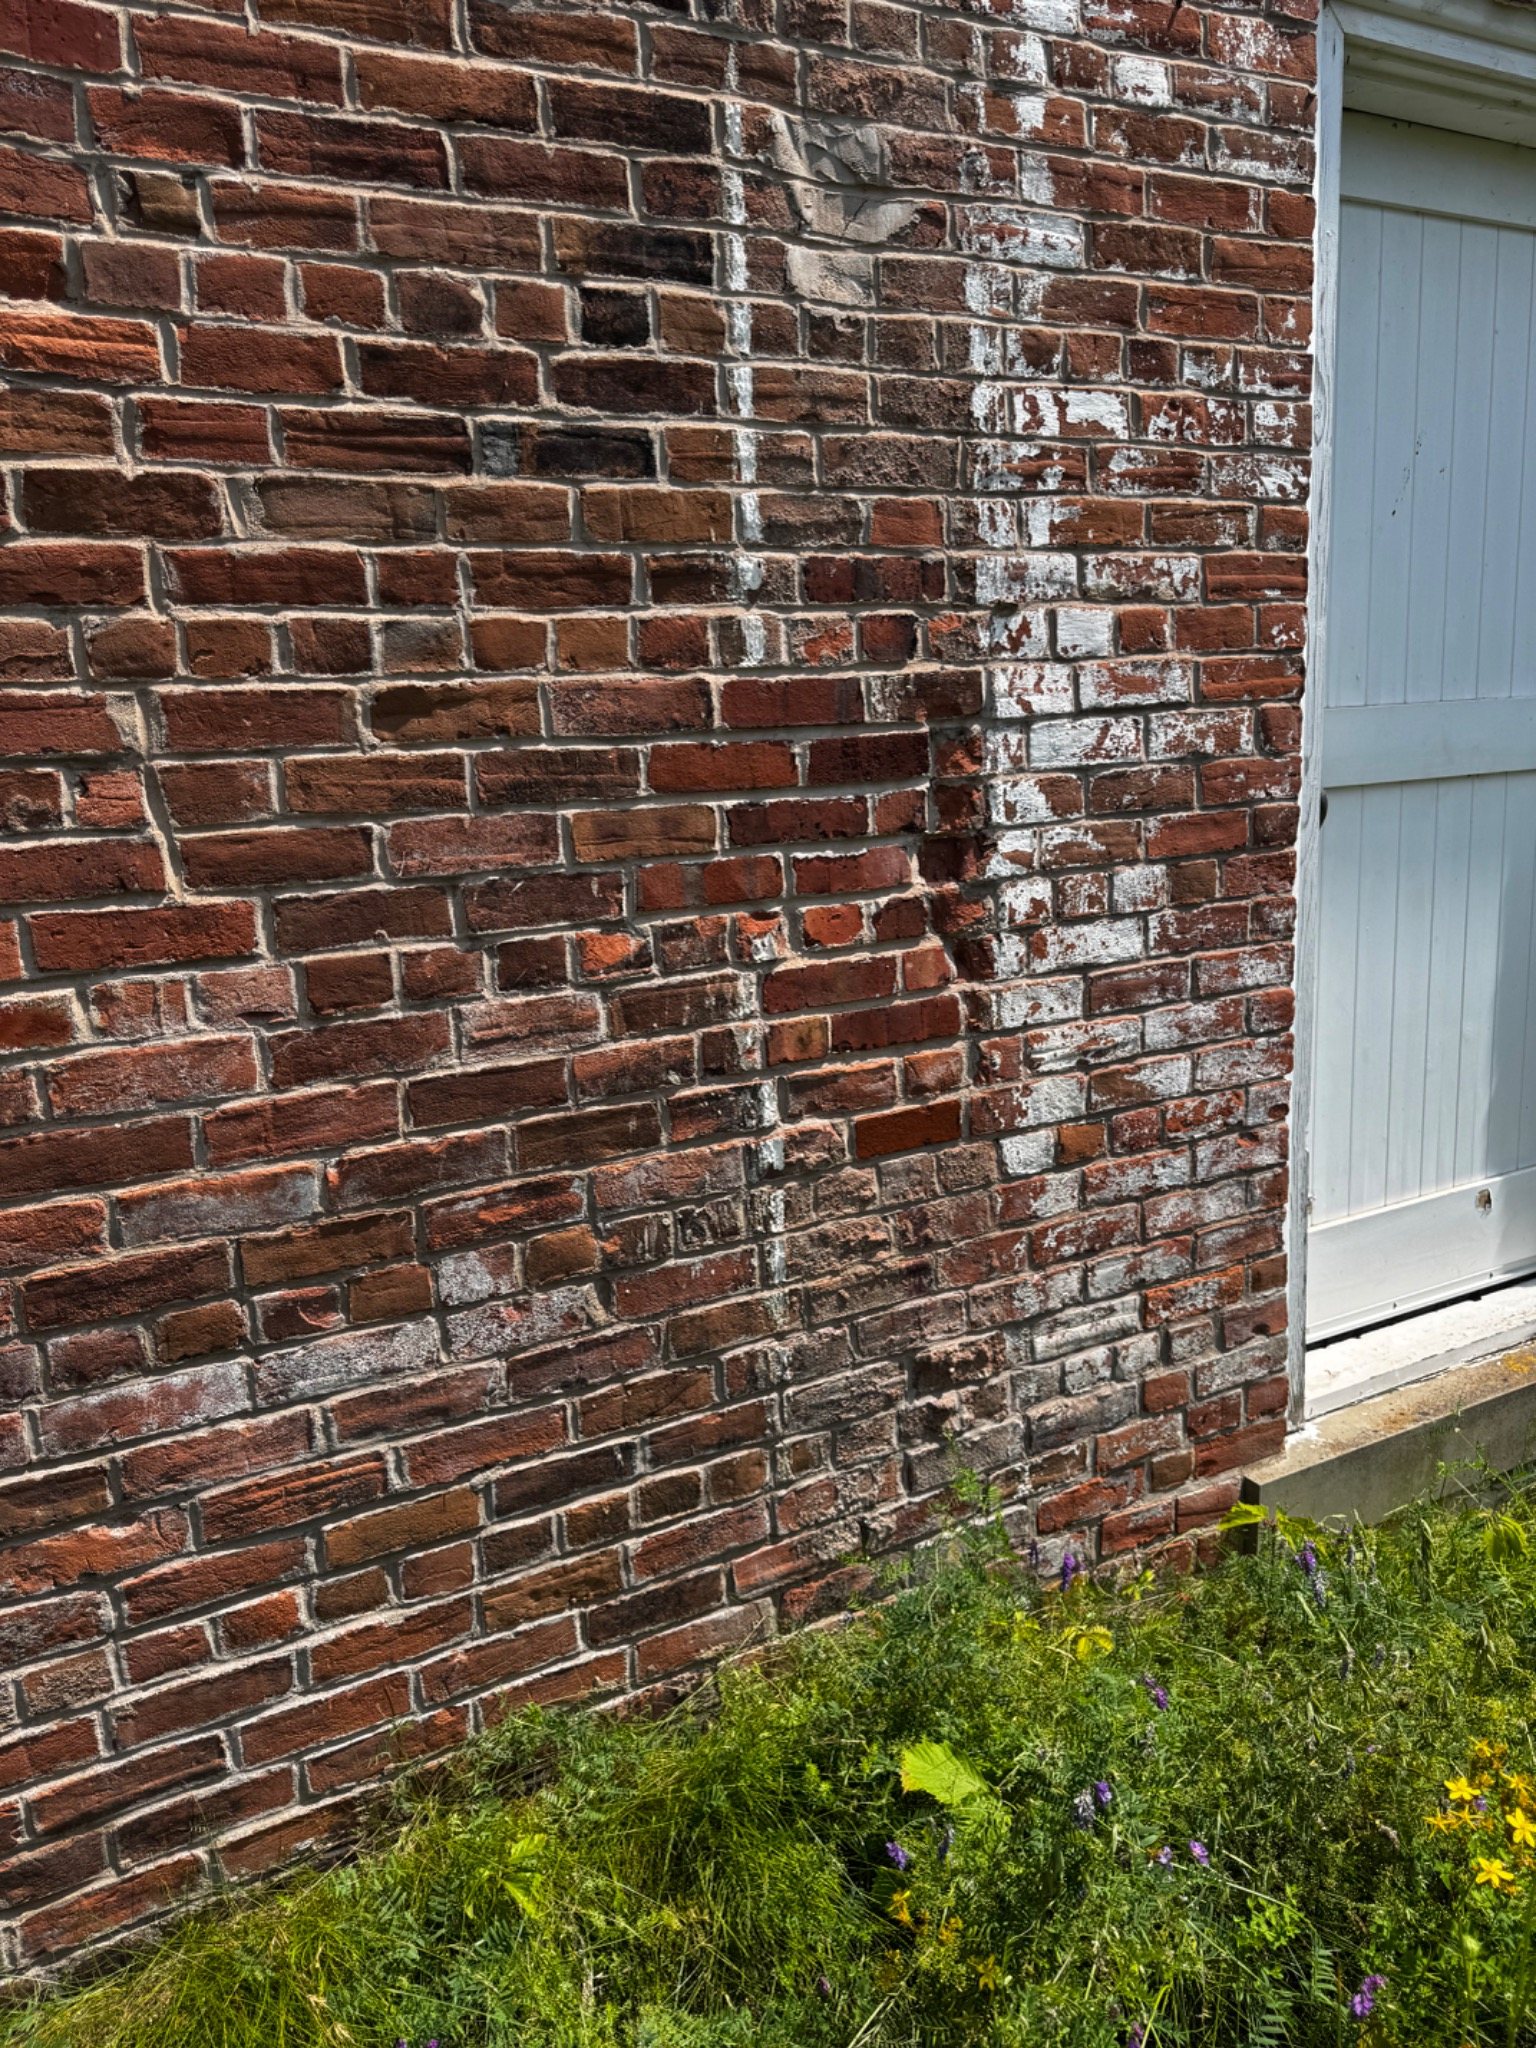
Repairs can change the look of a wall. Colour gets the attention, but joint width, depth and tooling often make mismatched repairs stand out just as much.
Historic brick and stonework may use narrow joints, beaded joints, ruled lines, grapevine-style tooling, flush work or other regional details that differ from modern standard practice.
On preservation work, the goal is normally to understand the original joint before deciding how to repoint it. National Park Service repointing guidance specifically emphasizes matching the historic mortar in colour, texture and tooling rather than treating the joint as a generic groove between units.
That is also why a mock-up matters. A small test area can reveal whether the new mortar, aggregate and joint profile actually look right once they begin to cure.
Repointing is the repair process of removing deteriorated mortar to an appropriate depth and installing new compatible mortar into the joint.
Traditional tuckpointing is a decorative technique. A base mortar, often coloured to blend with the masonry units, is installed first. A narrow contrasting fillet is then placed to create the visual effect of very fine, precise joints.
Today, many contractors and homeowners use “tuckpointing” as a general word for repointing. That usage is common, but it can create confusion when discussing historic work where true tuckpointing is part of the original appearance.
A repair specification should address joint preparation, mortar compatibility, joint width, finished depth and tooling. “Repoint wall” leaves a lot of room for interpretation.
Controls properties such as compressive strength, flexibility, permeability, bond, colour and texture. Older or softer masonry may require a more compatible mortar than a modern high-strength mix.
Controls the finished geometry at the wall face, including water shedding, compaction, shadow lines and historic appearance. The right mortar still needs to be finished correctly.
Good repointing starts by removing deteriorated mortar to sufficient depth without damaging the brick or stone. The joint is cleaned, prepared and dampened as appropriate, then new mortar is packed firmly into the joint rather than smeared across the surface.
Tooling happens when the mortar has reached the right consistency. Too early and the surface can smear or become weak. Too late and it may tear rather than compact. The final joint should have clean edges, consistent depth and the intended profile.
On important restoration work, a mock-up lets the owner, mason and conservation team judge joint width, profile, aggregate exposure and colour before repeating it across an elevation.
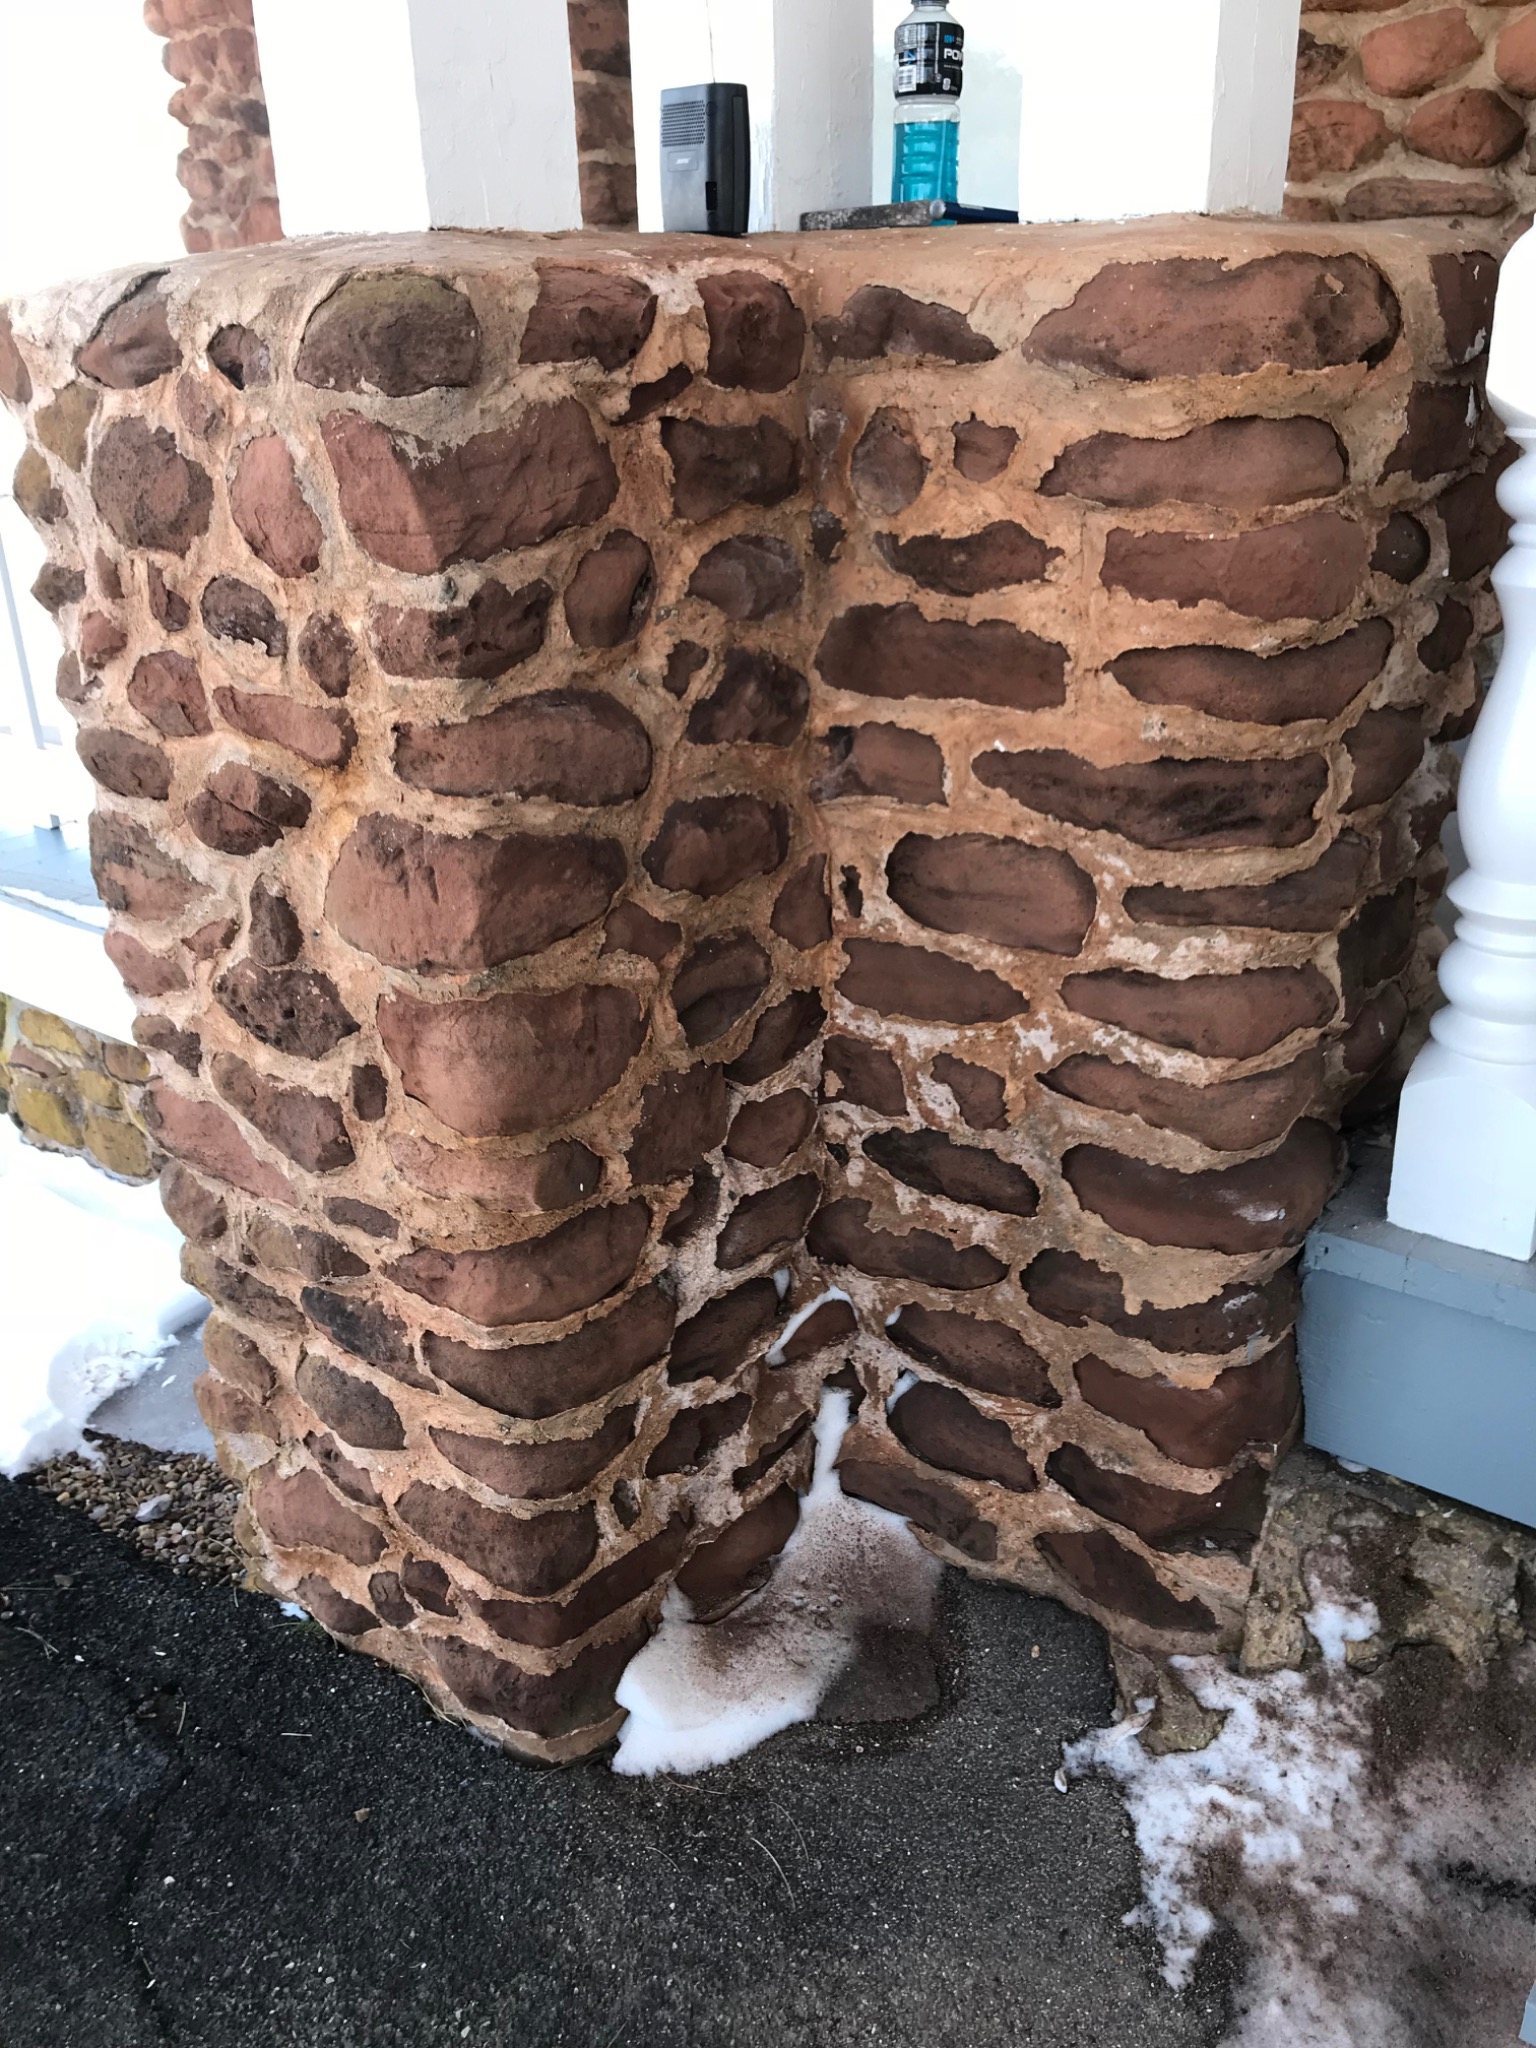
Field example: the finished joint needs to suit both the material and the building. On heritage work, profile, texture and colour are judged together rather than as separate cosmetic decisions.
Mortar placed only over the face of a deteriorated joint has little depth to bond and may separate quickly.
Broad smears change the wall's appearance and can be difficult to remove without damaging the masonry surface.
Overly recessed joints can expose edges, trap water and change the proportions of the wall.
A modern concave joint on a wall originally built with fine beaded or flush joints can make the repair visually obvious.
Thin mortar spread onto the masonry face tends to fail because the edge has almost no thickness or support.
Even beautifully tooled joints can contribute to damage if the mortar is materially incompatible with the brick or stone.
Wind-driven rain, coastal exposure and repeated freezing make water management especially important across Prince Edward Island and the Maritimes. A profile that sheds water and leaves a well-compacted joint face can be a practical durability advantage.
At the same time, older Atlantic Canadian buildings contain a wide range of historic joint styles. Conservation work should not erase those details simply to impose a modern standard profile everywhere.
The right approach is to balance exposure, original construction, material compatibility and appearance rather than choosing a joint from a catalogue in isolation.
Historic accuracy and weather resistance are not opposing goals when the original joint is understood and reproduced properly.
Brick Industry Association Technical Note 7B discusses joint tooling as part of water-resistant brick masonry and identifies concave, V and other joint profiles. BIA Technical Note 30 also compares how common joint shapes affect rain resistance and appearance.
National Park Service Preservation Brief 2 emphasizes matching historic mortar in colour, texture and tooling, and recommends test panels for repointing work. Parks Canada's conservation standards support minimal intervention and preservation of character-defining historic fabric.
Brick Industry Association: Water Penetration Resistance, Construction & Workmanship →
Brick Industry Association: Bonds and Patterns in Brickwork →
National Park Service: Preservation Brief 2, Repointing Mortar Joints →
Parks Canada: Standards and Guidelines for the Conservation of Historic Places →
Dean is a third-generation mason with more than 20 years of hands-on experience working with brick, natural stone, repointing, mortar matching, chimneys, foundations and heritage restoration in Prince Edward Island.
The DinoMac Masonry Knowledge Centre uses PEI field experience to explain masonry conditions and repair principles that are also relevant across Atlantic Canada and other cold, wet climates.
Last reviewed: August 28, 2026
Well-compacted concave, V and weathered joints are generally strong water-shedding choices, but the original architecture and exposure should still guide repair work.
No, but deep recesses can hold water and expose joint edges, so they are not automatically the best choice for highly exposed exterior walls.
Repointing replaces deteriorated mortar. Traditional tuckpointing is a decorative two-stage technique using a contrasting narrow fillet to create the appearance of fine joints.
Usually yes, particularly on historic masonry. Profile, width, depth and tooling all contribute to the original character of the wall.
Tooling compacts and finishes the exposed joint surface. It does not change an unsuitable mortar into a compatible one, but proper compaction improves the finished joint's weathering performance.
Use one when mortar colour, aggregate, joint width or historic tooling are important. A small sample is much easier to change than an entire elevation.
Include wide views of the wall, close-ups showing joint width and tooling, previous repairs, damaged areas and the PEI property location. DinoMac can help determine whether the existing joint profile should be reproduced and what repair approach fits the masonry.